LaTeX教程1_texstudio 新建文件夹-程序员宅基地
技术标签: LaTeX论文排版学习 latex
LaTeX教程1
声明
本套LaTeX笔记是根据B站视频:https://www.bilibili.com/video/BV15b411j7Au 所做,仅记录本人学习,若有侵权行为,请联系我删除!
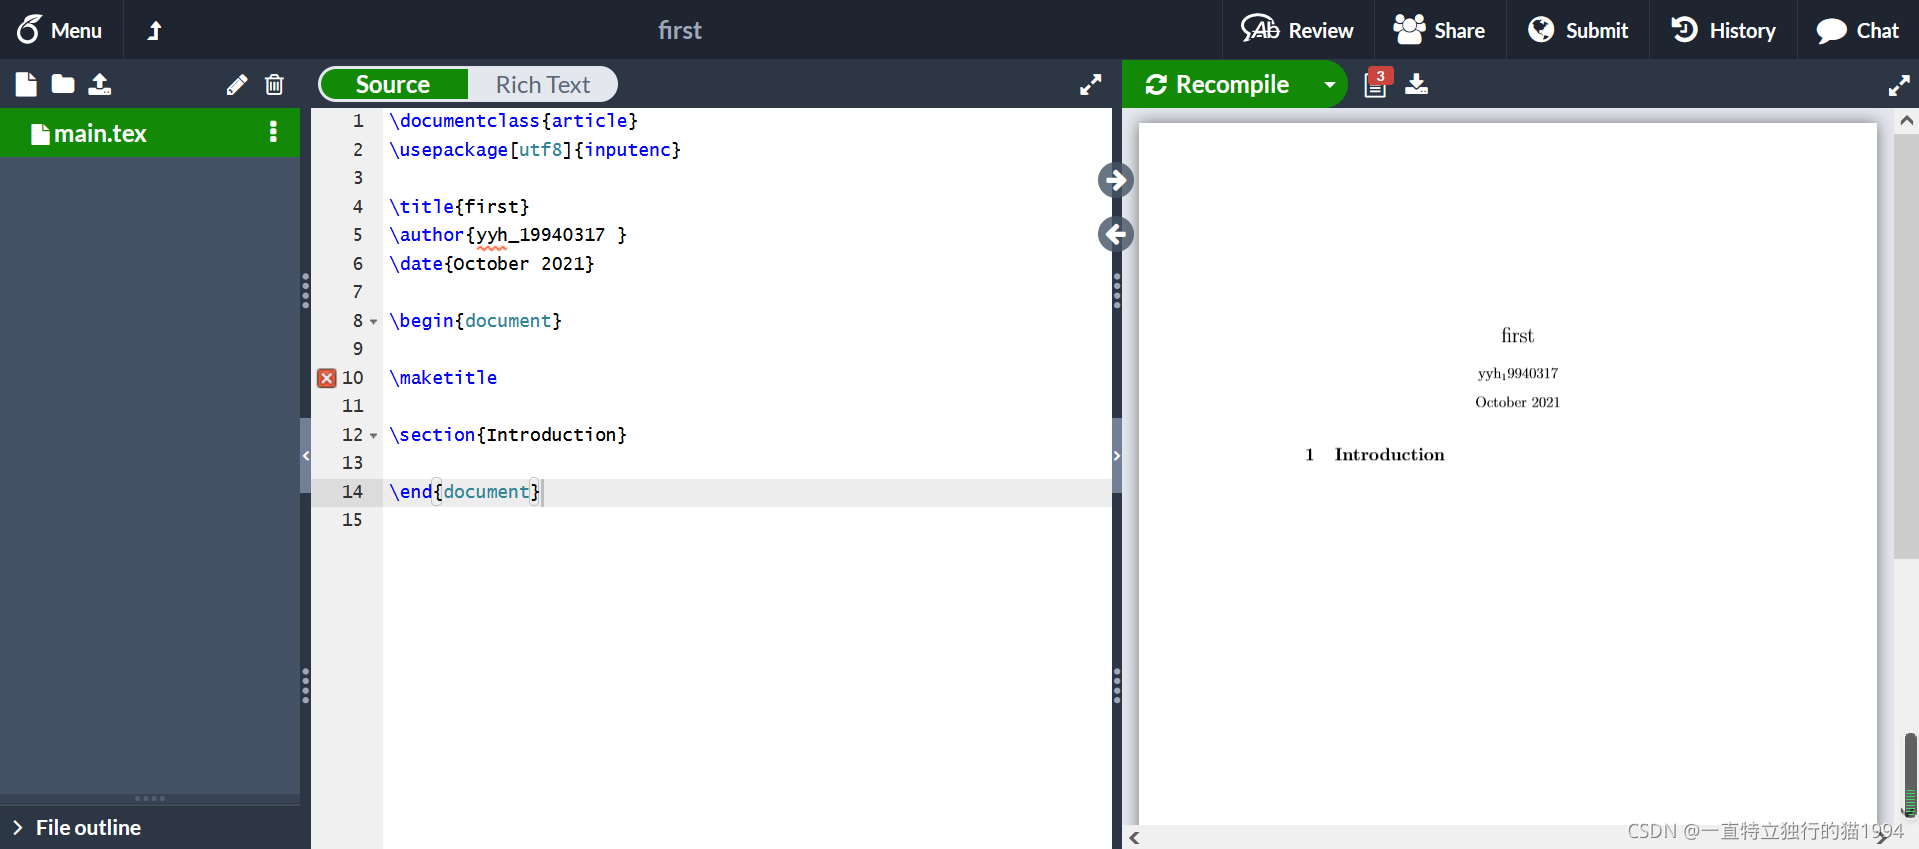
这里再介绍一个在线网站,可以在线编译查看效果。不方便下载软件的小伙伴可以使用网页版本在线编辑、编译、查看。
latex01-01-LaTeX软件的安装与环境配置
1. TexLive2021的下载
视频教程使用的软件是Tex Live,它是一个免费的跨平台的LaTeX发行版软件,可以从清华大学镜像网站进行下载。
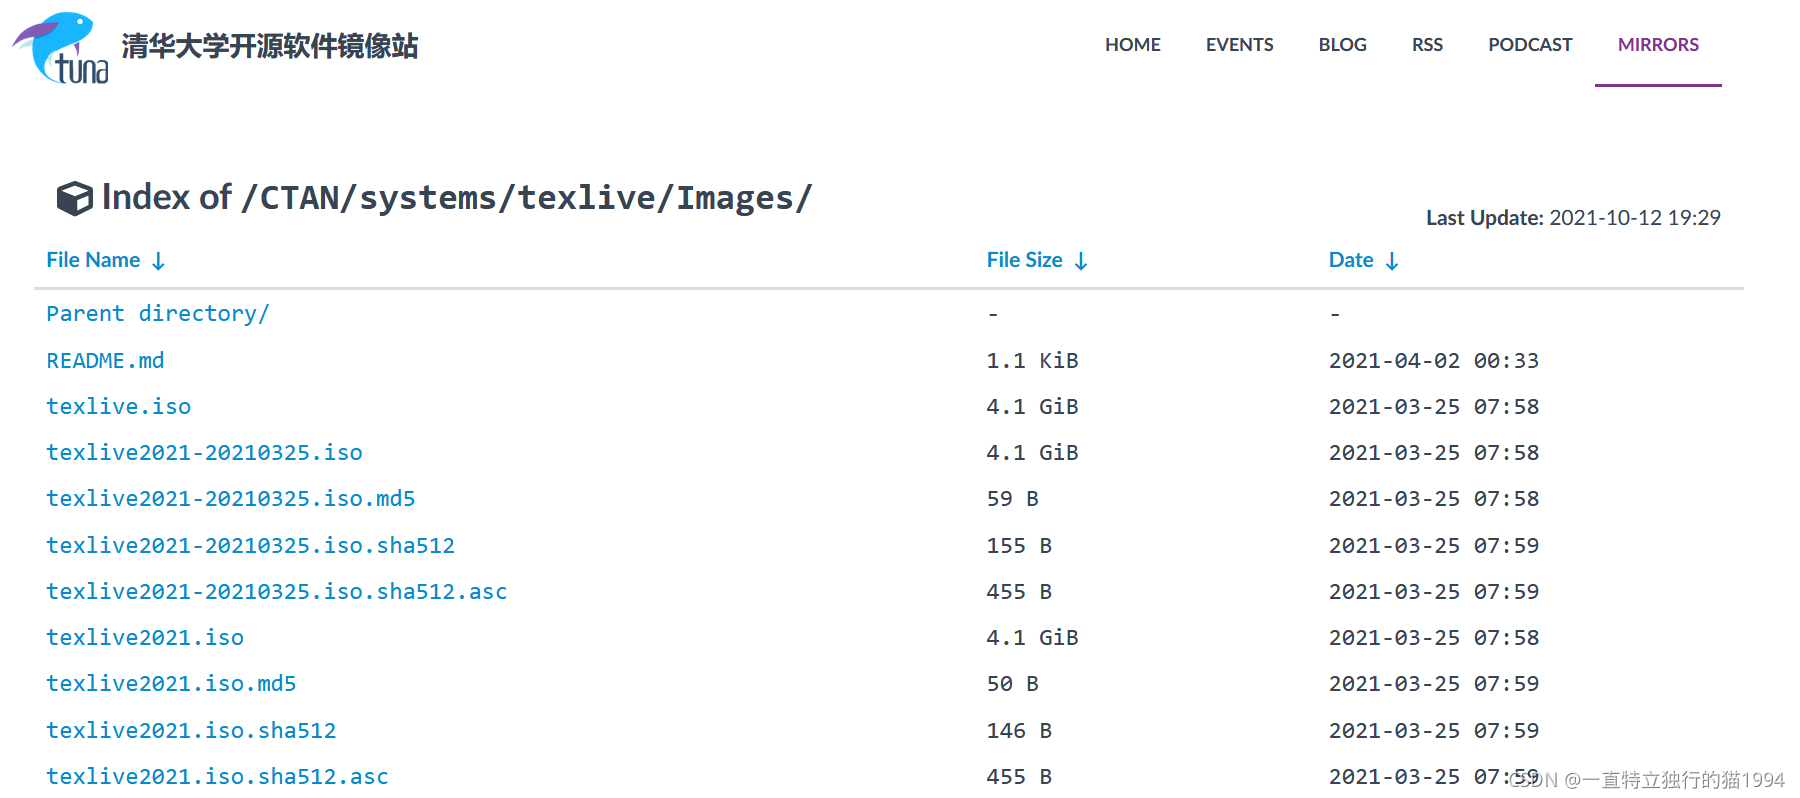 点击文件texlivexxxx.iso进行下载,这里我下载的文件是texlive2021.iso,大小是4.1GB,所以请保证硬盘有足够的空间进行安装。
下载完之后,是一个ISO文件,可以直接使用解压软件进行解压。
 至此,TexLive2021的下载完成。
2. TexLive2021的安装
找到install-tl-windows.bat文件,使用管理员身份运行,如图: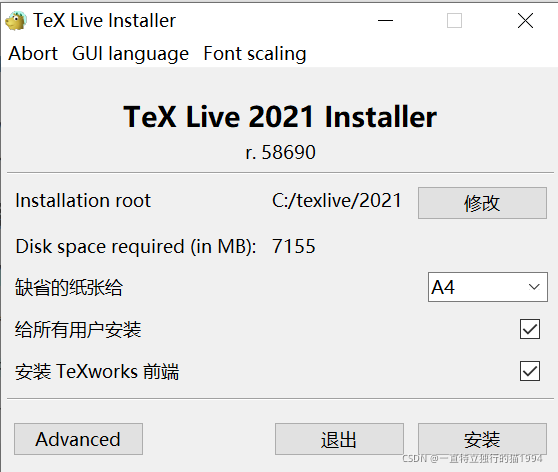 可以修改安装路径,我安装在了D盘,建议放在C盘以外的其他盘。
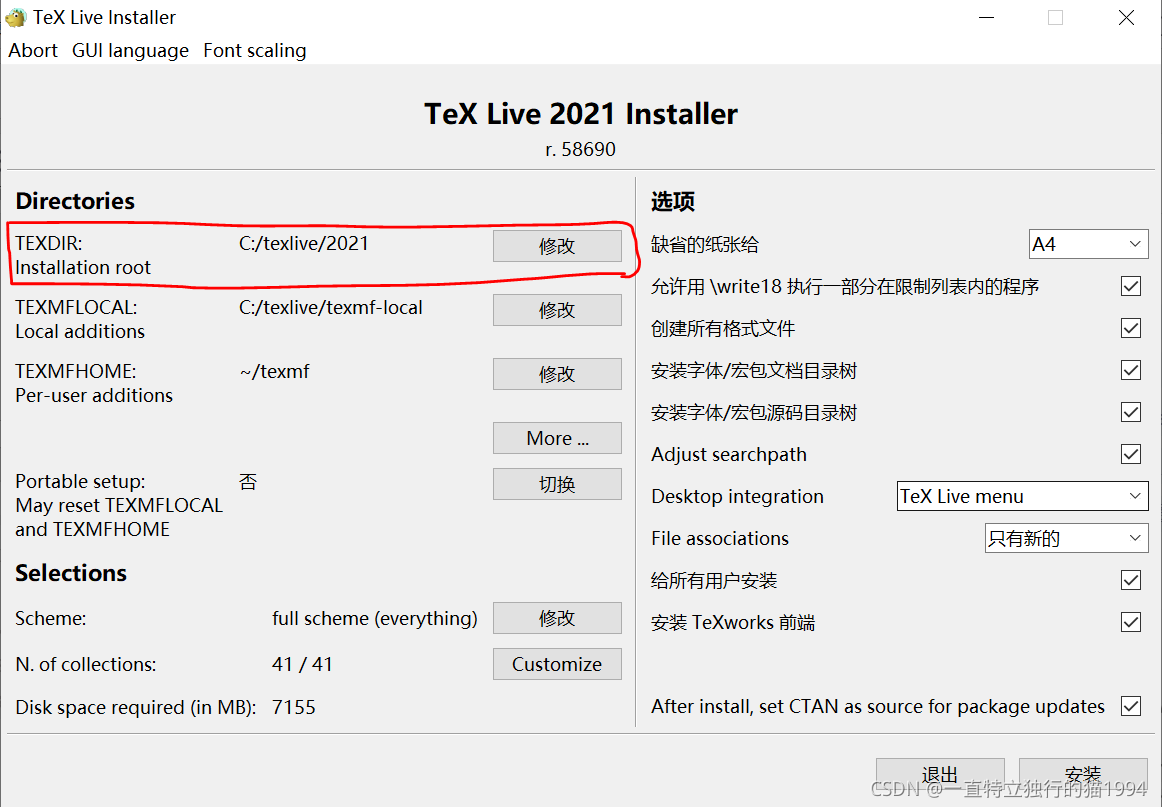
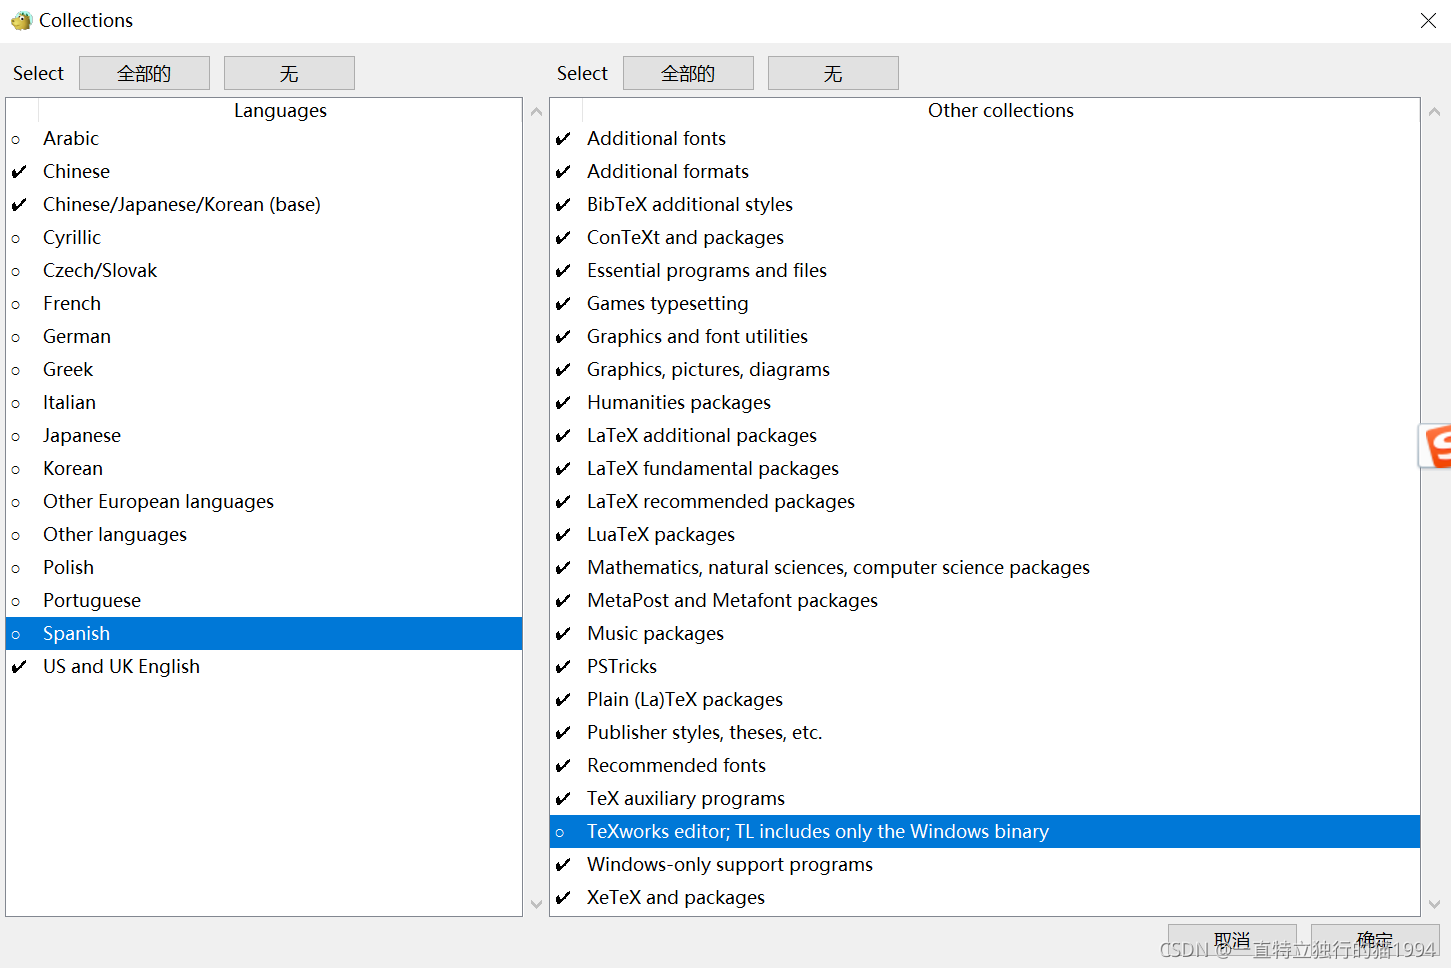
 点击左侧的Customize,可以将用不到的语言和功能取消勾选,加快安装的进度,我的语言取消的还剩下图中的三种。再取消右侧的“Texworks editor; TL…”勾选,当然你也可以按照默认,最后点击“安装”。
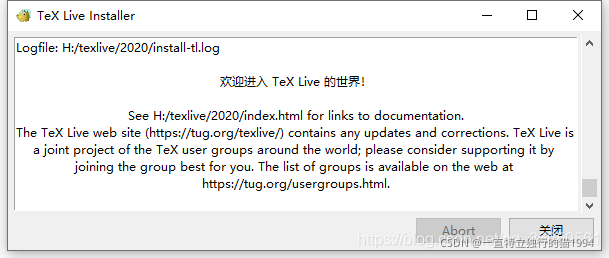
 等待时间根据安装内容的多少确定,直到看到下面的界面,说明安装完成了。因为我已经安装过TexLive2021了,所以下面的图是我从网上找的。
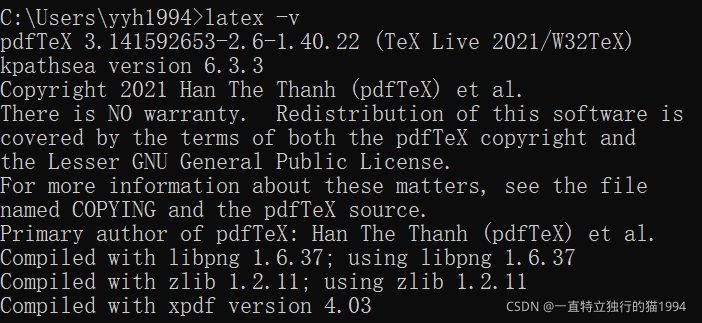
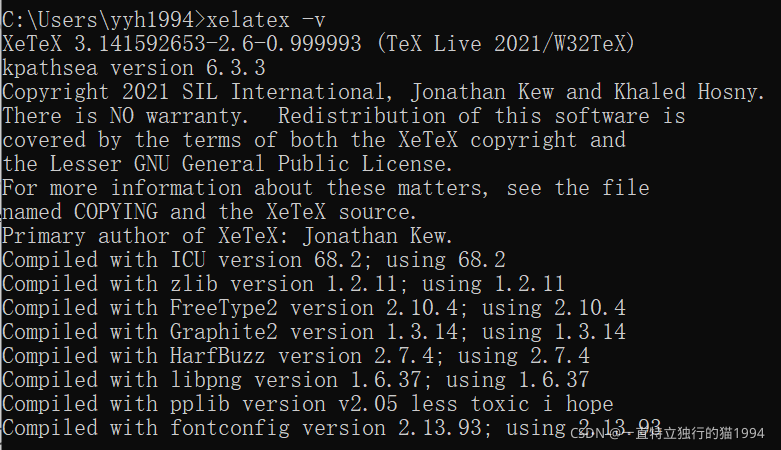
 为了验证TexLive2021是否安装成功,需要在命令行窗口输入命令,如果可以看到版本信息,说明安装正确。
tex -v

latex -v
xelatex -v
latex01-02-用命令行实现LaTeX文档的编写
返回到主目录下
cd \
新建一个名为testLatex的文件夹
mkdir testLatex
使用记事本新建一个名为test.tex的文件,没有就新建;有就覆盖。
notepad test.tex
输入如下内容后保存:
\documentclass{
    article}

\begin{
    document}

Hello \LaTeX.

\end{
    document}
查看当前目录下是否有test.tex文件
dir
使用latex进行编译
latex test.tex
查看当前目录
dir
多了一个test.dvi文件。我们使用dvipdfmx将dvi文件转换为pdf文件。
dvipdfmx test.dvi
打开此pdf文件
test.pdf
除了使用latex编译,再用dvipdfmx来生成pdf文件之外,我们还可以直接使用xelatex命令将tex源文件编译成pdf文件。注意,xelatex是一个支持utf-8的编译命令,即支持中文。
xelatex test.tex
我们可以将一些编译的过程做成一个批处理文件,即后缀名为bat的文本文件。例如,我们新建一个build.bat文件
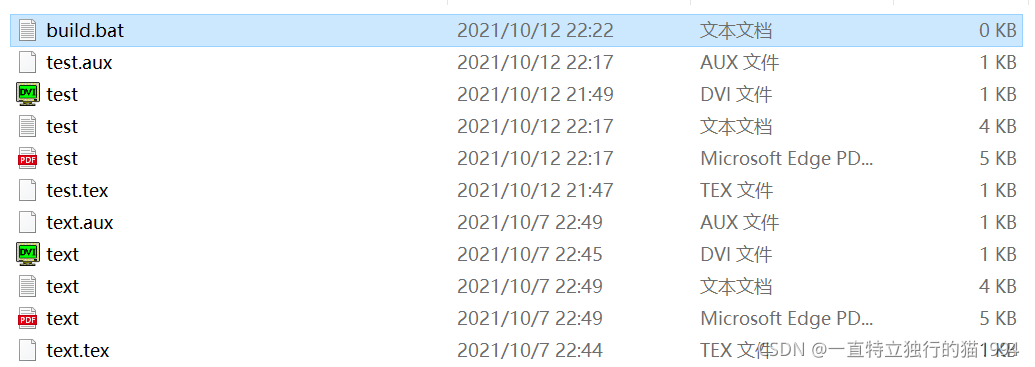 在build.bat文件中,我们输入
latex test.tex
dvipdfmx test.dvi
del *.aux *.dvi *.log
运行此批处理文件
build
同样,我们也可以为xelatex新建一个批处理文件buildx.bat
xelatex test.tex
del *.dvi *.aux *.log
运行此批处理文件进行编译
buildx
之前说过,xelatex支持中文编译,但是上面编译结果显示并不能对中文进行编译,原因在于:
- 需要将tex文件的编码格式设置成UTF-8;
- 修改test.tex文件,加入ctex的宏包,使它支持中文。
\documentclass{
    article}
\usepackage{
    ctex}

\begin{
    document}

你好,\LaTeX 。

\end{
    document}
好了,经过前面的演示,我们清楚了如何来编写一个LaTeX源文件,并且编译生成最终的pdf文件的过程。当然,如果我们完全在命令行内记事本中操作的话,这是一个非常繁琐的过程,不符合我们现在更为简单的操作的要求。为此,我们可以用一个称为vs code的IDE工具来实现LaTeX文档的编写、编译以及查看等过程。
注:此处视频中讲的是TexStudio,但是我在搭建深度学习环境的时候已经安装了VS Code,且经过我在网上的搜索,TexLive+VS Code现在是主流,网上有更多人推荐使用。因此,下面我以VS Code的下载、安装为例,而不是视频中的TexStudio。
latex01-03-用VSCode IDE实现LaTeX文档的编写
1. VSCode的下载及安装
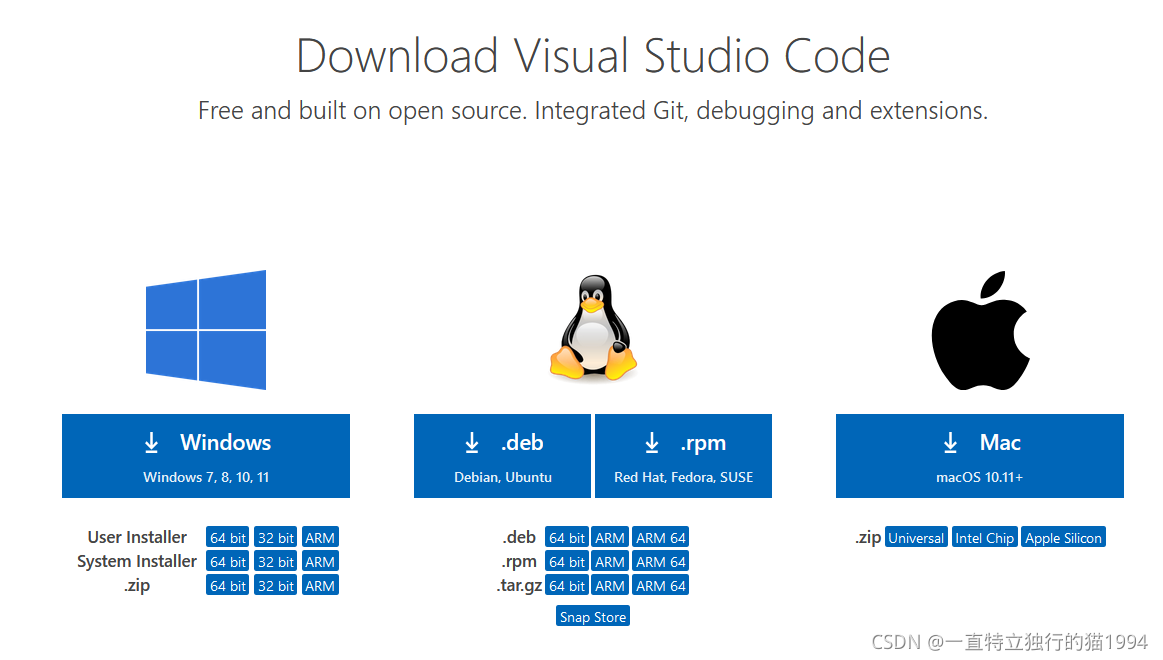
首先,在VSCode官网下载VSCode软件
 点击Download进行下载
 然后进行安装
 VSCode的安装比较简单,next,next就安装好了。若要查看具体过程,请参考博客。
接下来是在VSCode中进行LaTeX文档编写的配置。
2. VSCode的配置
2.1 安装LaTeX Workshop插件
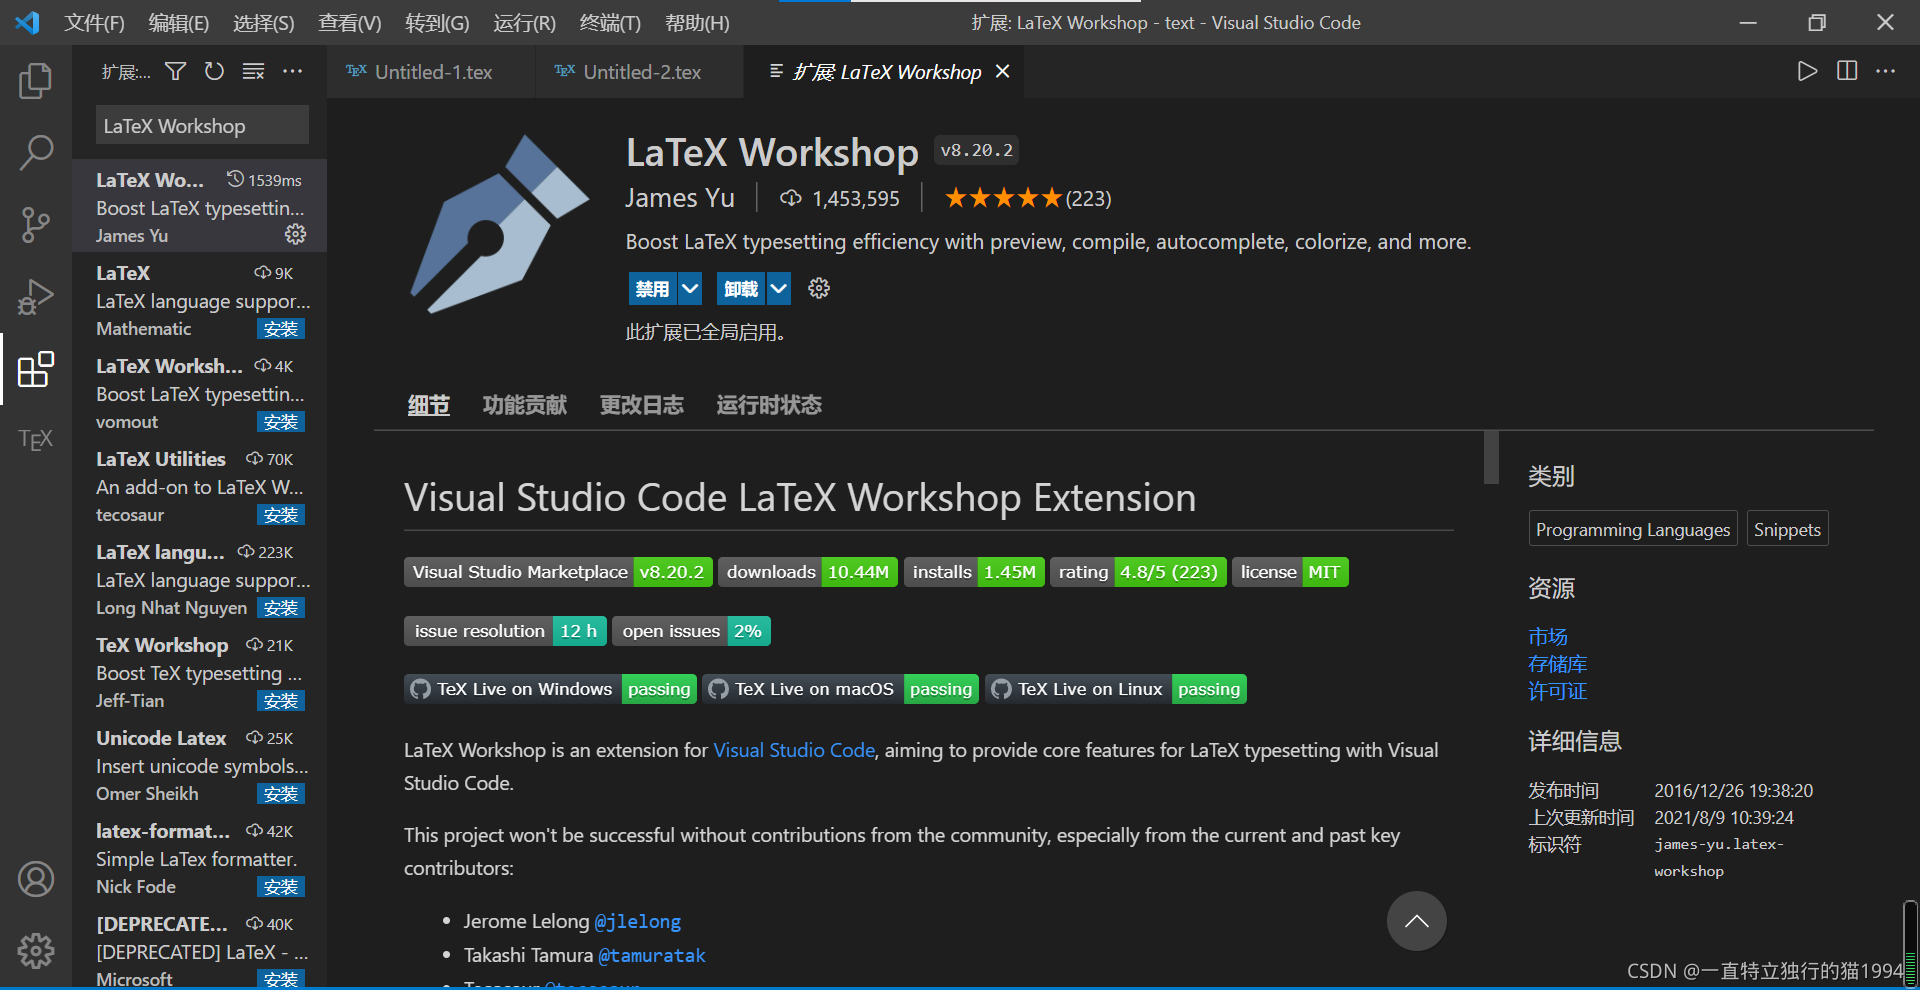 install,安装LaTeX Workshop插件。
2.2 修改user settings
设置过程请查看博客。
我的配置文件为:
// ======================== LaTeX 设置 BEGIN  ========================
        // bibtex 格式
        "latex-workshop.bibtex-format.tab": "tab",

        // 自动编译,全部关闭,当且仅当你认为有需要的时候才会去做编译
        "latex-workshop.latex.autoBuild.run": "never",
        "latex-workshop.latex.autoBuild.cleanAndRetry.enabled": false,

        // 设置 latex-workshop 的 PDF 预览程序,external 指的是外部程序
        "latex-workshop.view.pdf.viewer": "external",
        "latex-workshop.view.pdf.ref.viewer": "external",
        "latex-workshop.view.pdf.external.viewer.command": "C:/Users/Administrator/AppData/Local/SumatraPDF/SumatraPDF.exe", // 注意修改路径
        "latex-workshop.view.pdf.external.viewer.args": [
            "%PDF%"
        ],

        // 配置正向、反向搜索:.tex -> .pdf
        "latex-workshop.view.pdf.external.synctex.command": "C:/Users/Administrator/AppData/Local/SumatraPDF/SumatraPDF.exe", // 注意修改路径
        "latex-workshop.view.pdf.external.synctex.args": [
            // 正向搜索
            "-forward-search",
            "%TEX%",
            "%LINE%",
            "-reuse-instance",
            // 反向搜索
            "-inverse-search",
            "\"C:/Users/Administrator/AppData/Local/Programs/Microsoft VS Code/Code.exe\" \"C:/Users/Administrator/AppData/Local/Programs/Microsoft VS Code/resources/app/out/cli.js\" -gr %f:%l",
            "%PDF%"
        ],

        // 这是一些独立的编译选项,可以作为工具被编译方案调用
        "latex-workshop.latex.tools": [
            {

                // Windows 原生安装 TeX Live 2020 的编译选项
                "name": "Windows XeLaTeX",
                "command": "xelatex",
                "args": [
                    "-synctex=1",
                    "-interaction=nonstopmode",
                    "-file-line-error",
                    "-pdf",
                    "%DOCFILE%"
                ]
            },
            {

                // Windows Biber 编译
                "name": "Windows Biber",
                "command": "biber",
                "args": [
                    "%DOCFILE%"
                ]
            },
            {

                // WSL XeLaTeX 编译一般的含有中文字符的文档
                "name": "WSL XeLaTeX",
                "command": "wsl",
                "args": [
                    "/usr/local/texlive/2020/bin/x86_64-linux/xelatex",
                    "-synctex=1",
                    "-interaction=nonstopmode",
                    "-file-line-error",
                    "-pdf",
                    //"-output-directory=%OUTDIR%",
                    //"-aux-directory=%OUTDIR%",
                    "%DOCFILE%"
                ]
            },
            {

                // WSL biber / bibtex 编译带有 citation 标记项目的文档
                "name": "WSL Biber",
                "command": "wsl",
                "args": [
                    "/usr/local/texlive/2020/bin/x86_64-linux/biber",
                    "%DOCFILE%"
                ]
            },
            {

                // macOS 或者 Linux 的简单编译
                // 两种操作系统的操作方式相同
                "name": "macOS / Linux XeLaTeX",
                "commmand": "xelatex",
                "args": [
                    "-synctex=1",
                    "-interaction=nonstopmode",
                    "-file-line-error",
                    "-pdf",
                    "%DOCFILE%"
                ]
            },
            {

                // macOS 或者 Linux 的索引编译
                // 两种操作系统的操作方式相同
                "name": "macOS / Linux Biber",
                "command": "biber",
                "args": [
                    "%DOCFILE%"
                ]
            }
        ],

        // 这是一些编译方案,会出现在 GUI 菜单里
        "latex-workshop.latex.recipes": [
            {

                // 1.1 Windows 编译简单的小文档,这个选项不太常用,因为绝大多数文章都需要有参考文献索引
                "name": "Windows XeLaTeX 简单编译",
                "tools": [
                    "Windows XeLaTeX"
                ]
            },
            {

                // 1.2 Windows 编译带有索引的论文,需要进行四次编译;-> 符号只是一种标记而已,没有程序上的意义
                "name": "Windows xe->bib->xe->xe 复杂编译",
                "tools": [
                    "Windows XeLaTeX",
                    "Windows Biber",
                    "Windows XeLaTeX",
                    "Windows XeLaTeX"
                ]
            },
            {

                // 2.1  WSL 编译简单的小文档,这个选项不太常用,因为我绝大多数文章都需要有引用。
                "name": "XeLaTeX 简单编译",
                "tools": [
                    "WSL XeLaTeX"
                ]
            },
            {

                // 2.2 带有 citation 索引的文档,需要进行四次编译;-> 符号只是一种标记而已,没有程序上的意义
                "name": "xe->bib->xe->xe 复杂编译",
                "tools": [
                    "WSL XeLaTeX",
                    "WSL Biber",
                    "WSL XeLaTeX",
                    "WSL XeLaTeX"
                ]
            },
            {

                // 3.1 macOS 简单 小文档
                "name": "macOS XeLaTeX 简单编译",
                "tools": [
                    "macOS XeLaTeX"
                ]
            },
            {

                // 3.2 macOS 四次编译
                "name": "macOS xe->bib->xe->xe 复杂编译",
                "tools": [
                    "macOS / Linux XeLaTeX",
                    "macOS / Linux Biber",
                    "macOS / Linux XeLaTeX",
                    "macOS / Linux XeLaTeX"
                ]
            }
        ],

        // 清空中间文件
        "latex-workshop.latex.clean.fileTypes": [
            "*.aux",
            "*.bbl",
            "*.blg",
            "*.idx",
            "*.ind",
            "*.lof",
            "*.lot",
            "*.out",
            "*.toc",
            "*.acn",
            "*.acr",
            "*.alg",
            "*.glg",
            "*.glo",
            "*.gls",
            "*.ist",
            "*.fls",
            "*.log",
            "*.fdb_latexmk",
            "*.bcf",
            "*.run.xml",
            "*.synctex.gz"
        ]
    // ======================== LaTeX 设置 END ========================
重启VSCode。
2.3 测试VSCode
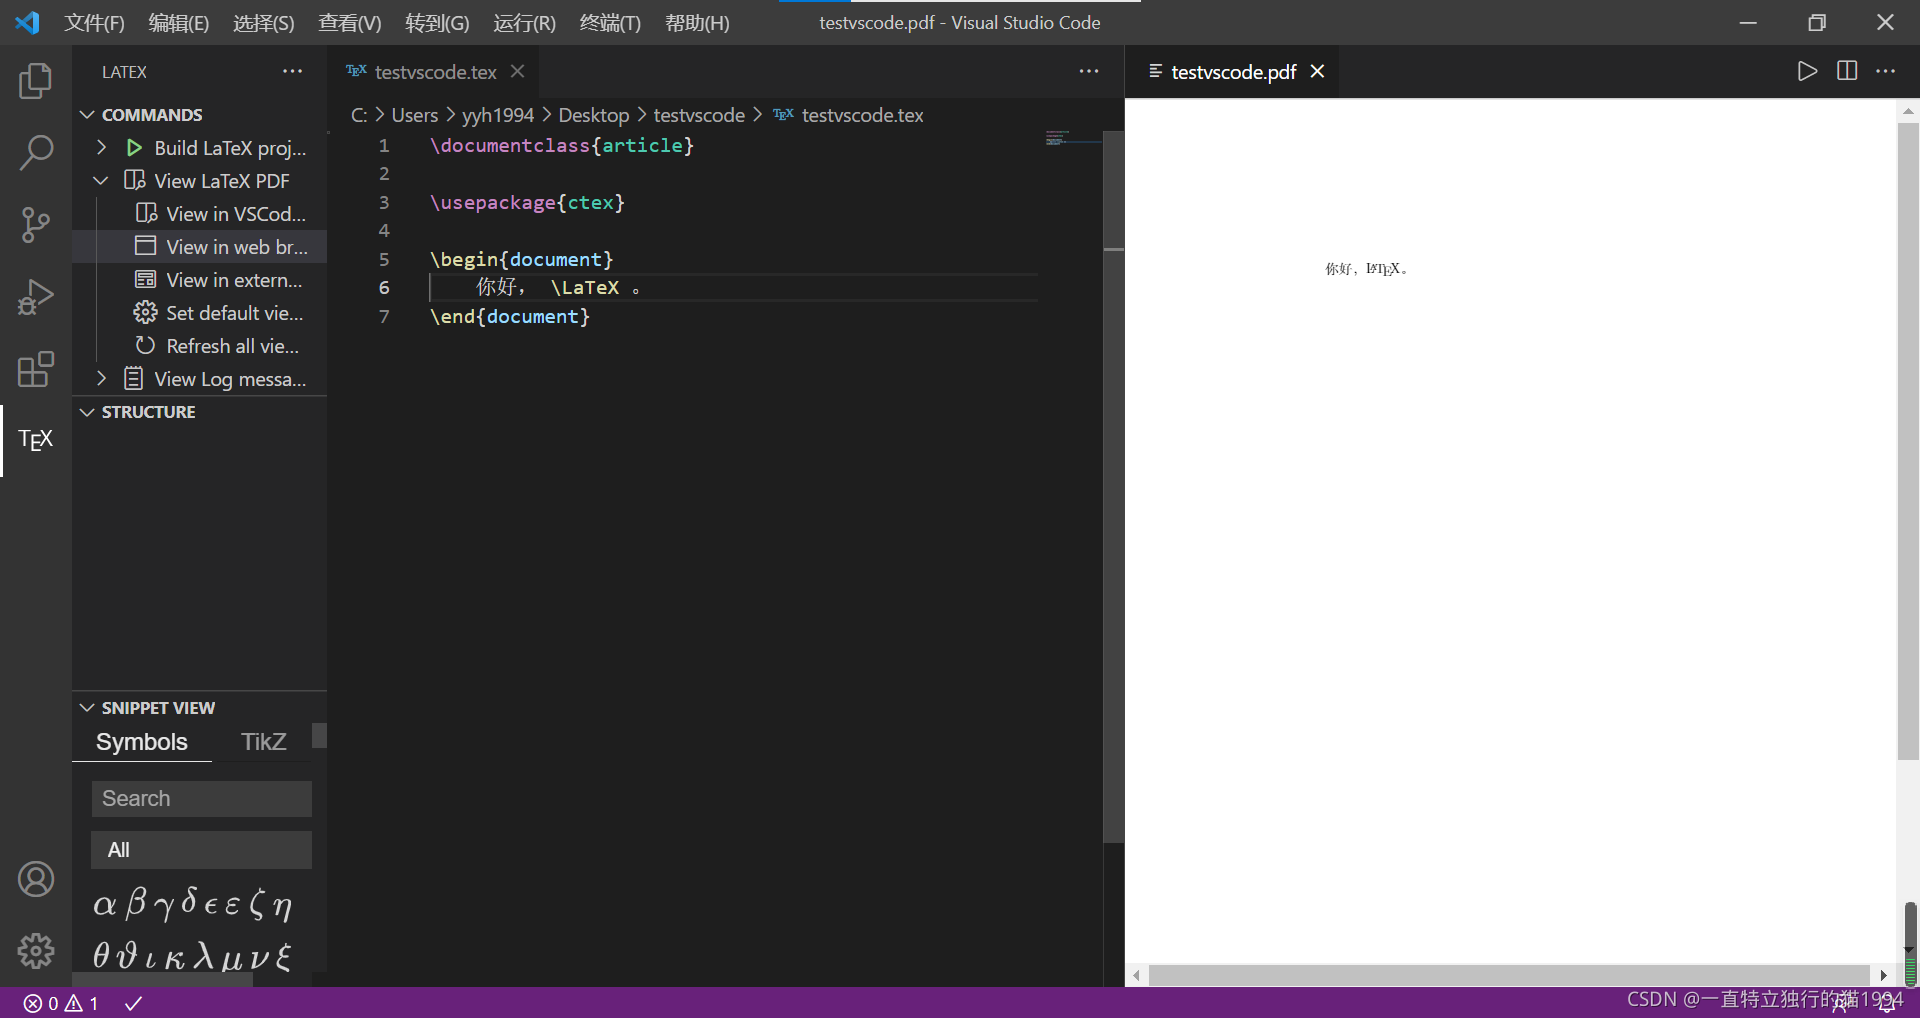
在安装、配置好VSCode这个IDE之后,我们就可以使用它来进行LaTeX源文件的编写、编译以及最终生成的PDF文件的查看操作了。
首先,我们创建一个testvscode.tex文件,因为该文件在编译过程中会产生许多其他文件,所以我们新建一个testvscode文件夹来存储这些文件。
latex02-LaTeX源文件的基本结构
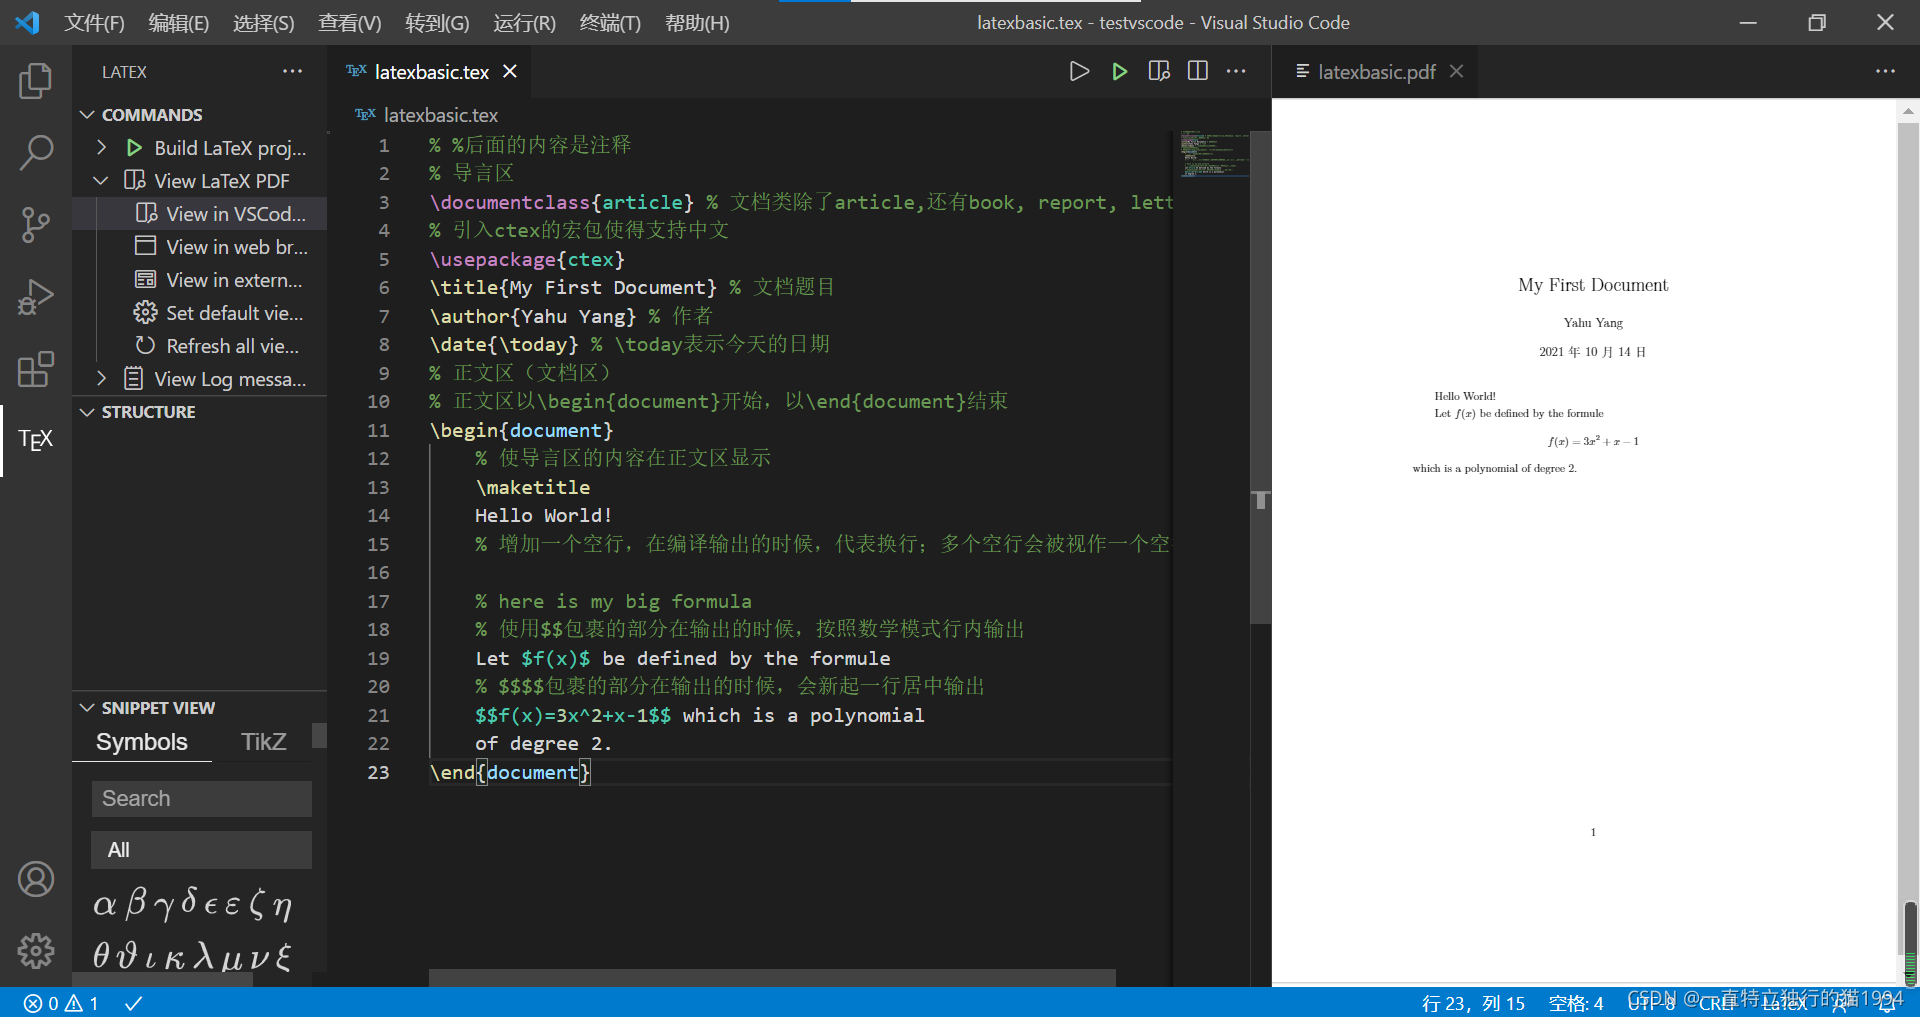
我们通过一个实例来分析一下LaTeX文件的基本结构。
tex文件的结构分为导言区和正文区(文档区),导言区可以进行一些全局的设置,正文区(文档区)就写正文。
% %后面的内容是注释
% 导言区
\documentclass{
    article} % 文档类除了article,还有book, report, letter
% 引入ctex的宏包使得支持中文
\usepackage{
    ctex}
\title{
    My First Document} % 文档题目
\author{
    Yahu Yang} % 作者
\date{
    \today} % \today表示今天的日期
% 正文区(文档区)
% 正文区以\begin{
    document}开始,以\end{
    document}结束
\begin{
    document}
    % 使导言区的内容在正文区显示
    \maketitle
    Hello World!
	% 增加一个空行,在编译输出的时候,代表换行;多个空行会被视作一个空行

    % here is my big formula
    % 使用$$包裹的部分在输出的时候,按照数学模式行内输出
    Let $f(x)$ be defined by the formule
    % $$$$包裹的部分在输出的时候,会新起一行居中输出
    $$f(x)=3x^2+x-1$$ which is a polynomial
    of degree 2.
\end{
    document}
latex03-LaTeX中的中文处理方法
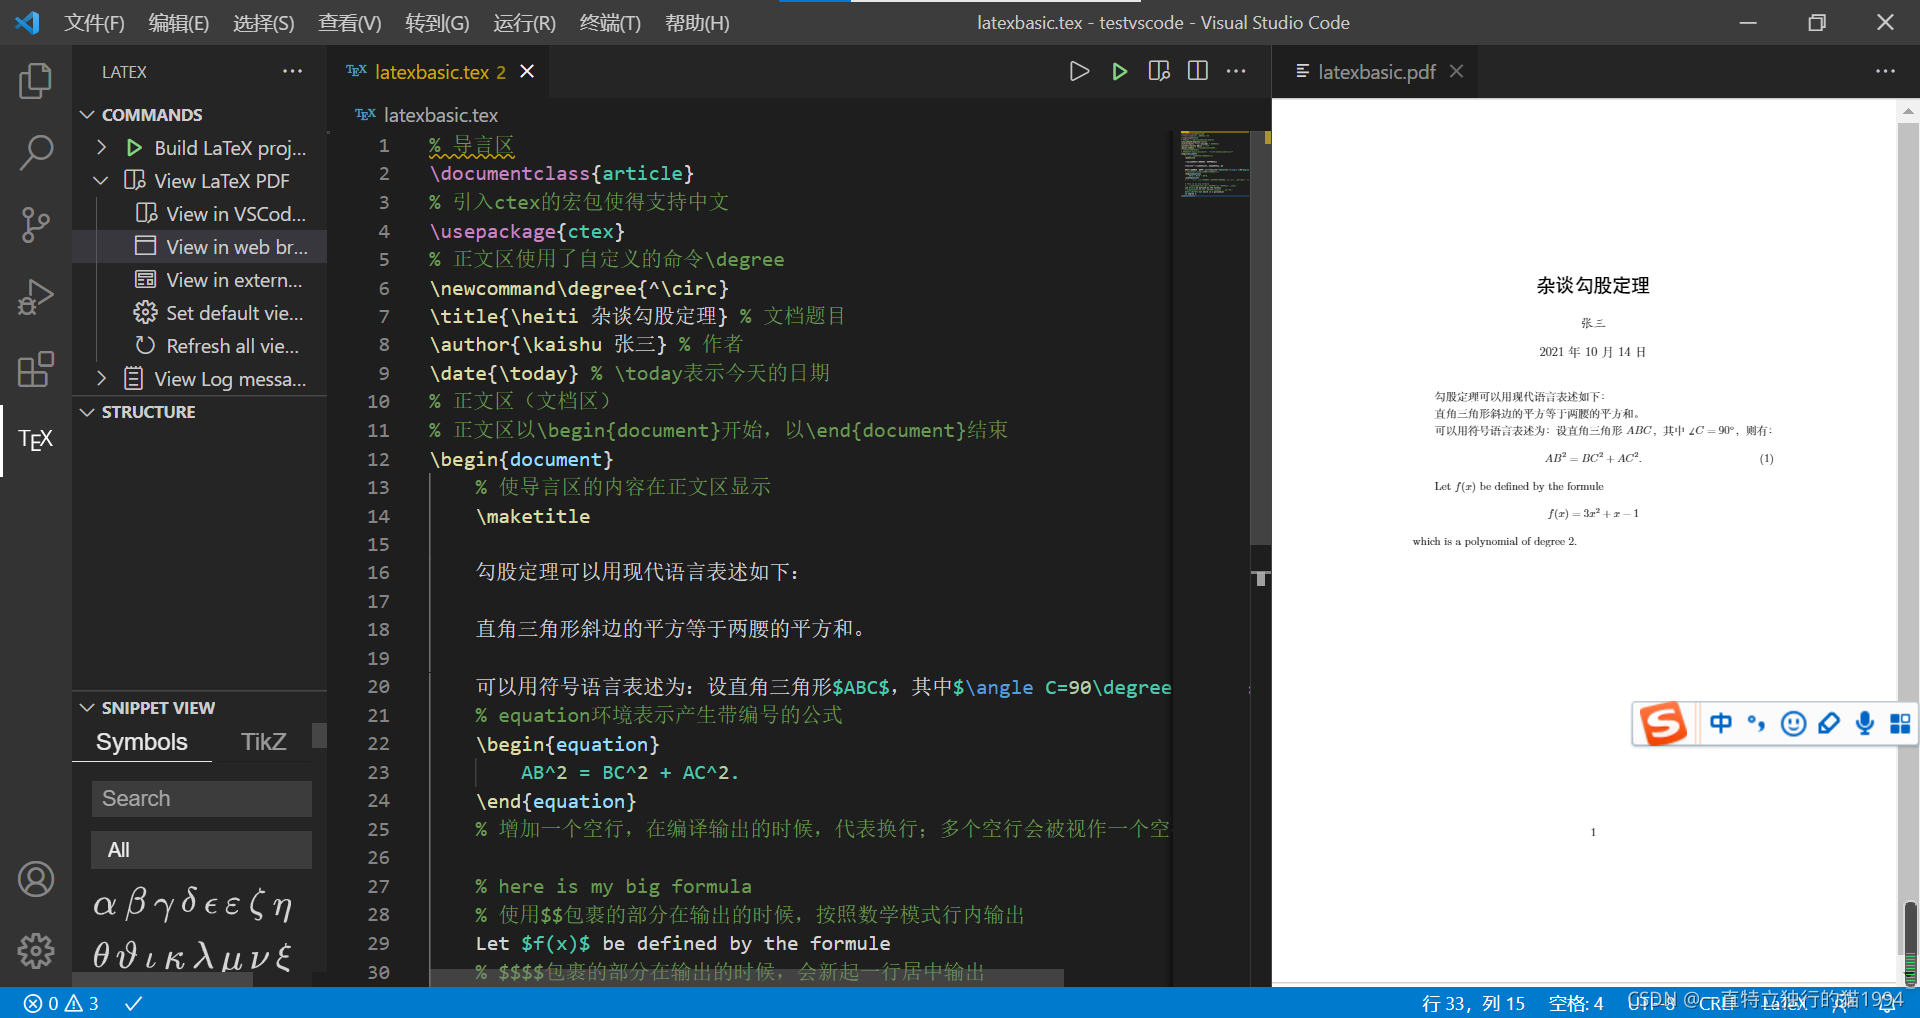
LaTeX中处理中文需要注意两点:
- 检查编辑器的编码格式是不是“UTF-8”;
- 引入ctex宏包。
% 导言区
\documentclass{
    article}
% 引入ctex的宏包使得支持中文
\usepackage{
    ctex}
% 正文区使用了自定义的命令\degree
\newcommand\degree{
    ^\circ}
\title{
    \heiti 杂谈勾股定理} % 文档题目
\author{
    \kaishu 张三} % 作者
\date{
    \today} % \today表示今天的日期
% 正文区(文档区)
% 正文区以\begin{
    document}开始,以\end{
    document}结束
\begin{
    document}
    % 使导言区的内容在正文区显示
    \maketitle

    勾股定理可以用现代语言表述如下:

    直角三角形斜边的平方等于两腰的平方和。

    可以用符号语言表述为:设直角三角形$ABC$,其中$\angle C=90\degree$,则有:
    % equation环境表示产生带编号的公式
    \begin{
    equation}
        AB^2 = BC^2 + AC^2.
    \end{
    equation}
	% 增加一个空行,在编译输出的时候,代表换行;多个空行会被视作一个空行

    % here is my big formula
    % 使用$$包裹的部分在输出的时候,按照数学模式行内输出
    Let $f(x)$ be defined by the formule
    % $$$$包裹的部分在输出的时候,会新起一行居中输出
    $$f(x)=3x^2+x-1$$ which is a polynomial
    of degree 2.
\end{
    document}
此外,我们还可以在控制台输入
texdoc ctex
查看ctex宏包手册

输入
texdoc lshort-zh
可以查看texlive提供的任何一个中文帮助文件。

latex04-LaTeX的字体字号设置
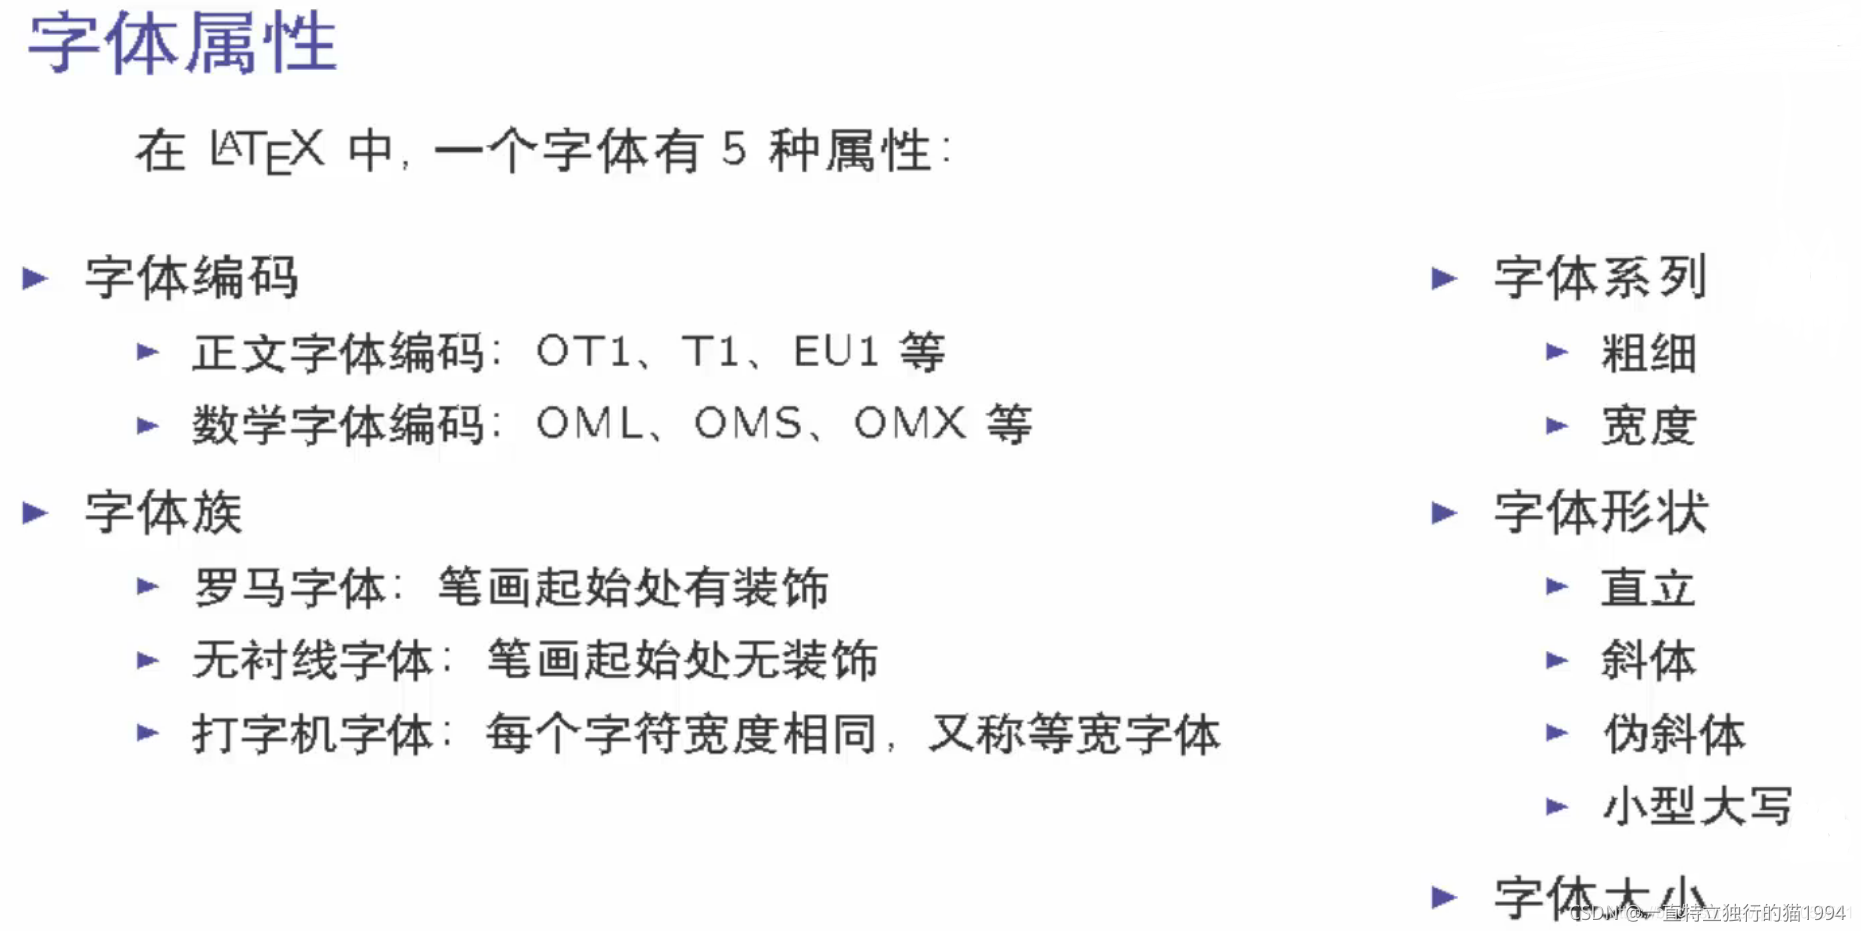 LaTeX的这5种属性都可以通过命令或声明进行设置,关于字体编码,后面再进行讨论,本节课主要讨论字体族、字体系列、字体形状和字体大小的设置。
字体大小默认值是10pt,修改默认值,需要写在\documentclass[11pt]{article}的方括号里,这里的10pt是article定义的,除了10pt,还有11pt和12pt,没有其他的了。
% 导言区
% 10pt是默认正常的字体大小,即下文中的normalsize
\documentclass[10pt]{
    article}
\usepackage{
    ctex}
% 自定义字体,类似于C语言中的自定义函数,在上面定义,下面调用
\newcommand{
    \myfont}{
    \textbf{
    \textsf{
    Fancy Text}}}

% 正文区(文档区)
\begin{
    document}
	% 字体族设置(罗马字体、无衬线字体、打字机字体)
	% 字体命令 {
    }中是作用到的文字
	\textrm{
    Roman Family} \textsf{
    Sans Serif Family}
	\texttt{
    Typewriter Family}

	% 字体声明 后面紧跟的文字是作用到的文字
	% 在字体声明时,如果不带{
    }限定范围,那么后面的所有文字都按照字体声明来显示,
	% 直达碰到下一个字体声明为止。
	{
    \rmfamily Roman Family} {
    \sffamily Sans Serif Family}
	{
    \ttfamily Typewriter Family}

	{
    \sffamily who you are? you find self on everyone around.
	take you as the same as others!}

	{
    \ttfamily Are you wiser than others? definitely no.
	in some ways, may it is true. What can you achieve?
	a luxurious house? a brillilant car? an admirable
	career? who knows?}

	% 字体系列设置(粗细、宽度)
	% 字体命令
	\textmd{
    Medium Series} \textbf{
    Boldface Series}

	% 字体声明
	{
    \mdseries Medium Series} {
    \bfseries Boldface Series}

	% 字体形状设置(直立、斜体、伪斜体、小型大写)
	%字体命令
	\textup{
    Upright Shape} \textit{
    Italic Shape}
	\textsl{
    Slanted Shape} \textsc{
    Small Caps Shape}

	% 字体声明
	{
    \upshape Upright Shape} {
    \itshape Italic Shape}
	{
    \slshape Slanted Shape} {
    \scshape Small Caps Shape}

	% 中文字体
	% \quad表示空格
	{
    \songti 宋体} \quad {
    \heiti 黑体} \quad {
    \fangsong 仿宋}
	\quad {
    \kaishu 楷书}

	中文字体的\textbf{
    粗体}与\textit{
    斜体}

	% 字体大小设置
	% 字体大小是通过一系列声明实现的,这些声明是与normalsize
	% 相对的大小
	{
    \tiny         Hello}\\
	{
    \scriptsize   Hello}\\
	{
    \footnotesize Hello}\\
	{
    \small        Hello}\\
	{
    \normalsize   Hello}\\
	{
    \large        Hello}\\
	{
    \Large        Hello}\\
	{
    \LARGE        Hello}\\
	{
    \huge         Hello}\\
	{
    \Huge         Hello}\\

	% 中文字号设置命令
	\zihao{
    5} 你好!

	% latex格式与内容分离
	\myfont
\end{
    document}
其他内容可以参考ctex手册
texdoc ctex
latex05-LaTeX文档的基本结构
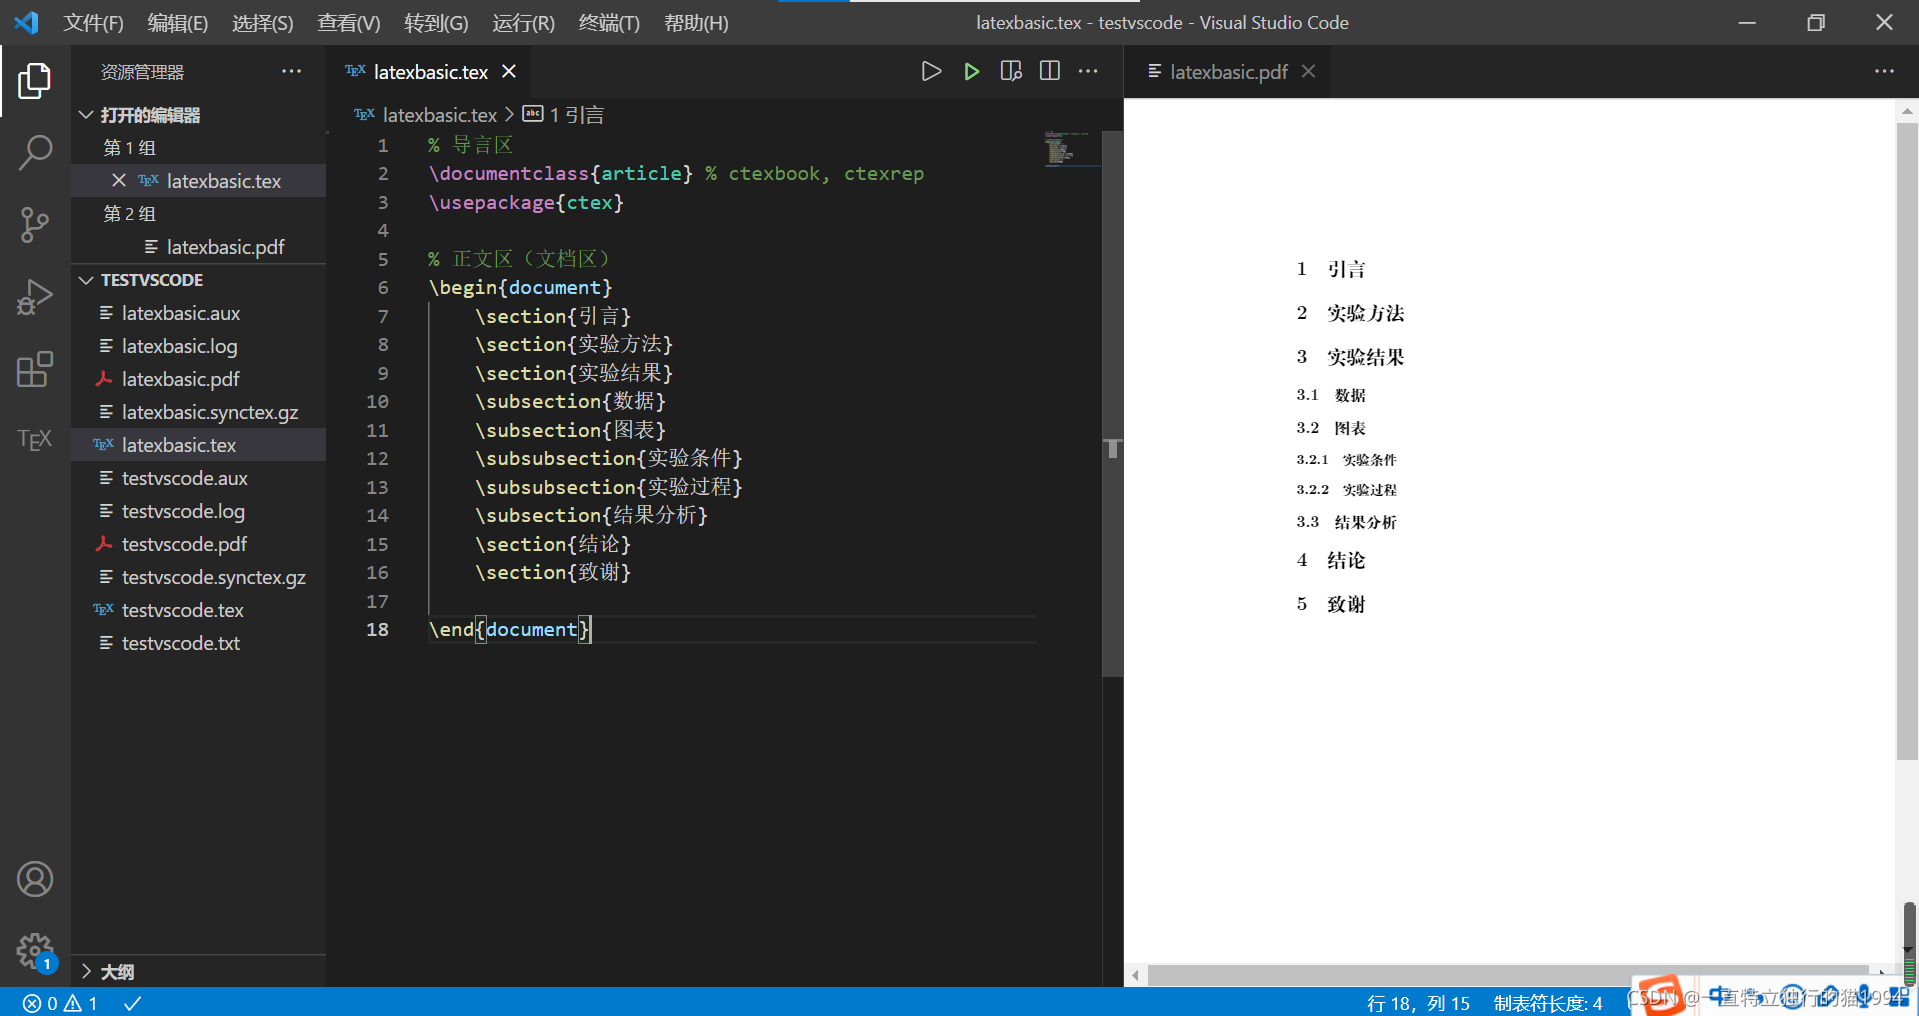
- \section{}:一级标题
- \subsection{}:二级标题
- \subsubsection{}:三级标题
% 导言区
\documentclass{
    article} % ctexbook, ctexrep
\usepackage{
    ctex}

% 正文区(文档区)
\begin{
    document}
	\section{
    引言}
	\section{
    实验方法}
	\section{
    实验结果}
	\subsection{
    数据}
	\subsection{
    图表}
	\subsubsection{
    实验条件}
	\subsubsection{
    实验过程}
	\subsection{
    结果分析}
	\section{
    结论}
	\section{
    致谢}

\end{
    document}
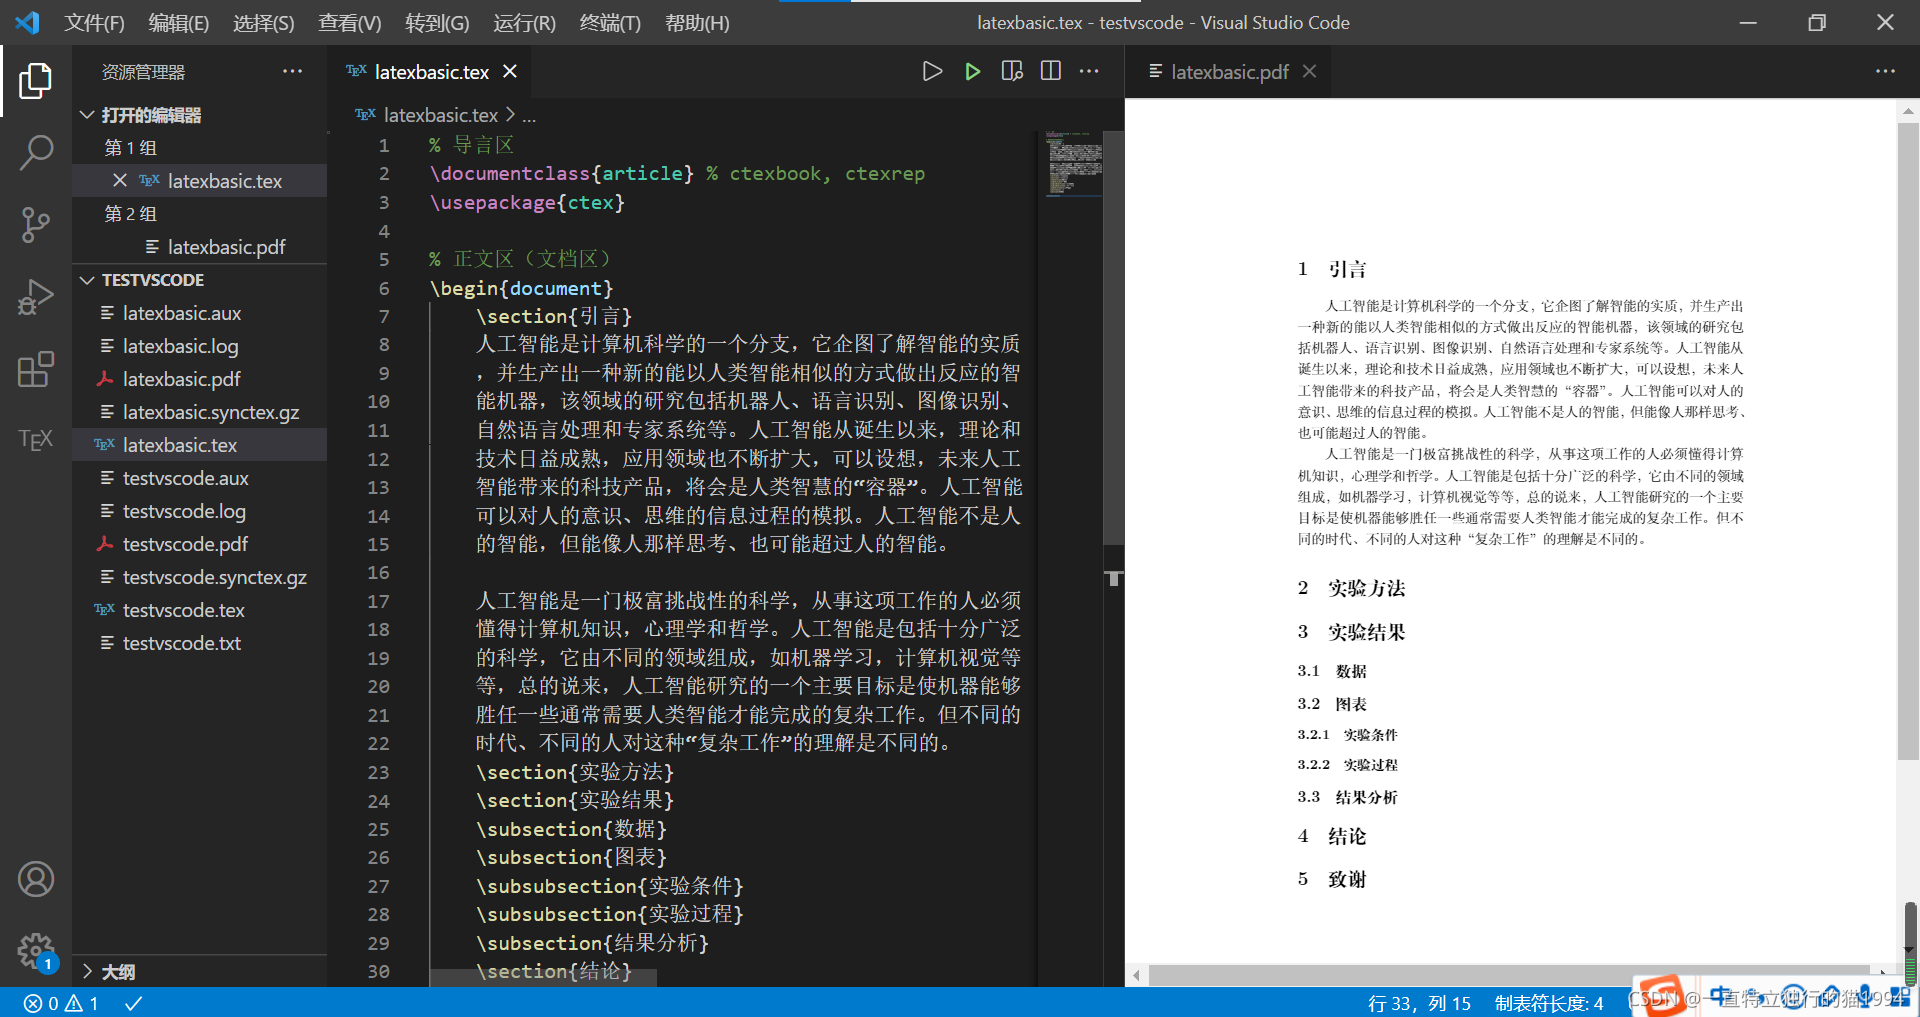
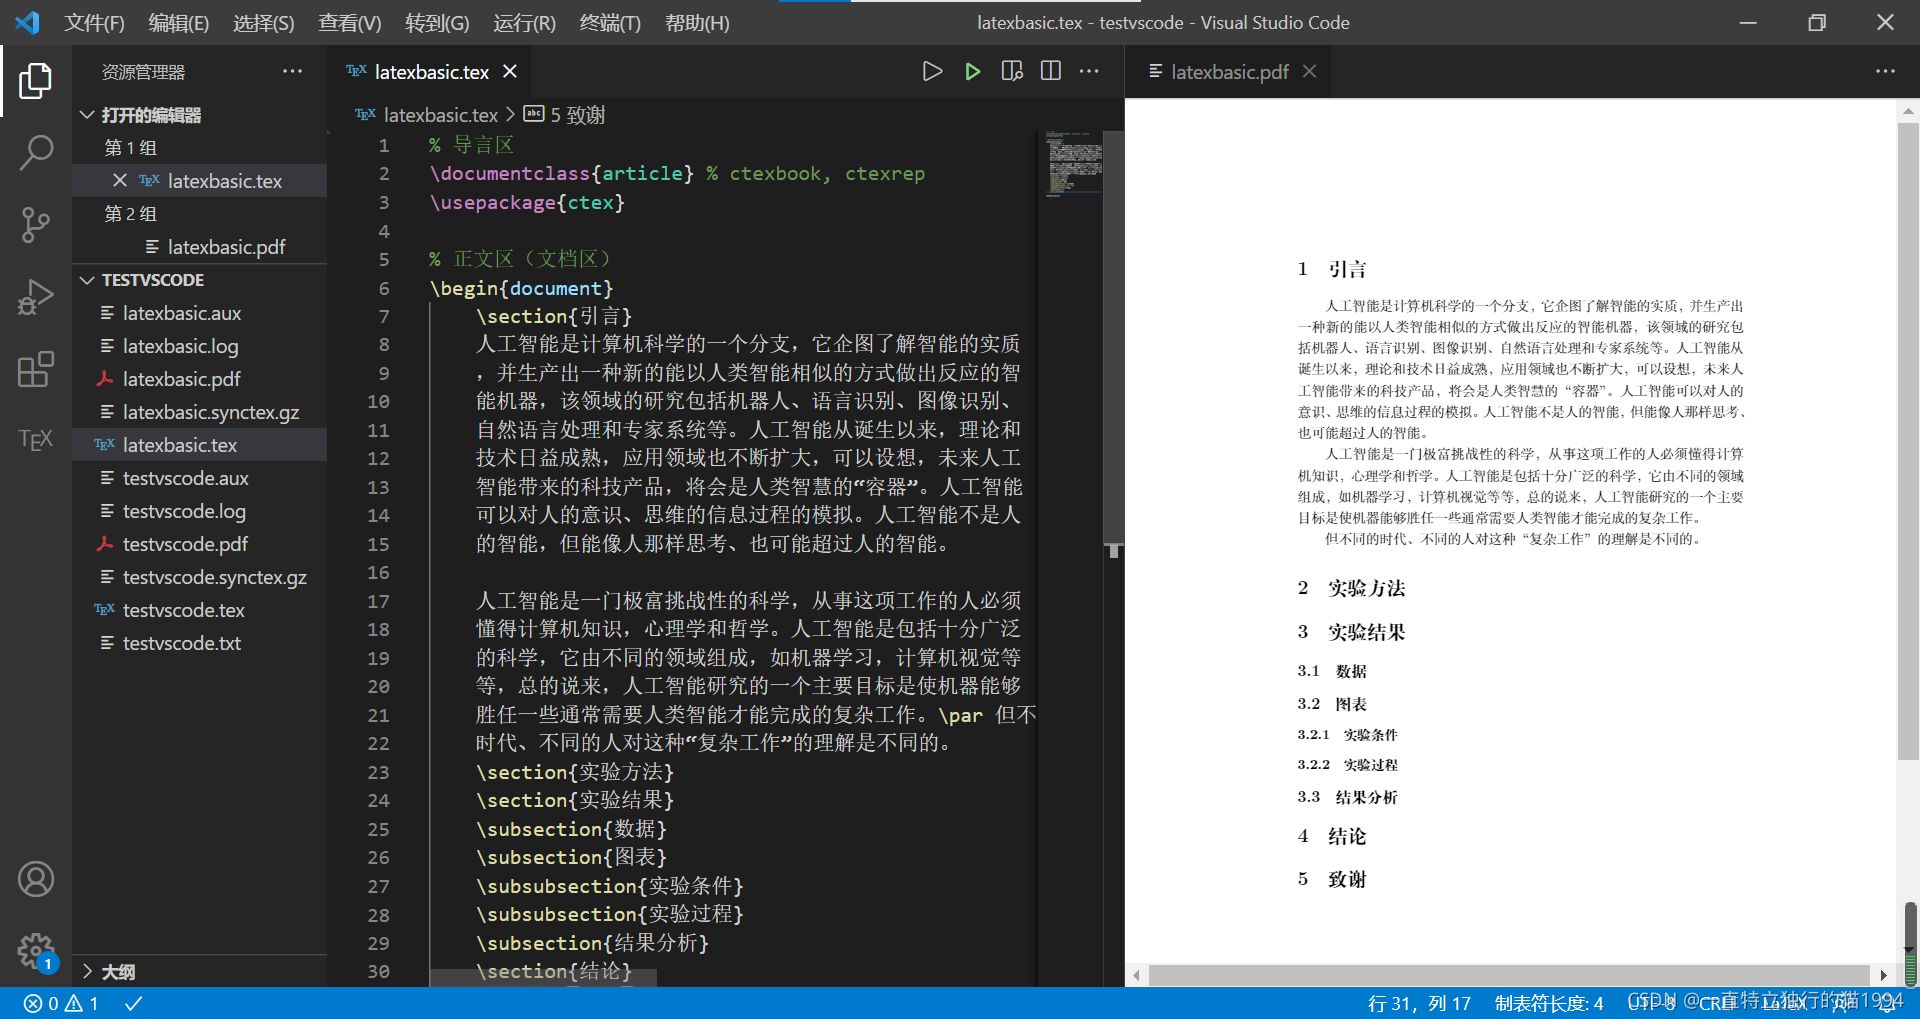
- 换行可以使用一个空行(多个空行和一个空行效果一样)。
- 可以使用\命令实现换行,并不会产生新的段落,所以首行不会产生缩进。
- 也可以使用\par命令产生新的段落。
- 通常,为了保证源文件的清晰,分段通常是用插入空行来实现的。
% 导言区
\documentclass{
    article} % ctexbook, ctexrep
\usepackage{
    ctex}

% 正文区(文档区)
\begin{
    document}
	\section{
    引言}
	人工智能是计算机科学的一个分支,它企图了解智能的实质
	,并生产出一种新的能以人类智能相似的方式做出反应的智
	能机器,该领域的研究包括机器人、语言识别、图像识别、
	自然语言处理和专家系统等。人工智能从诞生以来,理论和
	技术日益成熟,应用领域也不断扩大,可以设想,未来人工
	智能带来的科技产品,将会是人类智慧的“容器”。人工智能
	可以对人的意识、思维的信息过程的模拟。人工智能不是人
	的智能,但能像人那样思考、也可能超过人的智能。

	人工智能是一门极富挑战性的科学,从事这项工作的人必须
	懂得计算机知识,心理学和哲学。人工智能是包括十分广泛
	的科学,它由不同的领域组成,如机器学习,计算机视觉等
	等,总的说来,人工智能研究的一个主要目标是使机器能够
	胜任一些通常需要人类智能才能完成的复杂工作。但不同的
	时代、不同的人对这种“复杂工作”的理解是不同的。
	\section{
    实验方法}
	\section{
    实验结果}
	\subsection{
    数据}
	\subsection{
    图表}
	\subsubsection{
    实验条件}
	\subsubsection{
    实验过程}
	\subsection{
    结果分析}
	\section{
    结论}
	\section{
    致谢}

\end{
    document}
% 导言区
\documentclass{
    article} % ctexbook, ctexrep
\usepackage{
    ctex}

% 正文区(文档区)
\begin{
    document}
	\section{
    引言}
	人工智能是计算机科学的一个分支,它企图了解智能的实质
	,并生产出一种新的能以人类智能相似的方式做出反应的智
	能机器,该领域的研究包括机器人、语言识别、图像识别、
	自然语言处理和专家系统等。人工智能从诞生以来,理论和
	技术日益成熟,应用领域也不断扩大,可以设想,未来人工
	智能带来的科技产品,将会是人类智慧的“容器”。人工智能
	可以对人的意识、思维的信息过程的模拟。人工智能不是人
	的智能,但能像人那样思考、也可能超过人的智能。

	人工智能是一门极富挑战性的科学,从事这项工作的人必须
	懂得计算机知识,心理学和哲学。人工智能是包括十分广泛
	的科学,它由不同的领域组成,如机器学习,计算机视觉等
	等,总的说来,人工智能研究的一个主要目标是使机器能够
	胜任一些通常需要人类智能才能完成的复杂工作。\\ 但不同的
	时代、不同的人对这种“复杂工作”的理解是不同的。
	\section{
    实验方法}
	\section{
    实验结果}
	\subsection{
    数据}
	\subsection{
    图表}
	\subsubsection{
    实验条件}
	\subsubsection{
    实验过程}
	\subsection{
    结果分析}
	\section{
    结论}
	\section{
    致谢}

\end{
    document}

% 导言区
\documentclass{
    article} % ctexbook, ctexrep
\usepackage{
    ctex}

% 正文区(文档区)
\begin{
    document}
	\section{
    引言}
	人工智能是计算机科学的一个分支,它企图了解智能的实质
	,并生产出一种新的能以人类智能相似的方式做出反应的智
	能机器,该领域的研究包括机器人、语言识别、图像识别、
	自然语言处理和专家系统等。人工智能从诞生以来,理论和
	技术日益成熟,应用领域也不断扩大,可以设想,未来人工
	智能带来的科技产品,将会是人类智慧的“容器”。人工智能
	可以对人的意识、思维的信息过程的模拟。人工智能不是人
	的智能,但能像人那样思考、也可能超过人的智能。

	人工智能是一门极富挑战性的科学,从事这项工作的人必须
	懂得计算机知识,心理学和哲学。人工智能是包括十分广泛
	的科学,它由不同的领域组成,如机器学习,计算机视觉等
	等,总的说来,人工智能研究的一个主要目标是使机器能够
	胜任一些通常需要人类智能才能完成的复杂工作。\par 但不同的
	时代、不同的人对这种“复杂工作”的理解是不同的。
	\section{
    实验方法}
	\section{
    实验结果}
	\subsection{
    数据}
	\subsection{
    图表}
	\subsubsection{
    实验条件}
	\subsubsection{
    实验过程}
	\subsection{
    结果分析}
	\section{
    结论}
	\section{
    致谢}

\end{
    document}
当然,我们也可以使用ctexart这样的文档类来实现相应的操作。
% 导言区
\documentclass{
    ctexart} % ctexbook, ctexrep
% \usepackage{
    ctex}

% 正文区(文档区)
\begin{
    document}
	\section{
    引言}
	人工智能是计算机科学的一个分支,它企图了解智能的实质
	,并生产出一种新的能以人类智能相似的方式做出反应的智
	能机器,该领域的研究包括机器人、语言识别、图像识别、
	自然语言处理和专家系统等。人工智能从诞生以来,理论和
	技术日益成熟,应用领域也不断扩大,可以设想,未来人工
	智能带来的科技产品,将会是人类智慧的“容器”。人工智能
	可以对人的意识、思维的信息过程的模拟。人工智能不是人
	的智能,但能像人那样思考、也可能超过人的智能。

	人工智能是一门极富挑战性的科学,从事这项工作的人必须
	懂得计算机知识,心理学和哲学。人工智能是包括十分广泛
	的科学,它由不同的领域组成,如机器学习,计算机视觉等
	等,总的说来,人工智能研究的一个主要目标是使机器能够
	胜任一些通常需要人类智能才能完成的复杂工作。\par 但不同的
	时代、不同的人对这种“复杂工作”的理解是不同的。
	\section{
    实验方法}
	\section{
    实验结果}
	\subsection{
    数据}
	\subsection{
    图表}
	\subsubsection{
    实验条件}
	\subsubsection{
    实验过程}
	\subsection{
    结果分析}
	\section{
    结论}
	\section{
    致谢}

\end{
    document}
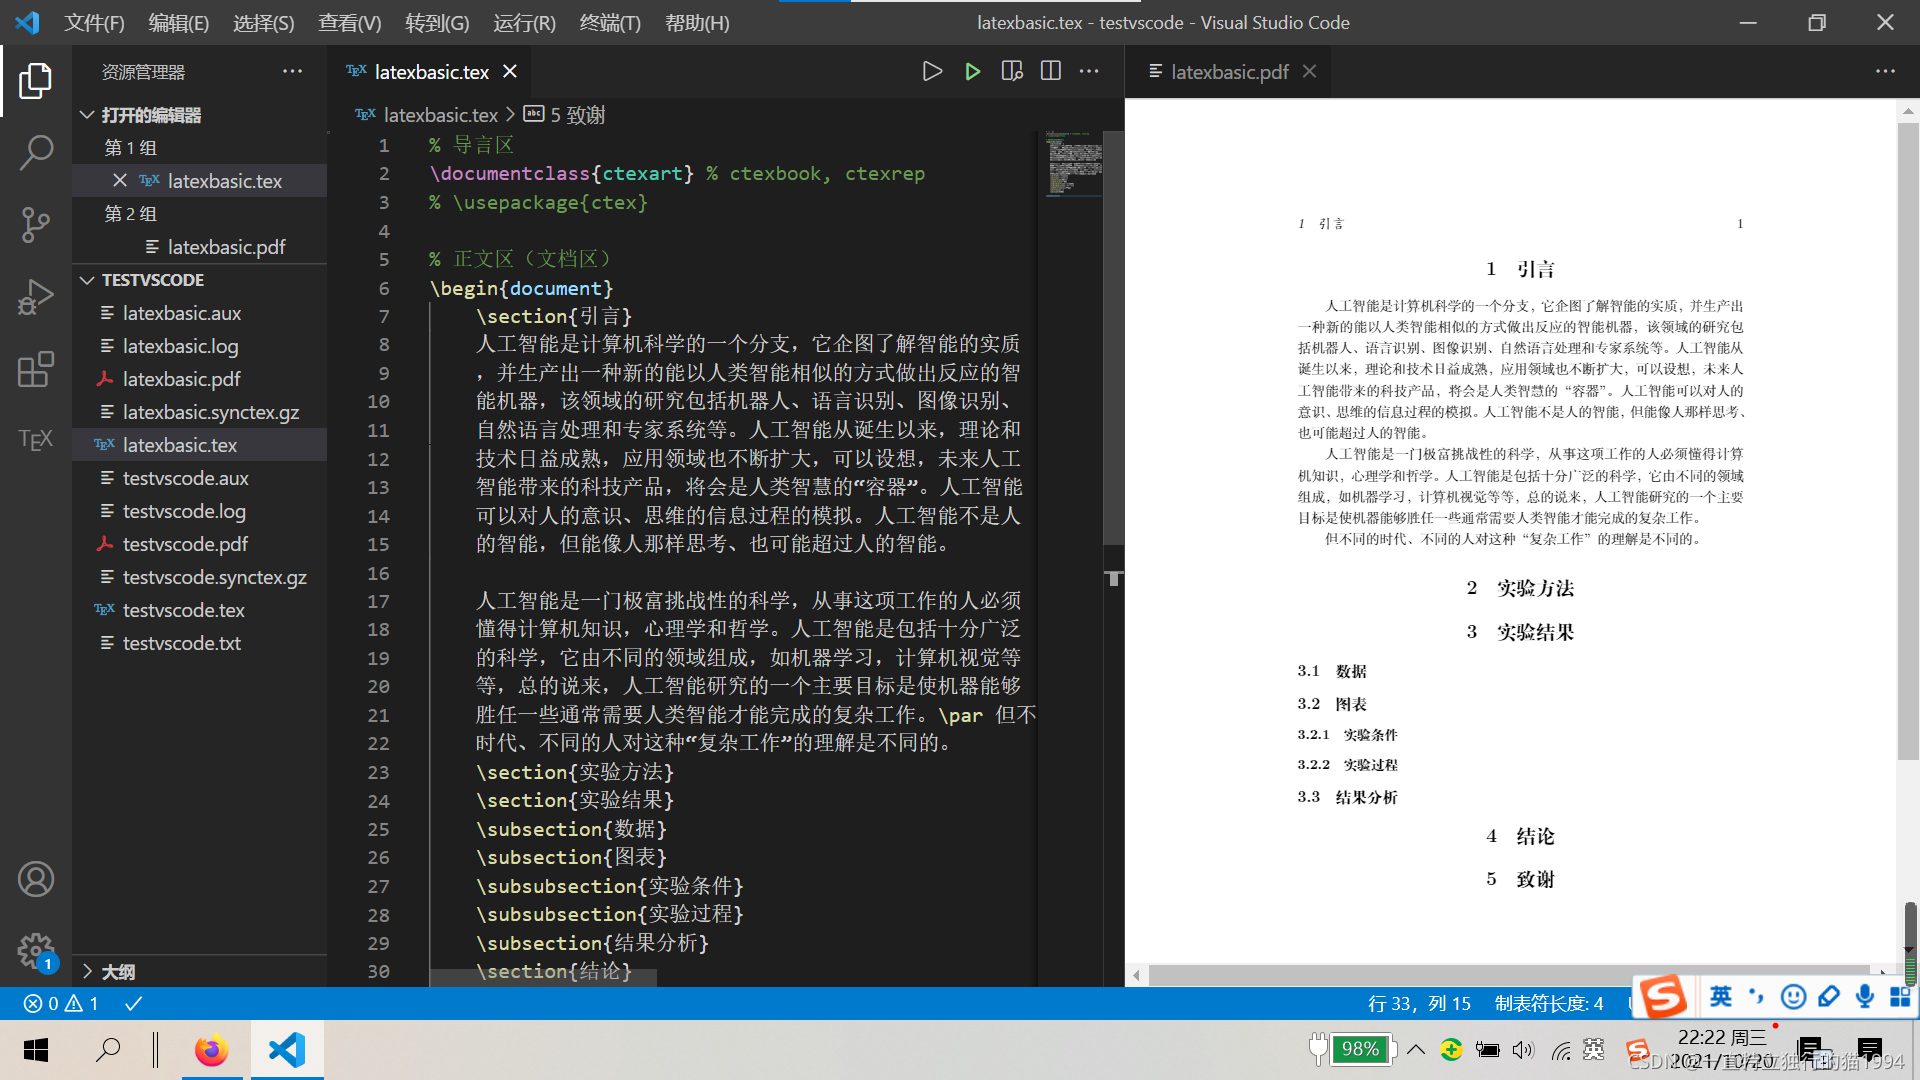
请注意,此时section是居中排版的。当然,这些设置是可以更改的。
% 导言区
\documentclass{
    ctexart} % ctexbook, ctexrep
% \usepackage{
    ctex}

% ============设置标题的格式============
\ctexset{

	section = {

		format+ = \zihao{
    -4} \heiti \raggedright,
		name = {
    ,、},
		beforeskip = 1.0ex plus 0.2ex minus .2ex,
		afterskip = 1.0ex plus 0.2ex minus .2ex,
		aftername = \hspace{
    0pt}
	},
	subsection = {

		format+ = \zihao{
    5} \heiti \raggedright,
		% name = {
    \thesubsection、},
		name = {
    ,、},
		number = \arabic{
    subsection},
		beforeskip = 1.0ex plus 0.2ex minus .2ex,
		afterskip = 1.0ex plus 0.2ex minus .2ex,
		aftername = \hspace{
    0pt}
	}
}

% 正文区(文档区)
\begin{
    document}
	\section{
    引言}
	人工智能是计算机科学的一个分支,它企图了解智能的实质
	,并生产出一种新的能以人类智能相似的方式做出反应的智
	能机器,该领域的研究包括机器人、语言识别、图像识别、
	自然语言处理和专家系统等。人工智能从诞生以来,理论和
	技术日益成熟,应用领域也不断扩大,可以设想,未来人工
	智能带来的科技产品,将会是人类智慧的“容器”。人工智能
	可以对人的意识、思维的信息过程的模拟。人工智能不是人
	的智能,但能像人那样思考、也可能超过人的智能。

	人工智能是一门极富挑战性的科学,从事这项工作的人必须
	懂得计算机知识,心理学和哲学。人工智能是包括十分广泛
	的科学,它由不同的领域组成,如机器学习,计算机视觉等
	等,总的说来,人工智能研究的一个主要目标是使机器能够
	胜任一些通常需要人类智能才能完成的复杂工作。\par 但不同的
	时代、不同的人对这种“复杂工作”的理解是不同的。
	\section{
    实验方法}
	\section{
    实验结果}
	\subsection{
    数据}
	\subsection{
    图表}
	\subsubsection{
    实验条件}
	\subsubsection{
    实验过程}
	\subsection{
    结果分析}
	\section{
    结论}
	\section{
    致谢}

\end{
    document}
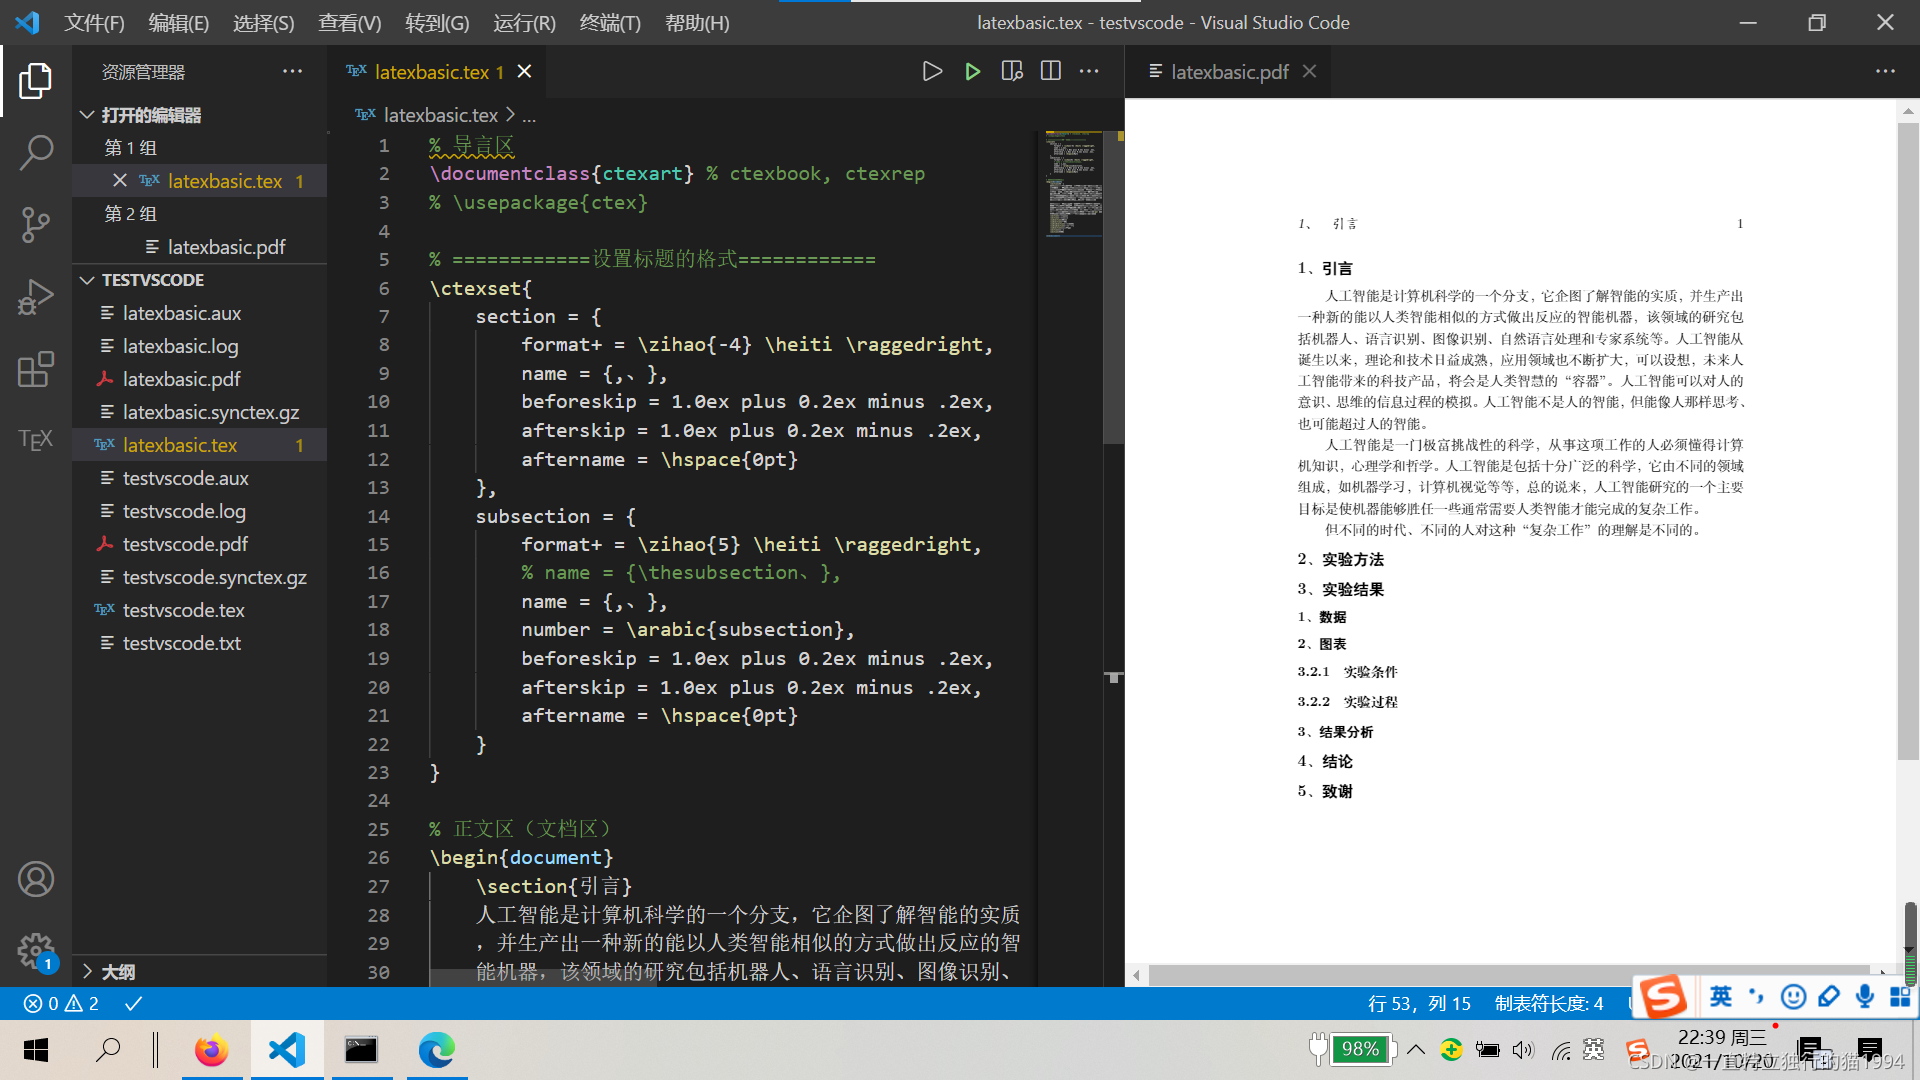
请注意,此时section已变为要求的排版格式。
类似的,我们还可以用\chapter命令来产生来章节的大纲。
% 导言区
\documentclass{
    ctexbook} % ctexbook, ctexrep
% \usepackage{
    ctex}

% ============设置标题的格式============
\ctexset{

	section = {

		format+ = \zihao{
    -4} \heiti \raggedright,
		name = {
    ,、},
		beforeskip = 1.0ex plus 0.2ex minus .2ex,
		afterskip = 1.0ex plus 0.2ex minus .2ex,
		aftername = \hspace{
    0pt}
	},
	subsection = {

		format+ = \zihao{
    5} \heiti \raggedright,
		% name = {
    \thesubsection、},
		name = {
    ,、},
		number = \arabic{
    subsection},
		beforeskip = 1.0ex plus 0.2ex minus .2ex,
		afterskip = 1.0ex plus 0.2ex minus .2ex,
		aftername = \hspace{
    0pt}
	}
}

% 正文区(文档区)
\begin{
    document}
	\chapter{
    绪论}
	\section{
    研究的目的和意义}
	\section{
    国内外研究现状}
	\subsection{
    国外研究现状}
	\subsection{
    国内研究现状}
	\section{
    研究内容}
	\section{
    研究方法与技术路线}
	\subsection{
    研究内容}
	\subsection{
    技术路线}

	\chapter{
    实验与结果分析}
	\section{
    引言}
	\section{
    实验方法}
	\section{
    实验结果}
	\subsection{
    数据}
	\subsection{
    图表}
	\subsubsection{
    实验条件}
	\subsubsection{
    实验过程}
	\subsection{
    结果分析}
	\section{
    结论}
	\section{
    致谢}
\end{
    document}
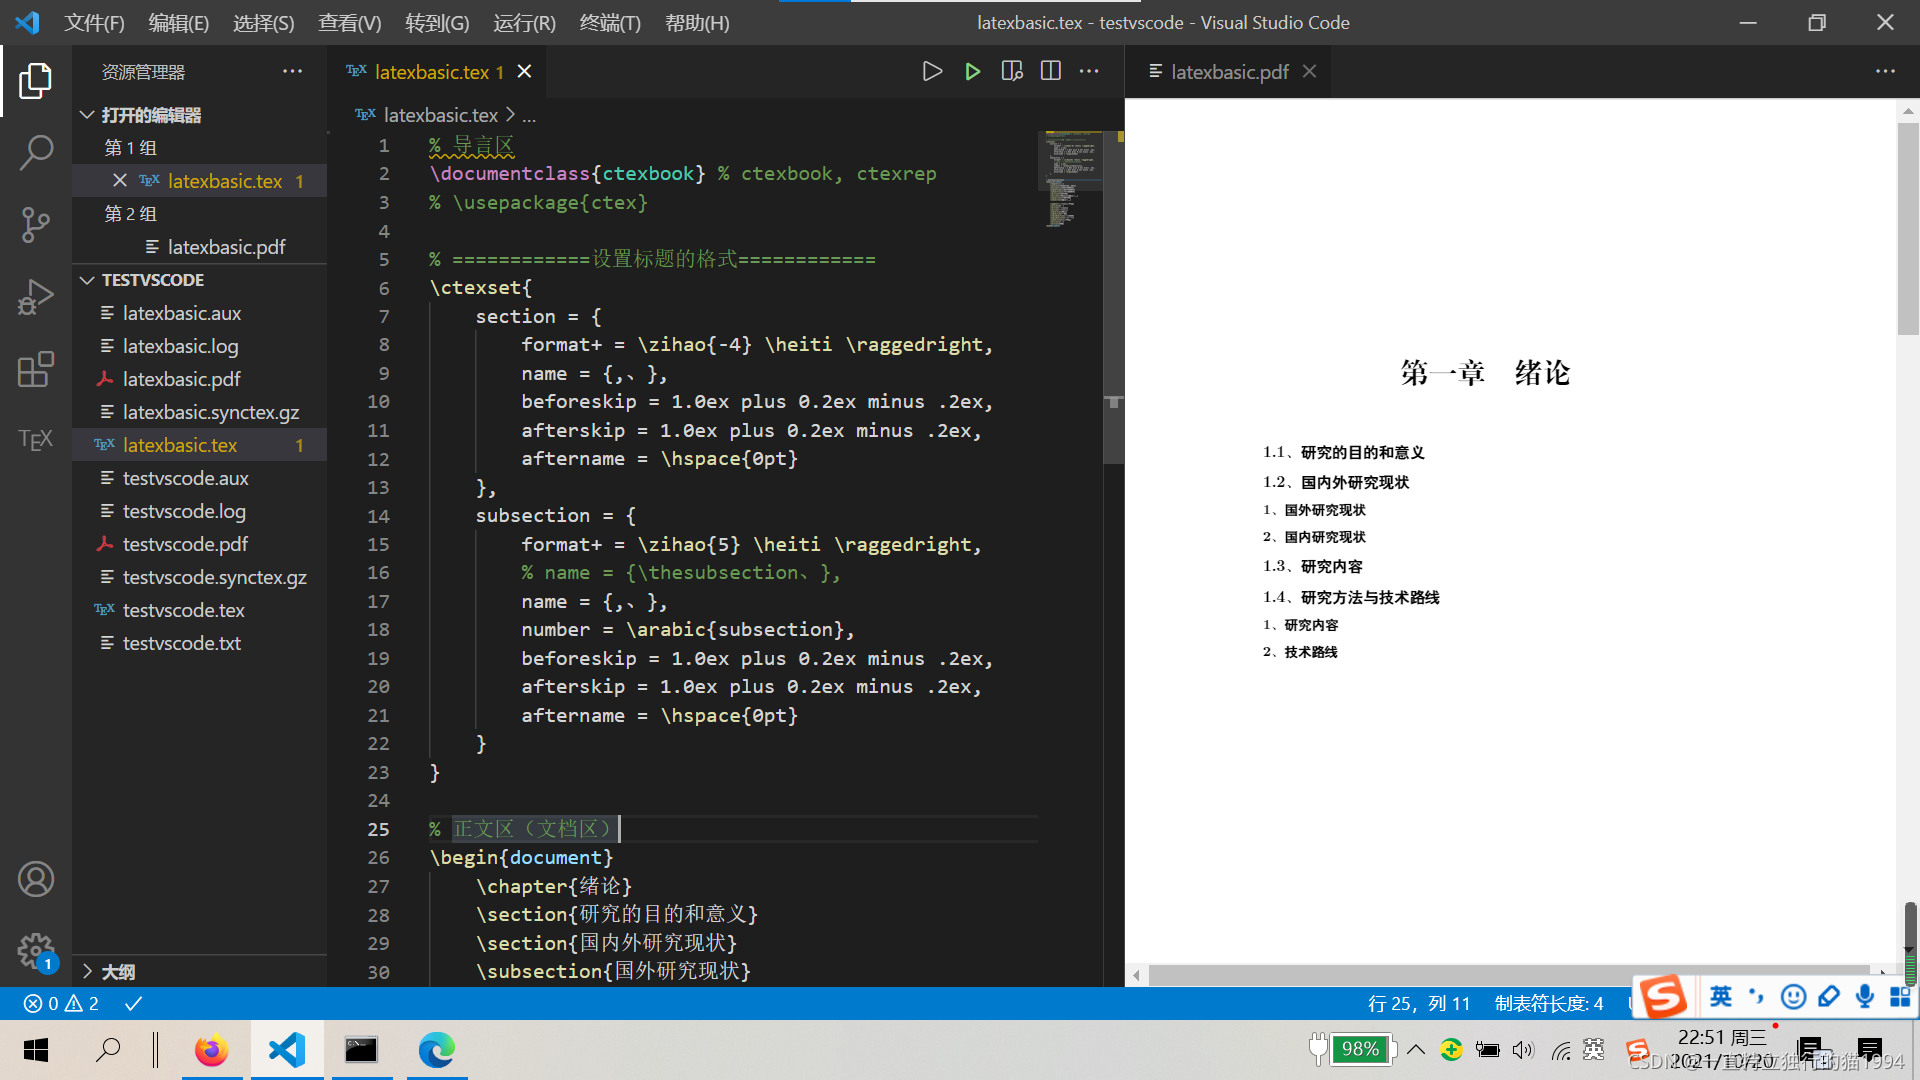
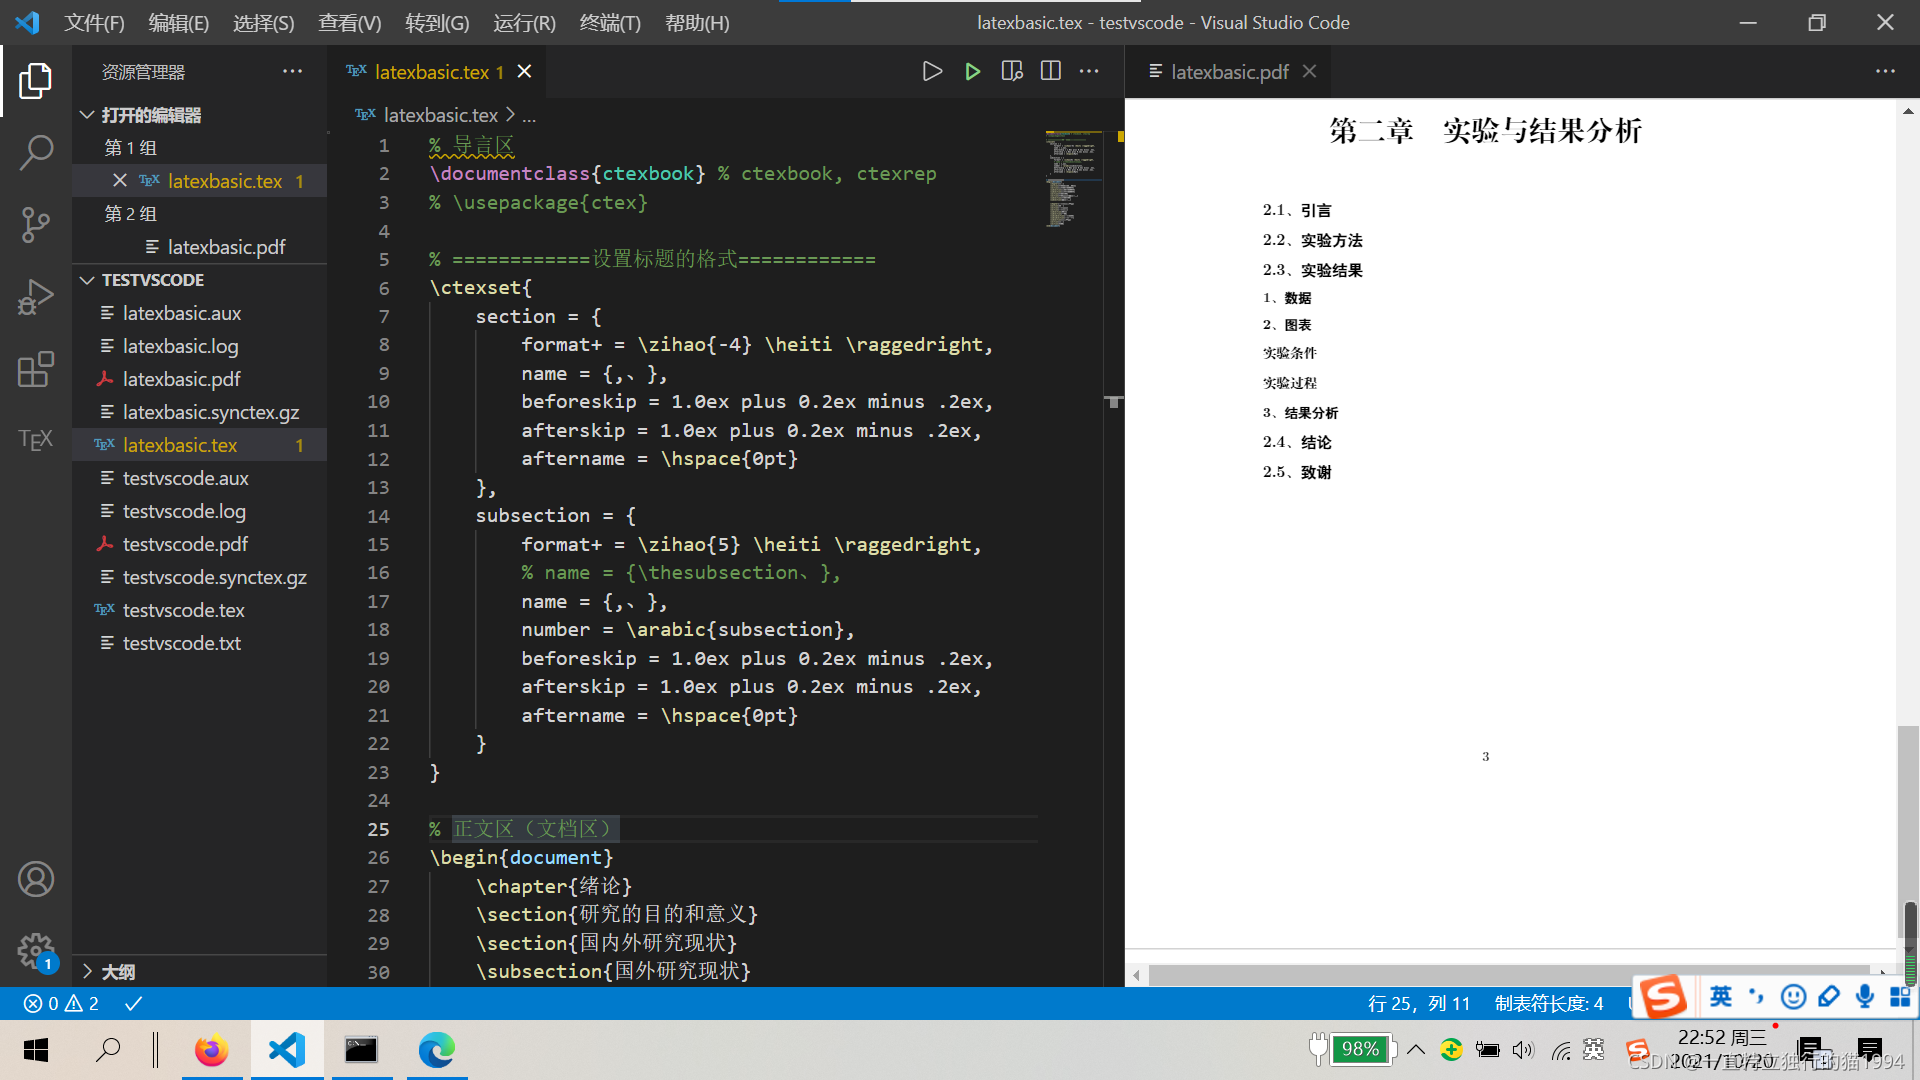
注意,此时的subsubsection是不起作用的。
同时,我们还可以使用\tableofcontents命令来产生整个文档的目录。
% 导言区
\documentclass{
    ctexbook} % ctexbook, ctexrep
% \usepackage{
    ctex}

% ============设置标题的格式============
\ctexset{

	section = {

		format+ = \zihao{
    -4} \heiti \raggedright,
		name = {
    ,、},
		beforeskip = 1.0ex plus 0.2ex minus .2ex,
		afterskip = 1.0ex plus 0.2ex minus .2ex,
		aftername = \hspace{
    0pt}
	},
	subsection = {

		format+ = \zihao{
    5} \heiti \raggedright,
		% name = {
    \thesubsection、},
		name = {
    ,、},
		number = \arabic{
    subsection},
		beforeskip = 1.0ex plus 0.2ex minus .2ex,
		afterskip = 1.0ex plus 0.2ex minus .2ex,
		aftername = \hspace{
    0pt}
	}
}

% 正文区(文档区)
\begin{
    document}
	\tableofcontents

	\chapter{
    绪论}
	\section{
    研究的目的和意义}
	\section{
    国内外研究现状}
	\subsection{
    国外研究现状}
	\subsection{
    国内研究现状}
	\section{
    研究内容}
	\section{
    研究方法与技术路线}
	\subsection{
    研究内容}
	\subsection{
    技术路线}

	\chapter{
    实验与结果分析}
	\section{
    引言}
	\section{
    实验方法}
	\section{
    实验结果}
	\subsection{
    数据}
	\subsection{
    图表}
	\subsubsection{
    实验条件}
	\subsubsection{
    实验过程}
	\subsection{
    结果分析}
	\section{
    结论}
	\section{
    致谢}
\end{
    document}

对于这些细节,我们可以查看相关手册。比如,在命令行输入
texdoc ctex
来打开ctex的宏包手册,便可以查阅ctexset命令的详细使用方法。
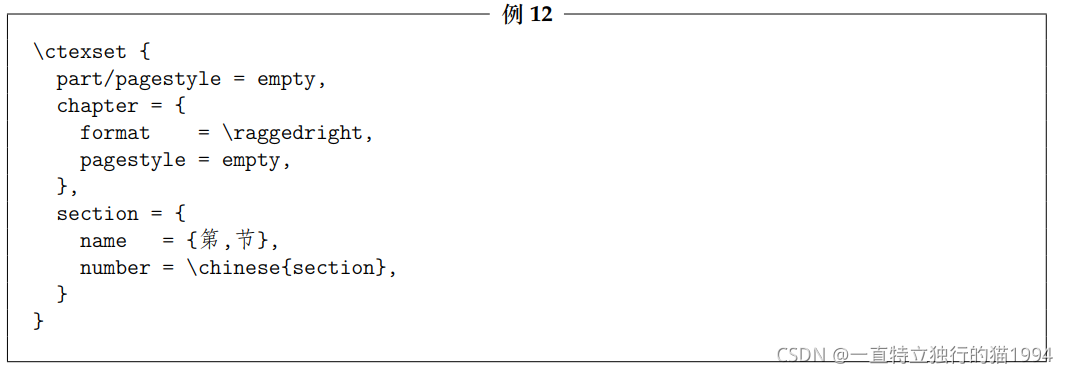
在导言区进行格式的设置,将内容与格式分离,是LaTeX排版的基本思想。
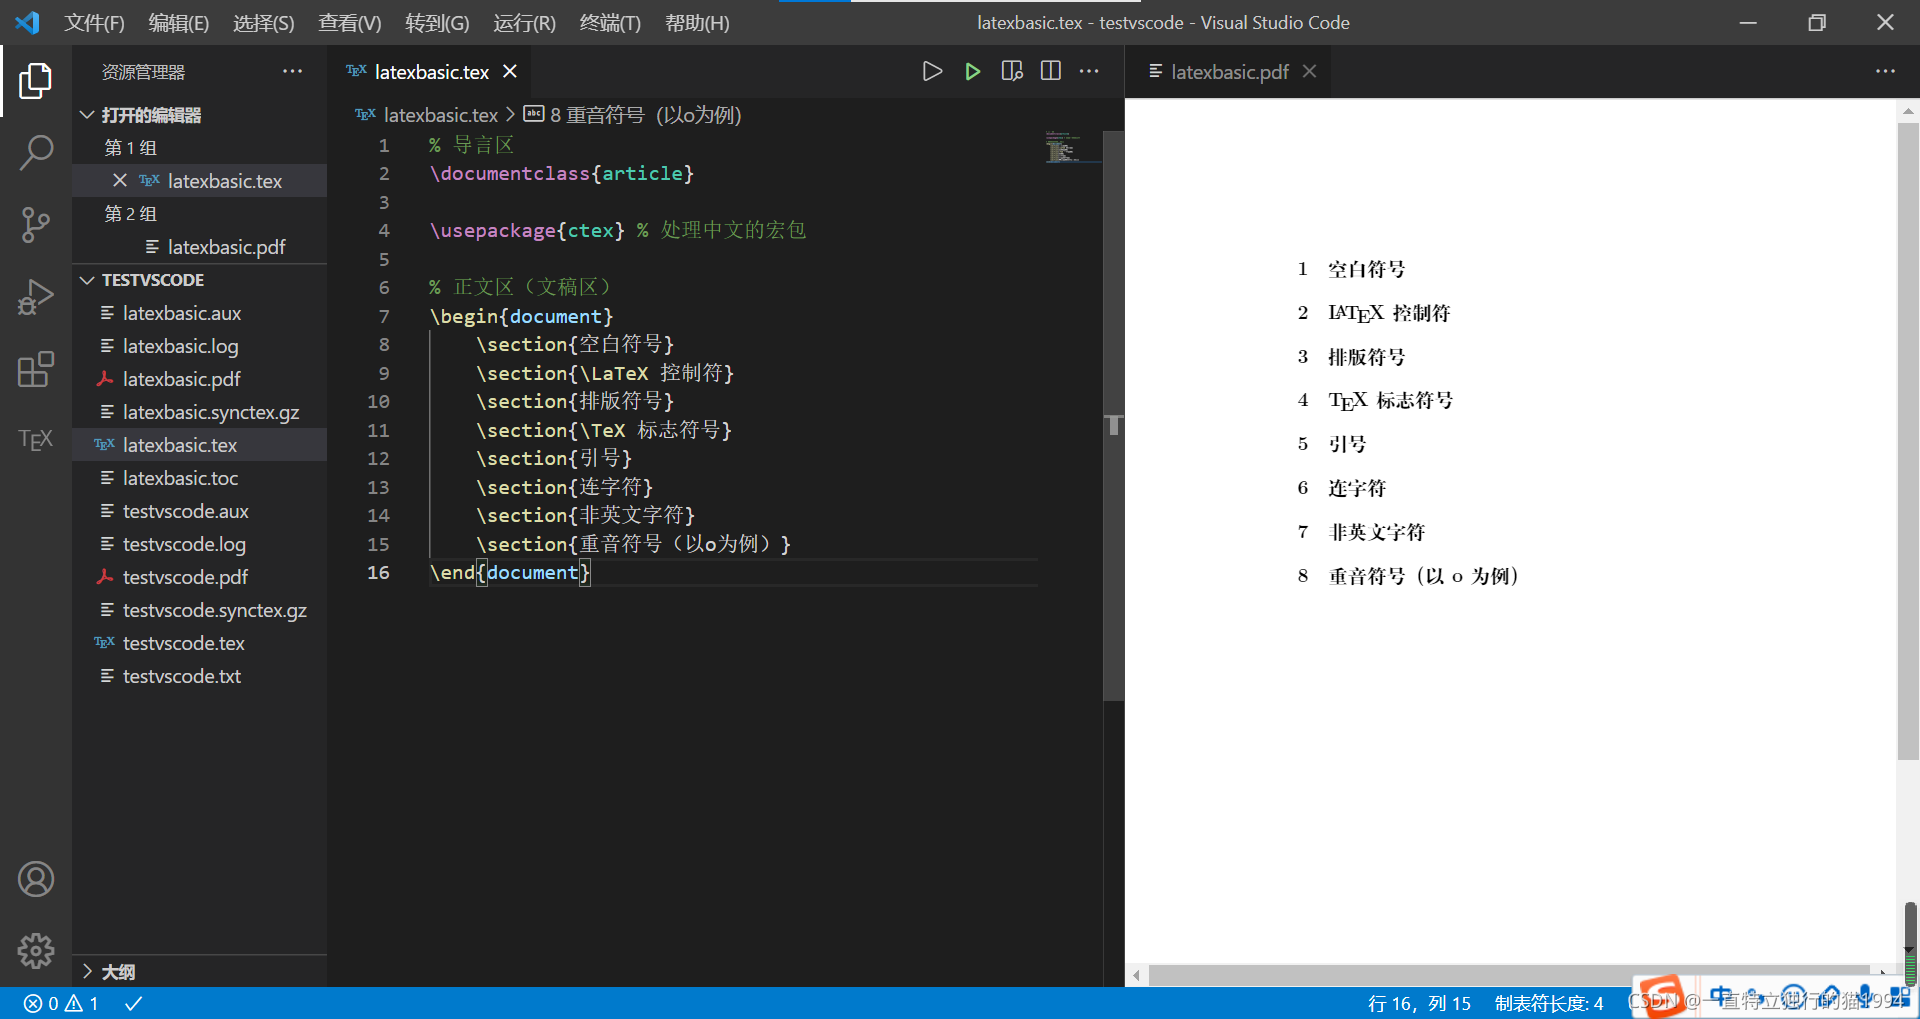
latex06-LaTeX中的特殊字符
这一讲,我们讲解LaTeX中部分特殊字符的处理。主要有空白字符、控制符、排版符号、标志符号、引号、连字符、非英文字符和重音符号。
% 导言区
\documentclass{
    article}

\usepackage{
    ctex} % 处理中文的宏包

% 正文区(文稿区)
\begin{
    document}
	\section{
    空白符号}
	\section{
    \LaTeX 控制符}
	\section{
    排版符号}
	\section{
    \TeX 标志符号}
	\section{
    引号}
	\section{
    连字符}
	\section{
    非英文字符}
	\section{
    重音符号(以o为例)}
\end{
    document}
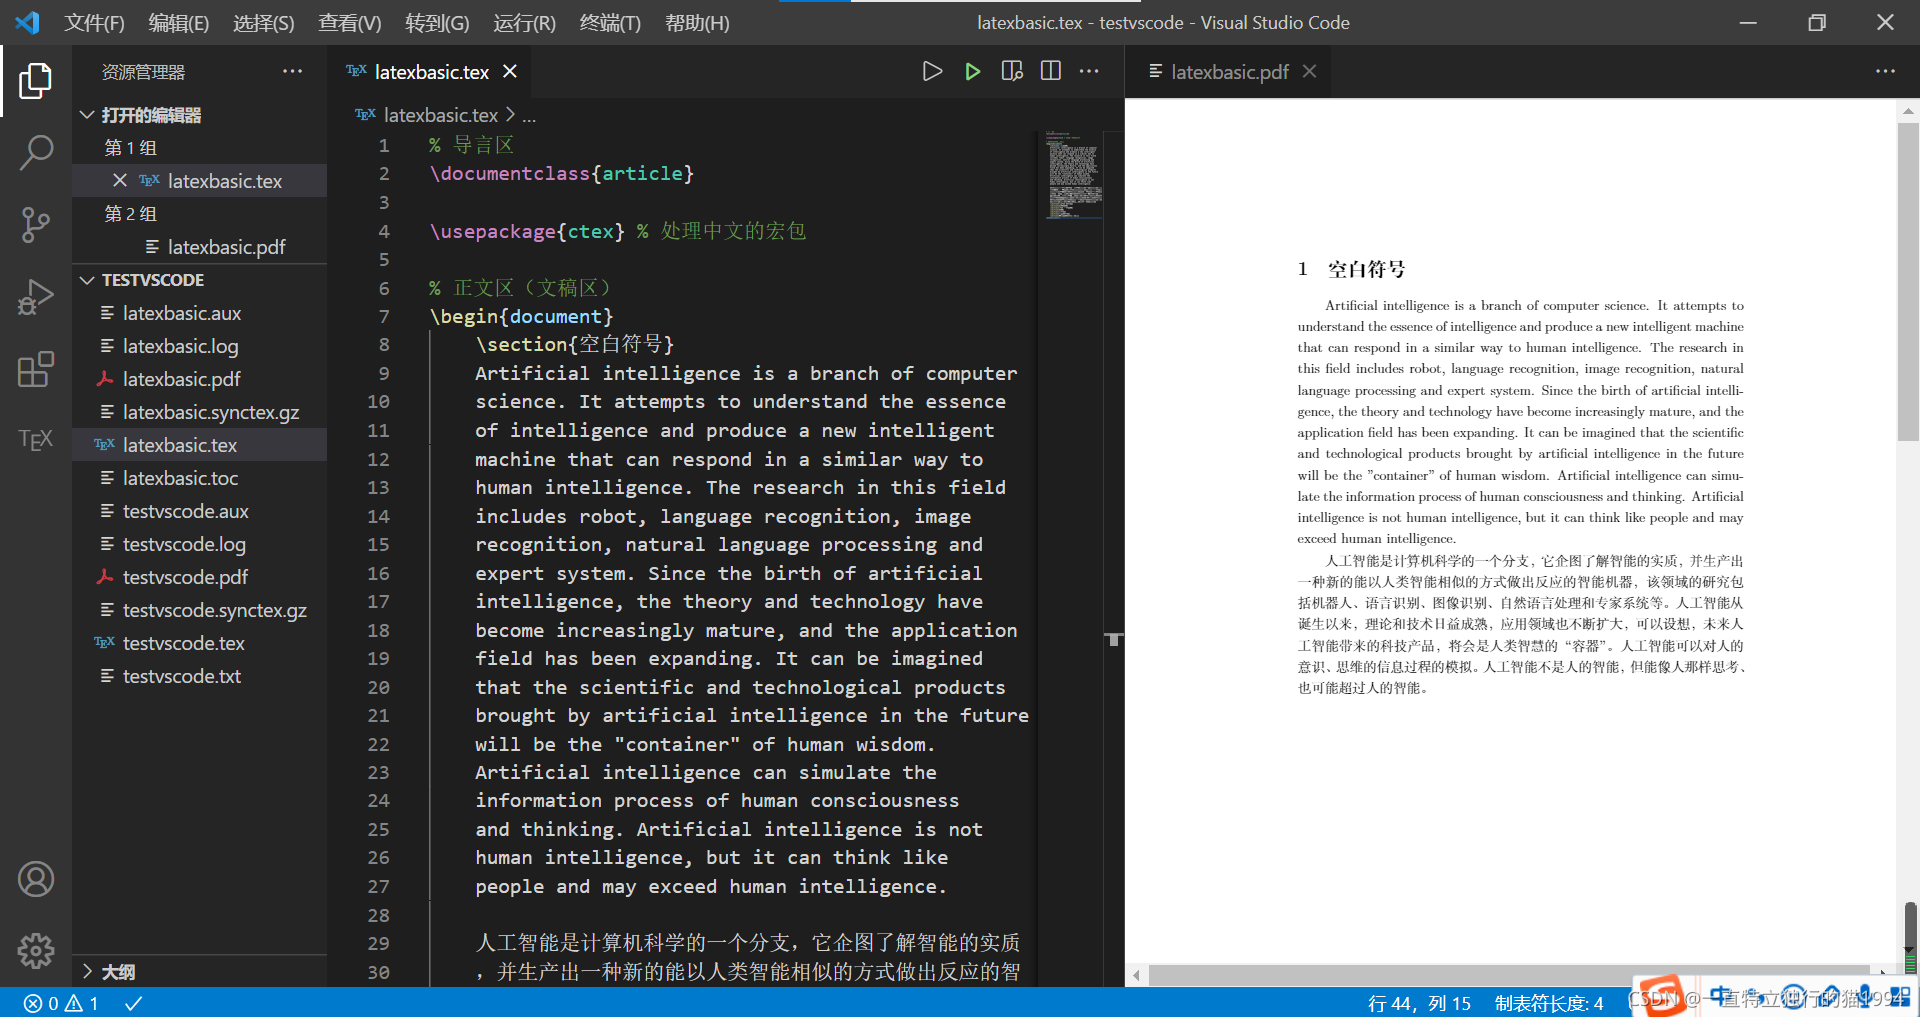
 输入一段英文和一段中文
% 导言区
\documentclass{
    article}

\usepackage{
    ctex} % 处理中文的宏包

% 正文区(文稿区)
\begin{
    document}
	\section{
    空白符号}
	Artificial intelligence is a branch of computer
	science. It attempts to understand the essence
	of intelligence and produce a new intelligent
	machine that can respond in a similar way to
	human intelligence. The research in this field
	includes robot, language recognition, image
	recognition, natural language processing and
	expert system. Since the birth of artificial
	intelligence, the theory and technology have
	become increasingly mature, and the application
	field has been expanding. It can be imagined
	that the scientific and technological products
	brought by artificial intelligence in the future
	will be the "container" of human wisdom.
	Artificial intelligence can simulate the
	information process of human consciousness
	and thinking. Artificial intelligence is not
	human intelligence, but it can think like
	people and may exceed human intelligence.

	人工智能是计算机科学的一个分支,它企图了解智能的实质
	,并生产出一种新的能以人类智能相似的方式做出反应的智
	能机器,该领域的研究包括机器人、语言识别、图像识别、
	自然语言处理和专家系统等。人工智能从诞生以来,理论和
	技术日益成熟,应用领域也不断扩大,可以设想,未来人工
	智能带来的科技产品,将会是人类智慧的“容器”。人工智能
	可以对人的意识、思维的信息过程的模拟。人工智能不是人
	的智能,但能像人那样思考、也可能超过人的智能。
	\section{
    \LaTeX 控制符}
	\section{
    排版符号}
	\section{
    \TeX 标志符号}
	\section{
    引号}
	\section{
    连字符}
	\section{
    非英文字符}
	\section{
    重音符号(以o为例)}
\end{
    document}
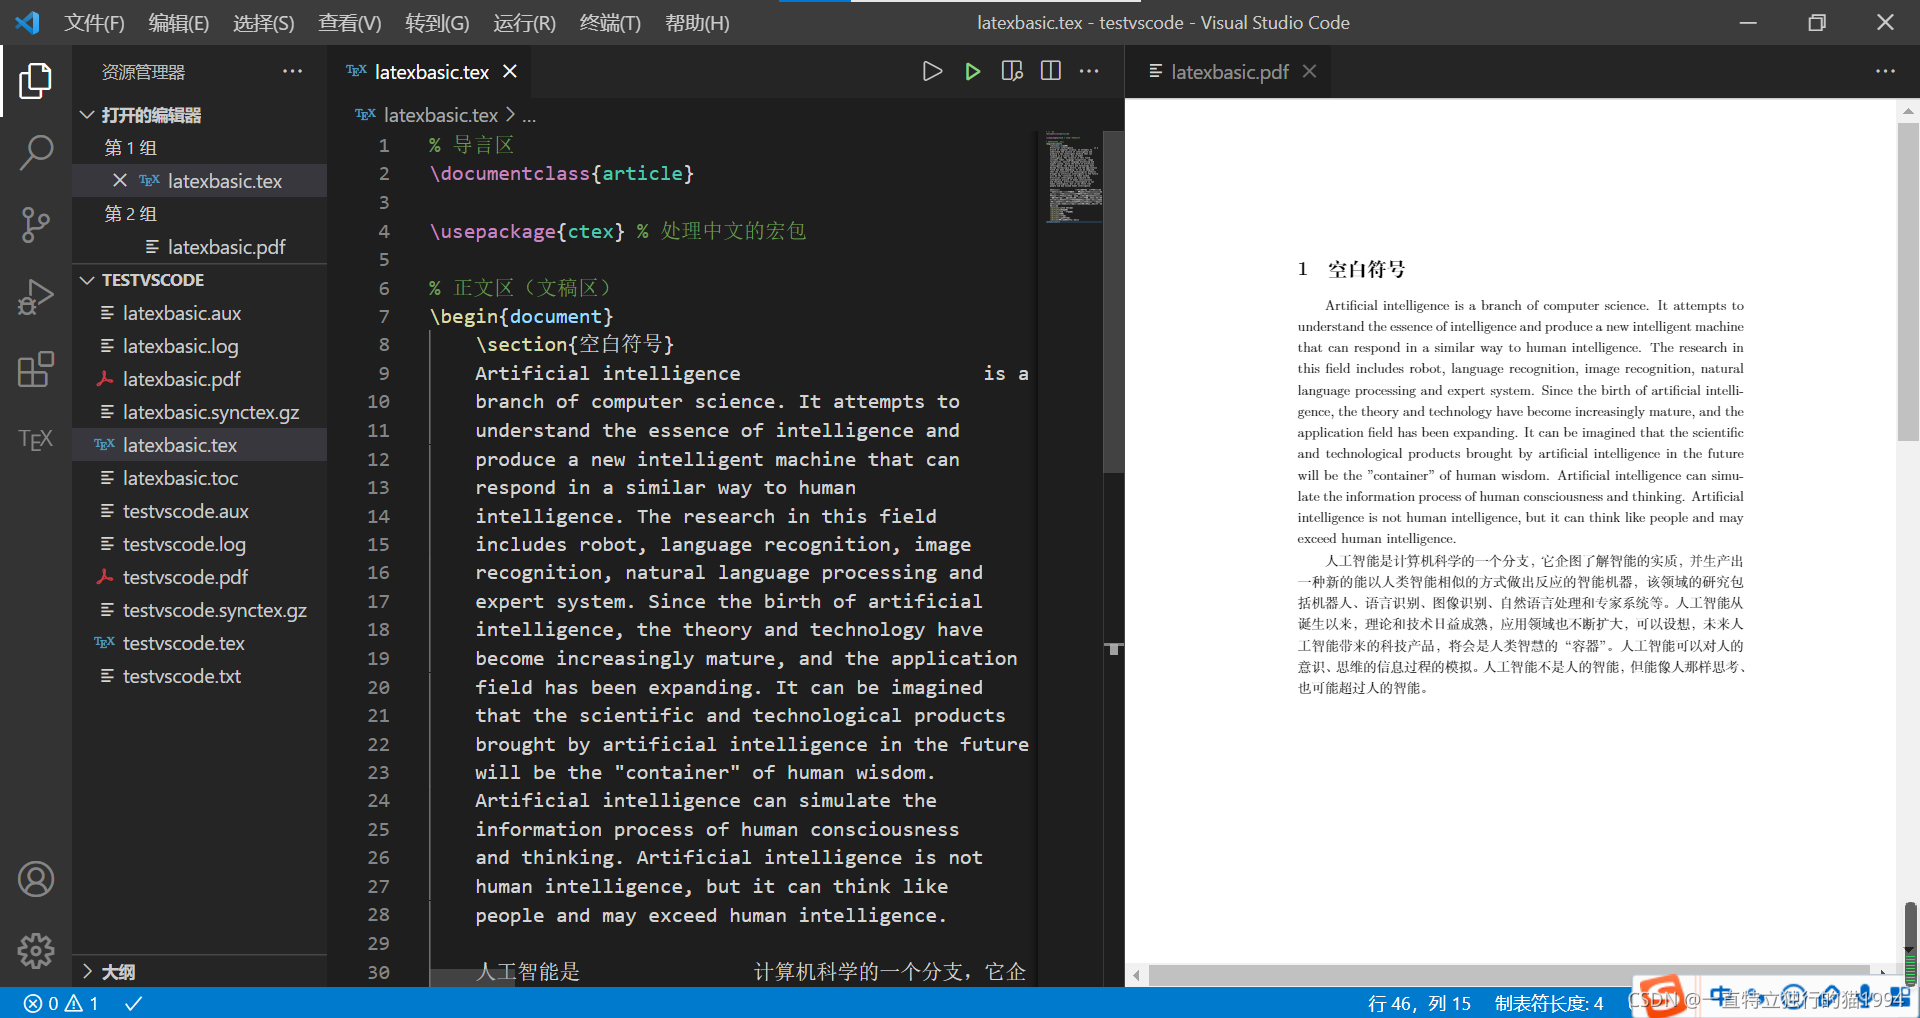
- 添加任意多个空格时,LaTeX将其视为一个空格,结果中并不会显示多个空格。
% 导言区
\documentclass{
    article}

\usepackage{
    ctex} % 处理中文的宏包

% 正文区(文稿区)
\begin{
    document}
	\section{
    空白符号}
	Artificial intelligence                     is a
	branch of computer science. It attempts to
	understand the essence of intelligence and
	produce a new intelligent machine that can
	respond in a similar way to human
	intelligence. The research in this field
	includes robot, language recognition, image
	recognition, natural language processing and
	expert system. Since the birth of artificial
	intelligence, the theory and technology have
	become increasingly mature, and the application
	field has been expanding. It can be imagined
	that the scientific and technological products
	brought by artificial intelligence in the future
	will be the "container" of human wisdom.
	Artificial intelligence can simulate the
	information process of human consciousness
	and thinking. Artificial intelligence is not
	human intelligence, but it can think like
	people and may exceed human intelligence.

	人工智能是               计算机科学的一个分支,它企
	图了解智能的实质,并生产出一种新的能以人类智能相似的
	方式做出反应的智能机器,该领域的研究包括机器人、语言
	识别、图像识别、自然语言处理和专家系统等。人工智能从
	诞生以来,理论和技术日益成熟,应用领域也不断扩大,可
	以设想,未来人工智能带来的科技产品,将会是人类智慧的
	“容器”。人工智能可以对人的意识、思维的信息过程的模拟。
	人工智能不是人的智能,但能像人那样思考、也可能超过人
	的智能。
	\section{
    \LaTeX 控制符}
	\section{
    排版符号}
	\section{
    \TeX 标志符号}
	\section{
    引号}
	\section{
    连字符}
	\section{
    非英文字符}
	\section{
    重音符号(以o为例)}
\end{
    document}
- 也可以在中文中添加英文,实现中英文混排。
% 导言区
\documentclass{
    article}

\usepackage{
    ctex} % 处理中文的宏包

% 正文区(文稿区)
\begin{
    document}
	\section{
    空白符号}
	Artificial intelligence                     is a
	branch of computer science. It attempts to
	understand the essence of intelligence and
	produce a new intelligent machine that can
	respond in a similar way to human
	intelligence. The research in this field
	includes robot, language recognition, image
	recognition, natural language processing and
	expert system. Since the birth of artificial
	intelligence, the theory and technology have
	become increasingly mature, and the application
	field has been expanding. It can be imagined
	that the scientific and technological products
	brought by artificial intelligence in the future
	will be the "container" of human wisdom.
	Artificial intelligence can simulate the
	information process of human consciousness
	and thinking. Artificial intelligence is not
	human intelligence, but it can think like
	people and may exceed human intelligence.

	人工智能是               计算机科学的一个分支,它企
	图了解智能的实质,并branch of computer science生产出一种新的能以人类智能相似的
	方式做出反应的智能机器,该领域的研究包括机器人、语言
	识别、图像识别、自然语言处理和专家系统等。人工智能从
	诞生以来,理论和技术日益成熟,应用领域也不断扩大,可
	以设想,未来人工智能带来的科技产品,将会是人类智慧的
	“容器”。人工智能可以对人的意识、思维的信息过程的模拟。
	人工智能不是人的智能,但能像人那样思考、也可能超过人
	的智能。
	\section{
    \LaTeX 控制符}
	\section{
    排版符号}
	\section{
    \TeX 标志符号}
	\section{
    引号}
	\section{
    连字符}
	\section{
    非英文字符}
	\section{
    重音符号(以o为例)}
\end{
    document}
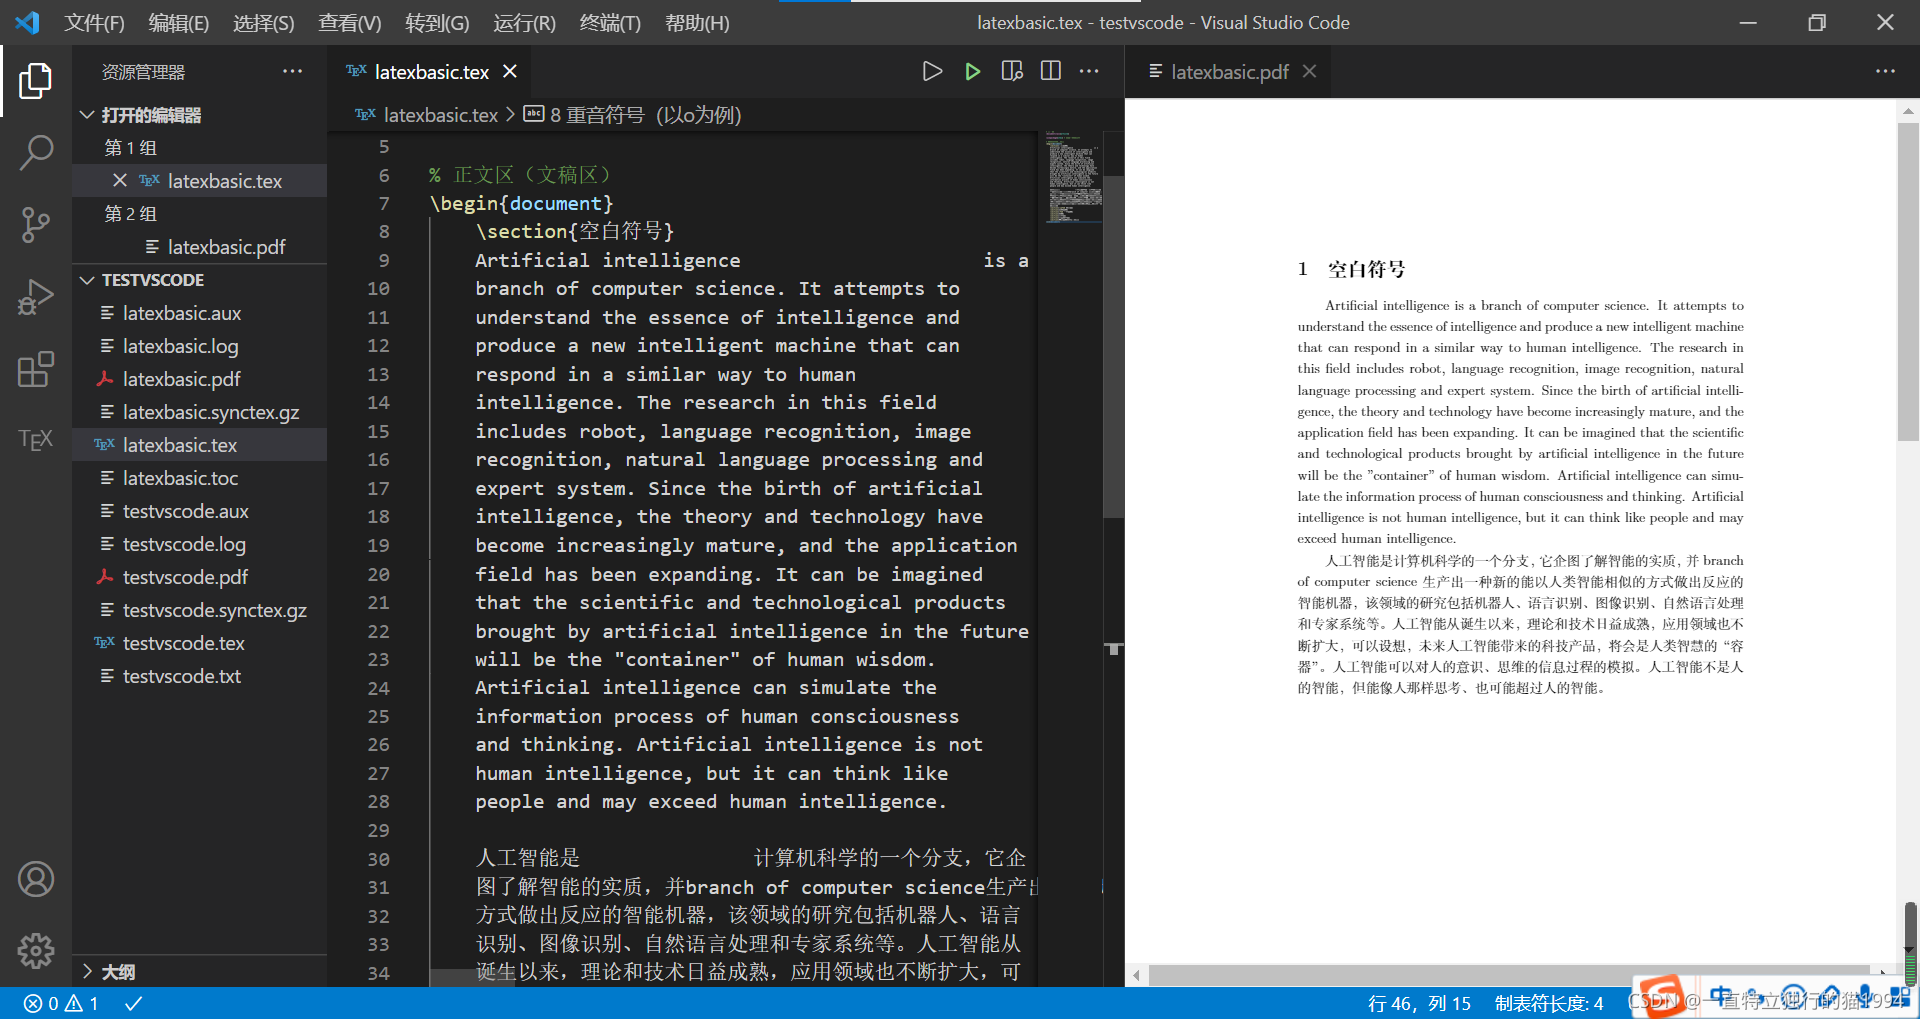
注意,此时在中文和英文之间会自动产生空格。
总结一下:
- 空行分段,多个空行等同一个空行
- 自动缩进,绝对不能使用空格代替
- 英文中多个空格处理为1个空格,中文中空格将被忽略
- 汉字与其它字符的间距会自动由XeLaTeX处理
- 禁止使用中文全角空格
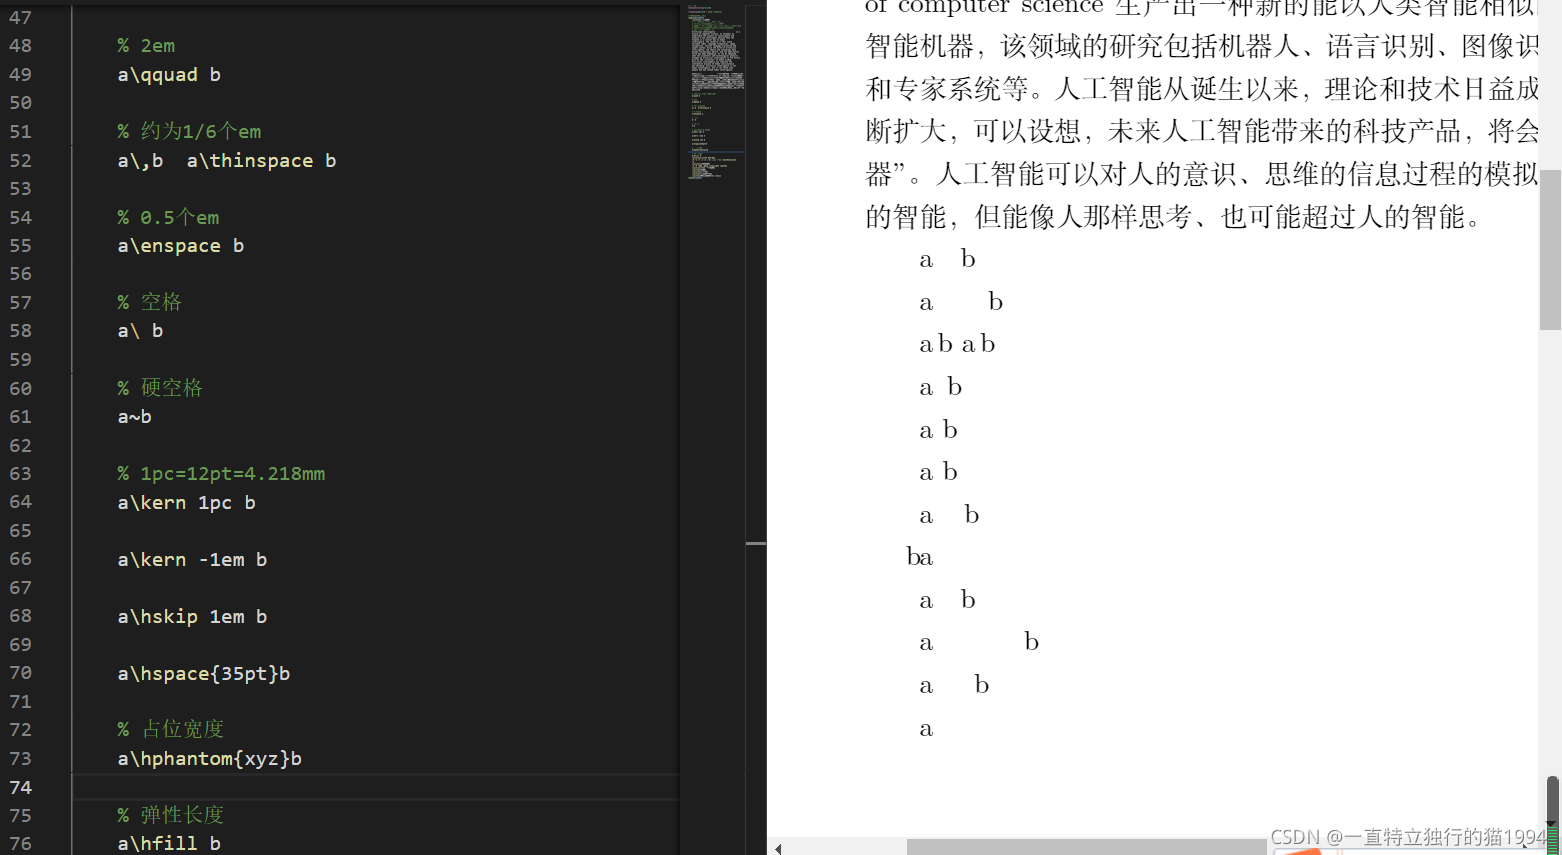
那么当需要输入空格这样的空白字符时,可以使用类似\quad这样的命令来实现。
空白符号
\section{
    空白符号}
	% 空行分段,多个空行等同一个空行
	% 自动缩进,绝对不能使用空格代替
	% 英文中多个空格处理为1个空格,中文中空格将被忽略
	% 汉字与其它字符的间距会自动由XeLaTeX处理
	% 禁止使用中文全角空格
	Artificial intelligence                     is a
	branch of computer science. It attempts to
	understand the essence of intelligence and
	produce a new intelligent machine that can
	respond in a similar way to human
	intelligence. The research in this field
	includes robot, language recognition, image
	recognition, natural language processing and
	expert system. Since the birth of artificial
	intelligence, the theory and technology have
	become increasingly mature, and the application
	field has been expanding. It can be imagined
	that the scientific and technological products
	brought by artificial intelligence in the future
	will be the "container" of human wisdom.
	Artificial intelligence can simulate the
	information process of human consciousness
	and thinking. Artificial intelligence is not
	human intelligence, but it can think like
	people and may exceed human intelligence.

	人工智能是               计算机科学的一个分支,它企
	图了解智能的实质,并branch of computer science生产出一种新的能以人类智能相似的
	方式做出反应的智能机器,该领域的研究包括机器人、语言
	识别、图像识别、自然语言处理和专家系统等。人工智能从
	诞生以来,理论和技术日益成熟,应用领域也不断扩大,可
	以设想,未来人工智能带来的科技产品,将会是人类智慧的
	“容器”。人工智能可以对人的意识、思维的信息过程的模拟。
	人工智能不是人的智能,但能像人那样思考、也可能超过人
	的智能。

	% 1em(当前字体中M的宽度)
	a\quad b

	% 2em
	a\qquad b

	% 约为1/6个em
	a\,b  a\thinspace b

	% 0.5个em
	a\enspace b

	% 空格
	a\ b

	% 硬空格
	a~b

	% 1pc=12pt=4.218mm
	a\kern 1pc b

	a\kern -1em b

	a\hskip 1em b

	a\hspace{
    35pt}b

	% 占位宽度
	a\hphantom{
    xyz}b

	% 弹性长度
	a\hfill b
控制符
- 在LaTeX中,# $ % { } ~{} _{} ^{} \textbackslash &等都有特殊的含义,这些符号称为LaTeX的控制符。为了输入这些控制符,我们可以在这些符号前面添加\,但是\用于换行,因此在文本模式中,\用textbackslash命令产生。
\section{
    \LaTeX 控制符}
	\# \$ \% \{
     \} \~{
    } \_{
    } \^{
    } \textbackslash
	\&

排版符号
- 对于排版中的一些特殊符号,也可以用相应的命令产生。
\section{
    排版符号}
	\S \P \dag \ddag \copyright \pounds

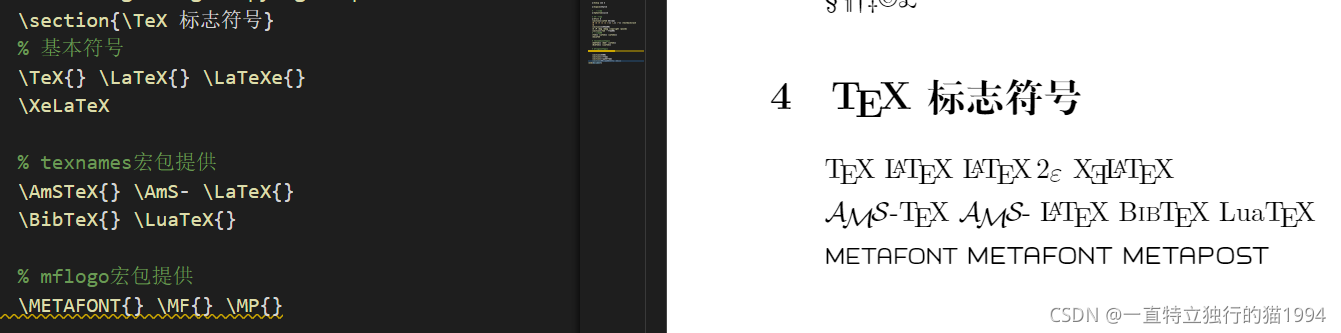
标志符号
也可以使用命令产生LaTeX的一些标志符号
\section{
    \TeX 标志符号}
	% 基本符号
	\TeX{
    } \LaTeX{
    } \LaTeXe{
    }

那么,类似的,能不能用XeLaTeX命令来产生XeLaTeX的一些标志符号呢?编译运行,会出现编译错误,编译错误说明没有\XeLaTeX这个命令,需要用\usepackage命令引入一个特殊的宏包。重新编译运行,便可以得到XeLaTeX的标志符号。
\section{
    \TeX 标志符号}
	% 基本符号
	\TeX{
    } \LaTeX{
    } \LaTeXe{
    }
	\XeLaTeX

当然,我们也可以产生LaTeX的其他标志,同样,我们需要用\usepackage命令来引入特殊的宏包
\usepackage{
    texnames} % 一些LOGO
\usepackage{
    mflogo}
\section{
    \TeX 标志符号}
	% 基本符号
	\TeX{
    } \LaTeX{
    } \LaTeXe{
    }
	\XeLaTeX

	% texnames宏包提供
	\AmSTeX{
    } \AmS- \LaTeX{
    }
	\BibTeX{
    } \LuaTeX{
    }

	% mflogo宏包提供
	\METAFONT{
    } \MF{
    } \MP{
    }
下面,我们讨论一下LaTeX中引号的问题。
引号
在LaTeX中,引号分为单引号和双引号,并有左右之分。在LaTeX中,用单个`表示左单引号,用’表示右单引号,用连续两个 撇号表示左双引号,用连续两个单引号表示右双引号。例如
\section{
    引号}
	` ' ``'' ``你好''

连字符
对于连字符,可以分别使用一个、两个、三个连续的减号,来生成短、中、长三种不同的连字符。
\section{
    连字符}
	-   --  ---

非英文字符
也可以用命令产生非英文字符
\section{
    非英文字符}
	\oe \OE \ae \AE \aa \AA \o \O \l \L \ss \SS !`
	?`

重音符号
还可以产生重音符号
\section{
    重音符号(以o为例)}
	\`o \'o \^o \''o \~o \=o \.o \u{
    o} \v{
    o} \H{
    o}
	\r{
    o} \t{
    o} \b{
    o} \c{
    o} \d{
    o}

本节代码:
% 导言区
\documentclass{
    article}

\usepackage{
    ctex} % 处理中文的宏包
\usepackage{
    xltxtra} % 提供了针对XeTeX的的改进并且加入了XeTeX的LOGO
\usepackage{
    texnames} % 一些LOGO
\usepackage{
    mflogo}

% 正文区(文稿区)
\begin{
    document}
	\section{
    空白符号}
	% 空行分段,多个空行等同一个空行
	% 自动缩进,绝对不能使用空格代替
	% 英文中多个空格处理为1个空格,中文中空格将被忽略
	% 汉字与其它字符的间距会自动由XeLaTeX处理
	% 禁止使用中文全角空格
	Artificial intelligence                     is a
	branch of computer science. It attempts to
	understand the essence of intelligence and
	produce a new intelligent machine that can
	respond in a similar way to human
	intelligence. The research in this field
	includes robot, language recognition, image
	recognition, natural language processing and
	expert system. Since the birth of artificial
	intelligence, the theory and technology have
	become increasingly mature, and the application
	field has been expanding. It can be imagined
	that the scientific and technological products
	brought by artificial intelligence in the future
	will be the "container" of human wisdom.
	Artificial intelligence can simulate the
	information process of human consciousness
	and thinking. Artificial intelligence is not
	human intelligence, but it can think like
	people and may exceed human intelligence.

	人工智能是               计算机科学的一个分支,它企
	图了解智能的实质,并branch of computer science生产出一种新的能以人类智能相似的
	方式做出反应的智能机器,该领域的研究包括机器人、语言
	识别、图像识别、自然语言处理和专家系统等。人工智能从
	诞生以来,理论和技术日益成熟,应用领域也不断扩大,可
	以设想,未来人工智能带来的科技产品,将会是人类智慧的
	“容器”。人工智能可以对人的意识、思维的信息过程的模拟。
	人工智能不是人的智能,但能像人那样思考、也可能超过人
	的智能。

	% 1em(当前字体中M的宽度)
	a\quad b

	% 2em
	a\qquad b

	% 约为1/6个em
	a\,b  a\thinspace b

	% 0.5个em
	a\enspace b

	% 空格
	a\ b

	% 硬空格
	a~b

	% 1pc=12pt=4.218mm
	a\kern 1pc b

	a\kern -1em b

	a\hskip 1em b

	a\hspace{
    35pt}b

	% 占位宽度
	a\hphantom{
    xyz}b

	% 弹性长度
	a\hfill b
	\section{
    \LaTeX 控制符}
	\# \$ \% \{
     \} \~{
    } \_{
    } \^{
    } \textbackslash
	\&
	\section{
    排版符号}
	\S \P \dag \ddag \copyright \pounds
	\section{
    \TeX 标志符号}
	% 基本符号
	\TeX{
    } \LaTeX{
    } \LaTeXe{
    }
	\XeLaTeX

	% texnames宏包提供
	\AmSTeX{
    } \AmS- \LaTeX{
    }
	\BibTeX{
    } \LuaTeX{
    }

	% mflogo宏包提供
	\METAFONT{
    } \MF{
    } \MP{
    }

	\section{
    引号}
	` ' ``'' ``你好''
	\section{
    连字符}
	-   --  ---
	\section{
    非英文字符}
	\oe \OE \ae \AE \aa \AA \o \O \l \L \ss \SS !`
	?`
	\section{
    重音符号(以o为例)}
	\`o \'o \^o \''o \~o \=o \.o \u{
    o} \v{
    o} \H{
    o}
	\r{
    o} \t{
    o} \b{
    o} \c{
    o} \d{
    o}
\end{
    document}
latex07-LaTeX中的插图
这一讲,我们讨论一下LaTeX中的插图问题。
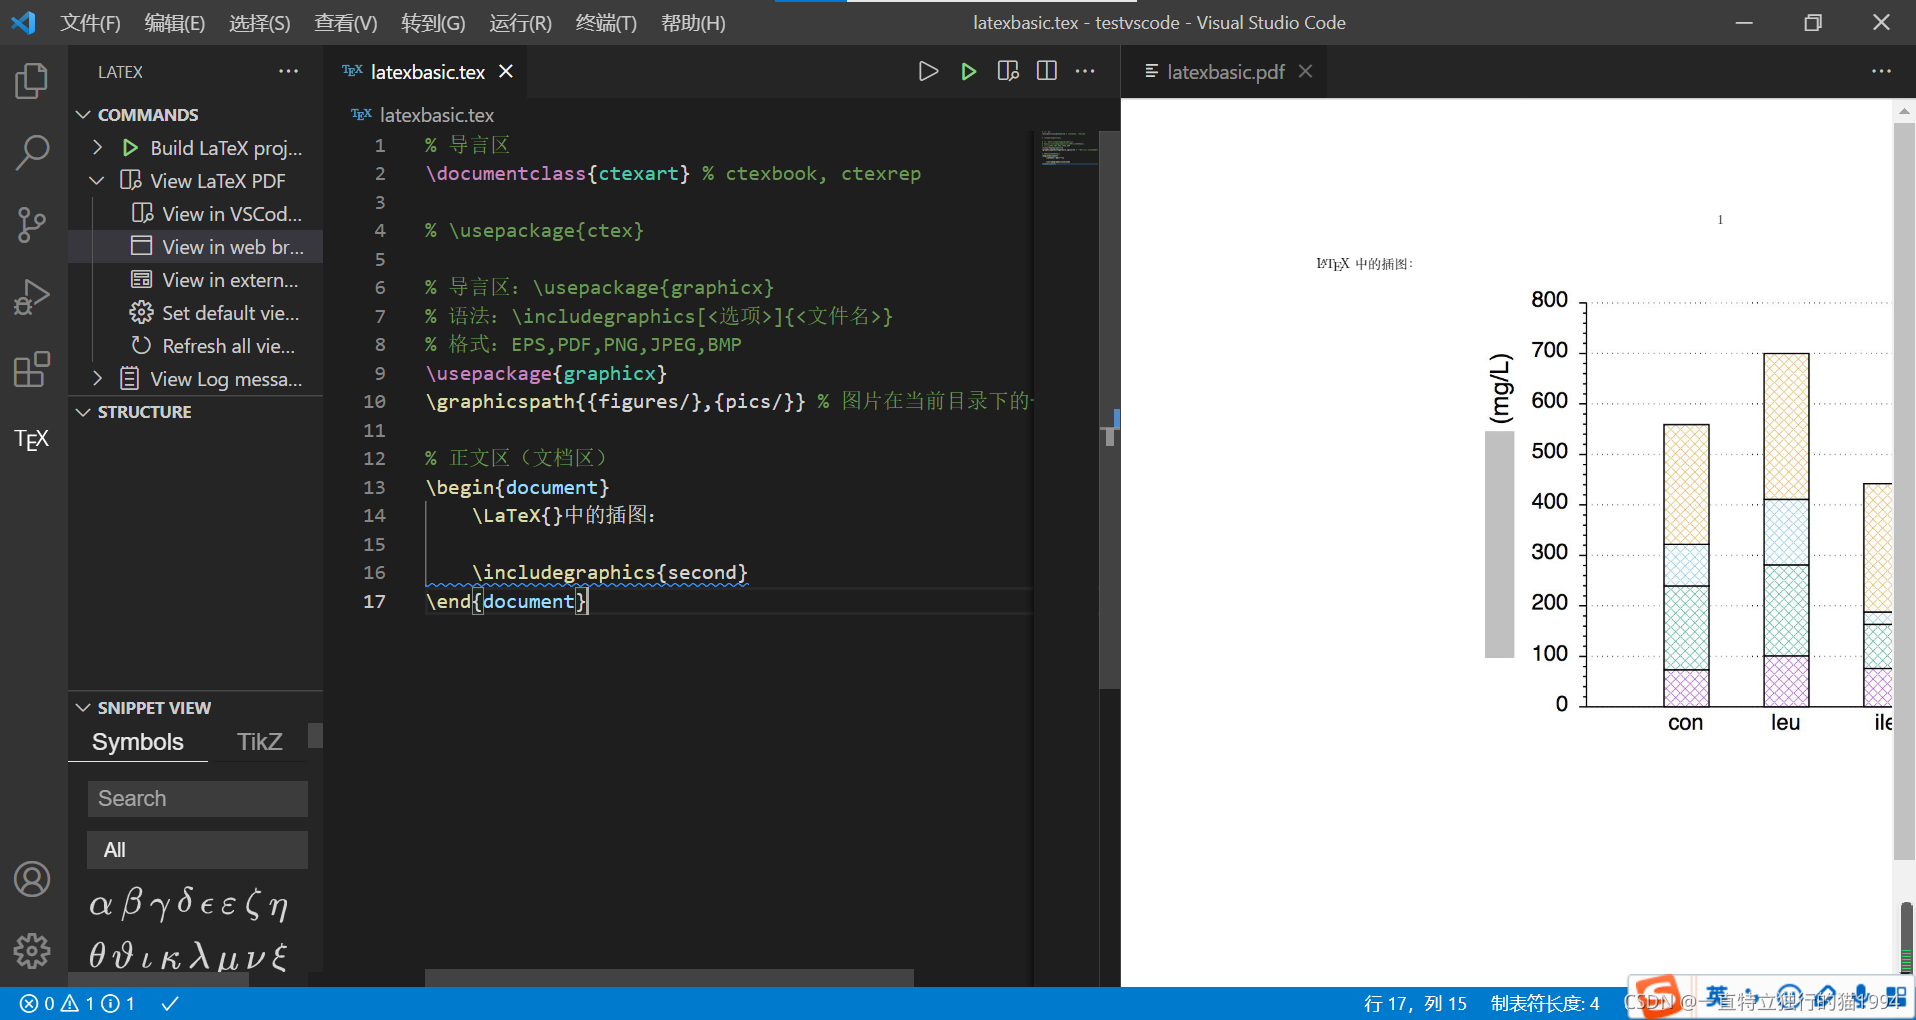
在LaTeX中,是通过graphicx宏包实现插图的。为此,我们需要用\usepackage命令引入graphicx宏包,然后在文档区使用\includegraphics命令插入图像,该命令的必选参数用于指定需要插入的图像的文件名,其可选参数用于指定图像的缩放比例、旋转等参数。当使用XeLaTeX编译时,graphicx宏包支持多种图像文件格式。还可以通过\graphicspath命令指定图像文件的搜索路径,将图像等资源文件进行分门别类管理,是非常有必要的。例如,可以将所有图像文件放在当前路径下的figures文件夹中,此时可以用\graphicspath命令指定搜索路径为当前路径下的figures文件夹,当然,也可以添加其他路径,注意要用{}实现分组。查看各图像文件的文件名,然后用\includegraphics命令插入图像,用必选参数指定文件名,编译运行并查看结果。
% 导言区
\documentclass{
    ctexart} % ctexbook, ctexrep

% \usepackage{
    ctex}

% 导言区:\usepackage{
    graphicx}
% 语法:\includegraphics[<选项>]{
    <文件名>}
% 格式:EPS,PDF,PNG,JPEG,BMP
\usepackage{
    graphicx}
\graphicspath{
    {
    figures/},{
    pics/}} % 图片在当前目录下的figures目录

% 正文区(文档区)
\begin{
    document}
	\LaTeX{
    }中的插图:

	\includegraphics{
    second}
\end{
    document}
采用同样的方式,插入其他两幅图像。当然,也可以加入文件后缀名。编译运行并查看结果
\includegraphics{
    second.jpg}
\includegraphics{
    third.jpg}
\includegraphics{
    fifth.jpg}
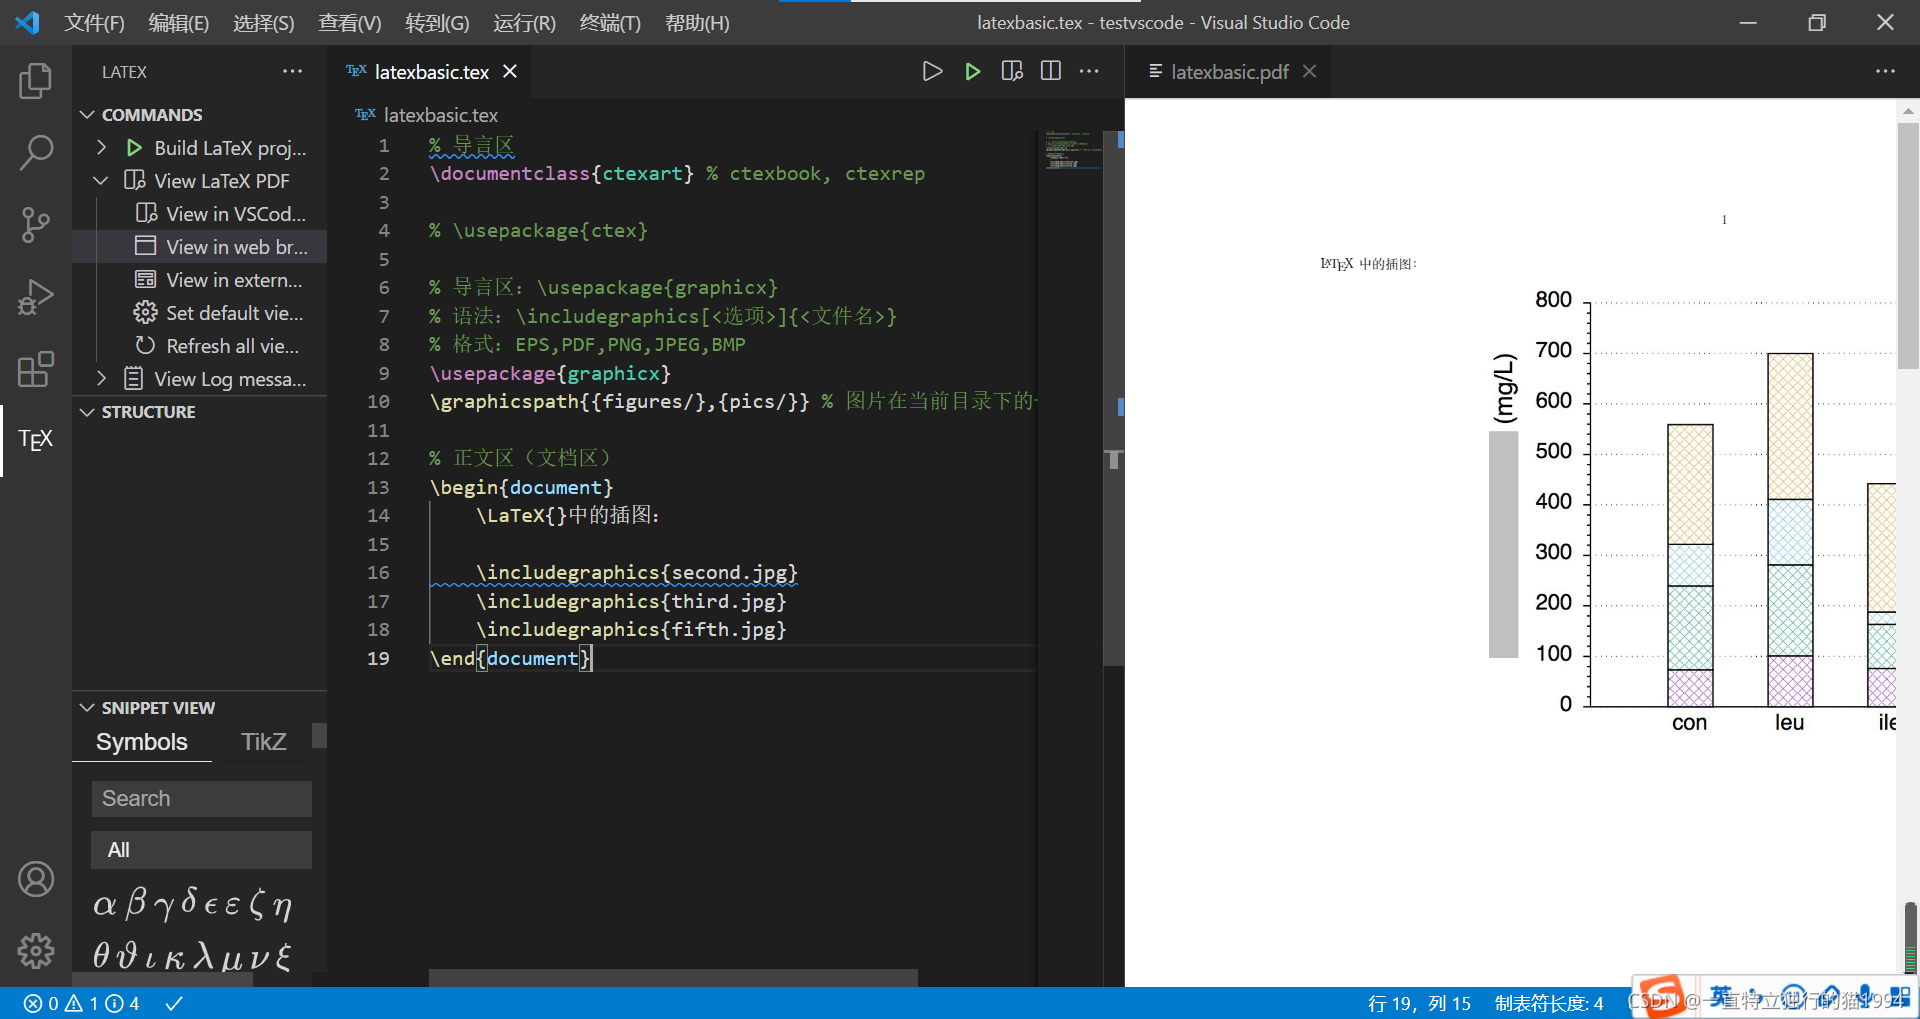
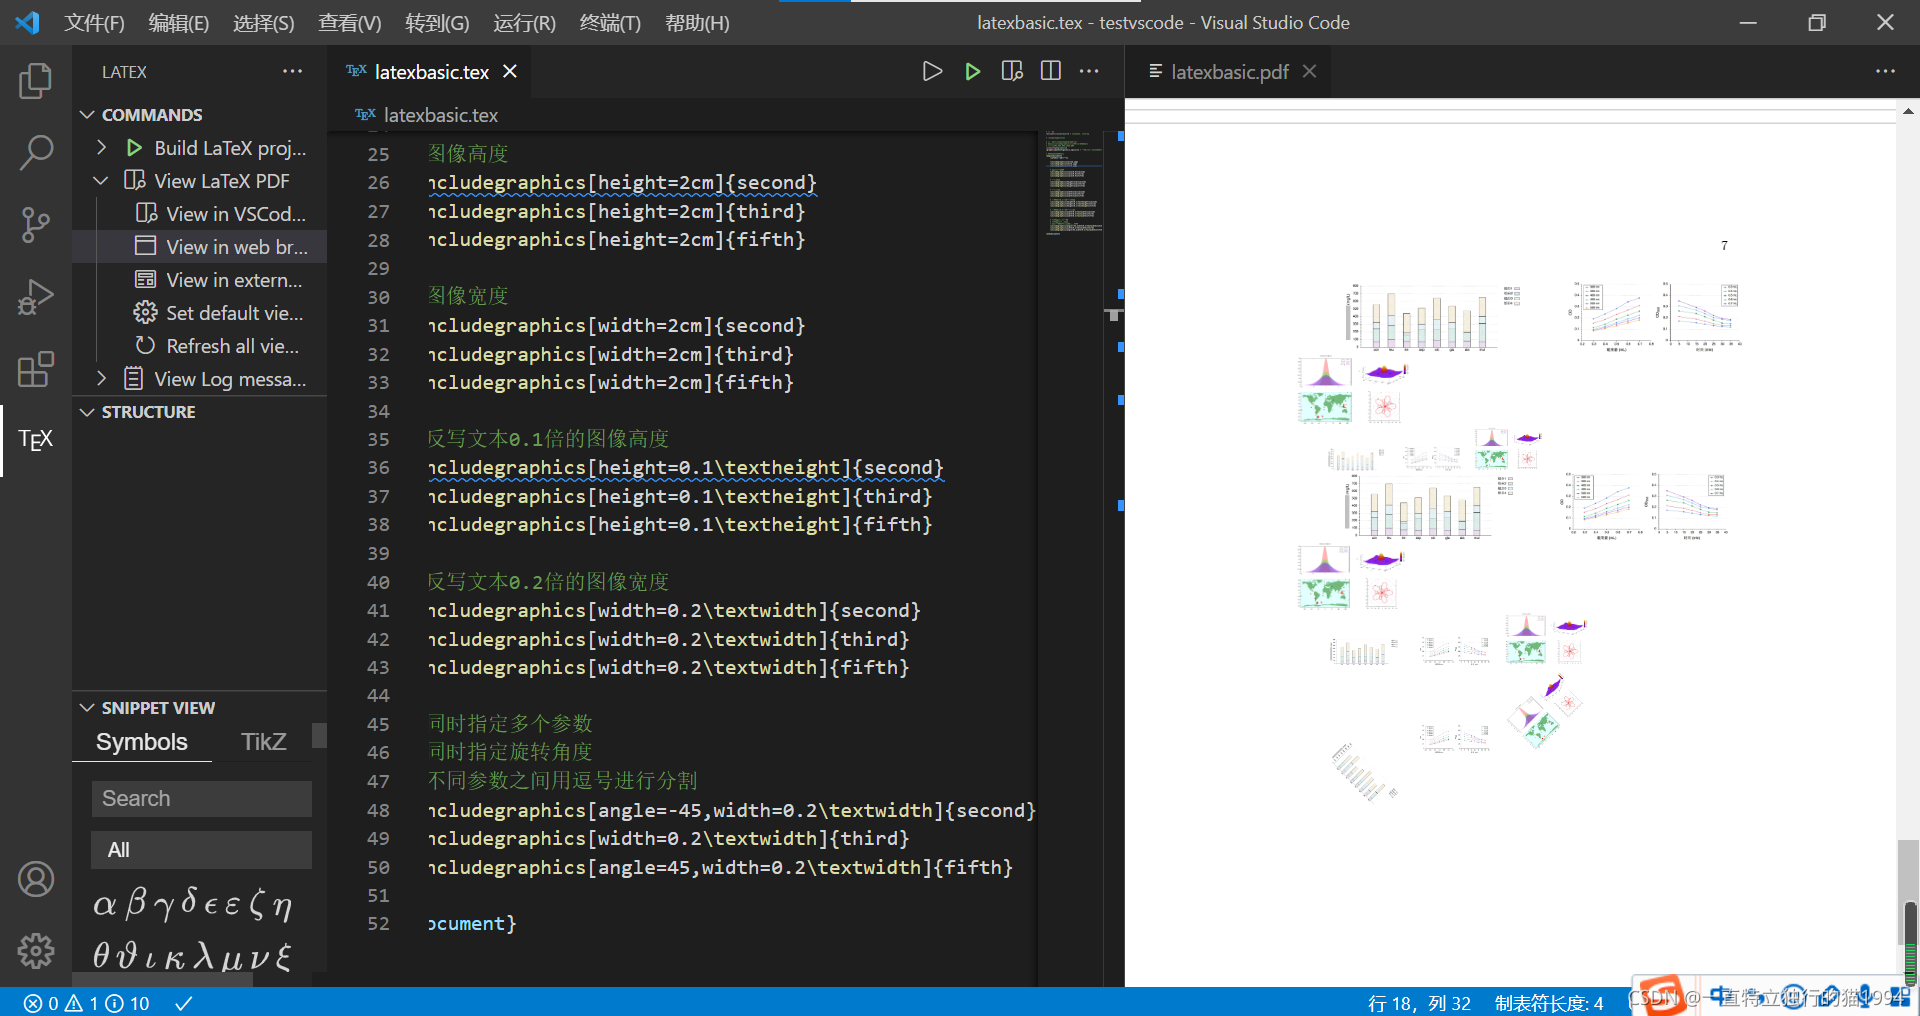
显然,插图太大,无法正常排版。为此,我么可以为\includegraphics命令引入可选参数,注意,可选参数使用[]表示的。
\LaTeX{
    }中的插图:

	\includegraphics{
    second.jpg}
	\includegraphics{
    third.jpg}
	\includegraphics{
    fifth.jpg}

	% 指定缩放因子
	\includegraphics[scale=0.9]{
    second}
	\includegraphics[scale=0.9]{
    third}
	\includegraphics[scale=0.9]{
    fifth}

	% 图像高度
	\includegraphics[height=2cm]{
    second}
	\includegraphics[height=2cm]{
    third}
	\includegraphics[height=2cm]{
    fifth}

	% 图像宽度
	\includegraphics[width=2cm]{
    second}
	\includegraphics[width=2cm]{
    third}
	\includegraphics[width=2cm]{
    fifth}

	% 图像相对高度
	\includegraphics[height=0.1\textheight]{
    second}
	\includegraphics[height=0.1\textheight]{
    third}
	\includegraphics[height=0.1\textheight]{
    fifth}

	% 图像相对宽度
	\includegraphics[width=0.2\textwidth]{
    second}
	\includegraphics[width=0.2\textwidth]{
    third}
	\includegraphics[width=0.2\textwidth]{
    fifth}

	% 同时指定多个参数
	% 同时指定相对宽度和旋转角度
	% 不同参数之间用逗号进行分割
	\includegraphics[angle=-45,width=0.2\textwidth]{
    second}
	\includegraphics[width=0.2\textwidth]{
    third}
	\includegraphics[angle=45,width=0.2\textwidth]{
    fifth}
关于这些命令的细节,可以使用
texdoc graphicx
帮助文档进行查看。
本节代码:
% 导言区
\documentclass{
    ctexart} % ctexbook, ctexrep

% \usepackage{
    ctex}

% 导言区:\usepackage{
    graphicx}
% 语法:\includegraphics[<选项>]{
    <文件名>}
% 格式:EPS,PDF,PNG,JPEG,BMP
\usepackage{
    graphicx}
\graphicspath{
    {
    figures/},{
    pics/}} % 图片在当前目录下的figures目录

% 正文区(文档区)
\begin{
    document}
	\LaTeX{
    }中的插图:

	\includegraphics{
    second.jpg}
	\includegraphics{
    third.jpg}
	\includegraphics{
    fifth.jpg}

	% 指定缩放因子
	\includegraphics[scale=0.9]{
    second}
	\includegraphics[scale=0.9]{
    third}
	\includegraphics[scale=0.9]{
    fifth}

	% 图像高度
	\includegraphics[height=2cm]{
    second}
	\includegraphics[height=2cm]{
    third}
	\includegraphics[height=2cm]{
    fifth}

	% 图像宽度
	\includegraphics[width=2cm]{
    second}
	\includegraphics[width=2cm]{
    third}
	\includegraphics[width=2cm]{
    fifth}

	% 图像相对高度
	\includegraphics[height=0.1\textheight]{
    second}
	\includegraphics[height=0.1\textheight]{
    third}
	\includegraphics[height=0.1\textheight]{
    fifth}

	% 图像相对宽度
	\includegraphics[width=0.2\textwidth]{
    second}
	\includegraphics[width=0.2\textwidth]{
    third}
	\includegraphics[width=0.2\textwidth]{
    fifth}

	% 同时指定多个参数
	% 同时指定相对宽度和旋转角度
	% 不同参数之间用逗号进行分割
	\includegraphics[angle=-45,width=0.2\textwidth]{
    second}
	\includegraphics[width=0.2\textwidth]{
    third}
	\includegraphics[angle=45,width=0.2\textwidth]{
    fifth}

\end{
    document}
latex08-LaTeX中的表格
这一讲,我们主要讨论LaTeX中表格的制作和排版问题。
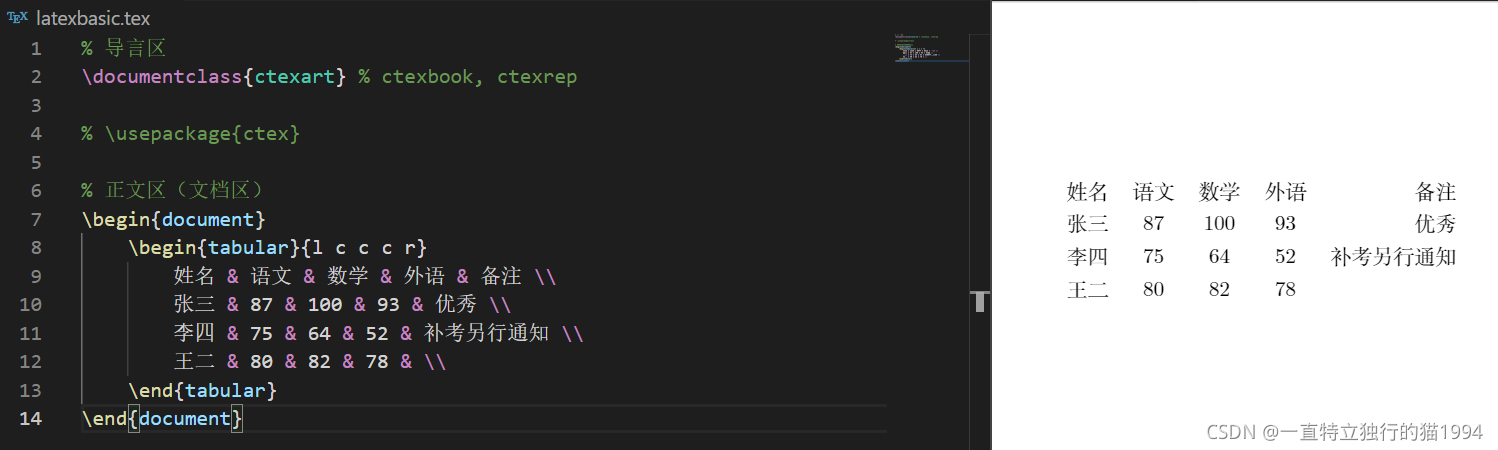
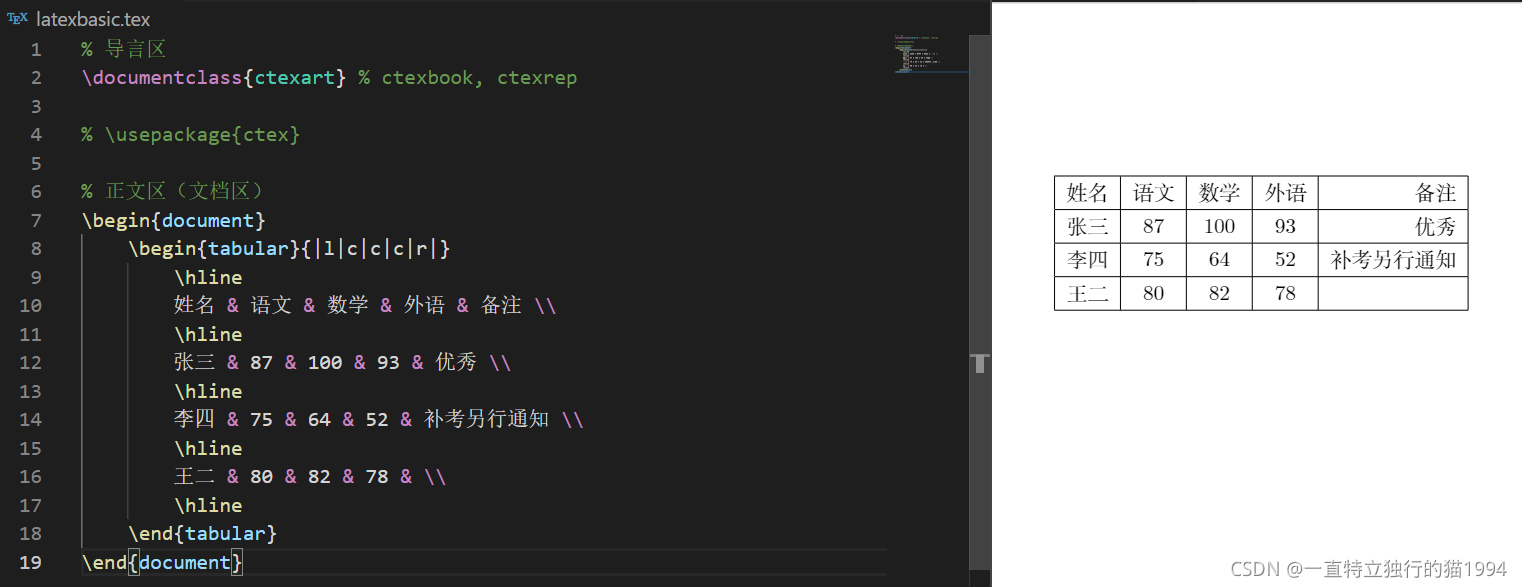
- 在LaTeX中,可以使用tabular环境生成表格;
- tabular环境需要一个指定列排版格式的必选参数,可以用l指定左对齐,用c指定居中对齐,用r指定右对齐;
- 本例中生成了一个五列的表格,分别为左对齐、居中对齐、居中对齐、居中对齐、居中对齐和右对齐。然后在环境中编写表格的内容;
- 不同列间用&符号分割;
- 用\结束该行,并产生新的一行。
编译运行并查看结果
% 导言区
\documentclass{
    ctexart} % ctexbook, ctexrep

% \usepackage{
    ctex}

% 正文区(文档区)
\begin{
    document}
	\begin{
    tabular}{
    l c c c r}
		姓名 & 语文 & 数学 & 外语 & 备注 \\
		张三 & 87 & 100 & 93 & 优秀 \\
		李四 & 75 & 64 & 52 & 补考另行通知 \\
		王二 & 80 & 82 & 78 & \\
	\end{
    tabular}
\end{
    document}
- 可以在列格式说明里用|符号产生表格竖线。
编译运行并查看结果
% 导言区
\documentclass{
    ctexart} % ctexbook, ctexrep

% \usepackage{
    ctex}

% 正文区(文档区)
\begin{
    document}
	\begin{
    tabular}{
    l | c | c | c | r}
		姓名 & 语文 & 数学 & 外语 & 备注 \\
		张三 & 87 & 100 & 93 & 优秀 \\
		李四 & 75 & 64 & 52 & 补考另行通知 \\
		王二 & 80 & 82 & 78 & \\
	\end{
    tabular}
\end{
    document}
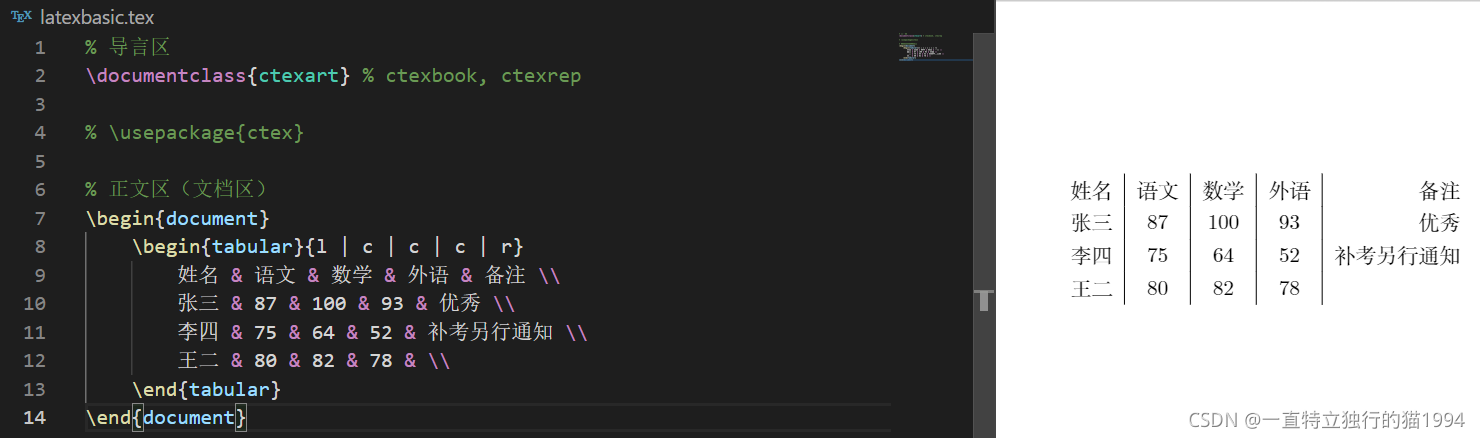
- 注意,在列格式说明中空格是不起作用的。
- 可以使用\hline命令产生表格横线。
- 也可以使用两个\hline命令产生双横线。
- 可以用两个||符号产生表格双竖线。
编译运行并查看结果
% 导言区
\documentclass{
    ctexart} % ctexbook, ctexrep

% \usepackage{
    ctex}

% 正文区(文档区)
\begin{
    document}
	\begin{
    tabular}{
    l||c|c|c|r}
		\hline
		姓名 & 语文 & 数学 & 外语 & 备注 \\
		\hline \hline
		张三 & 87 & 100 & 93 & 优秀 \\
		\hline
		李四 & 75 & 64 & 52 & 补考另行通知 \\
		\hline
		王二 & 80 & 82 & 78 & \\
		\hline
	\end{
    tabular}
\end{
    document}
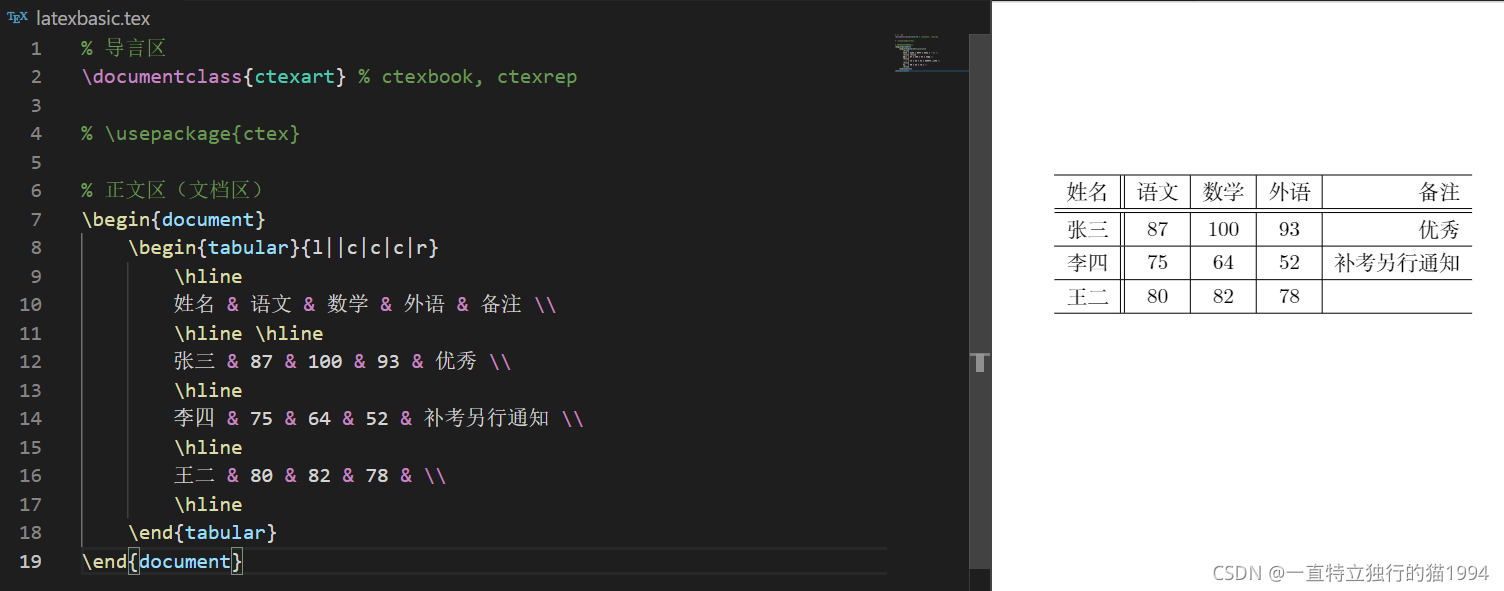
- 可以在任何需要的地方添加表格线。
% 导言区
\documentclass{
    ctexart} % ctexbook, ctexrep

% \usepackage{
    ctex}

% 正文区(文档区)
\begin{
    document}
	\begin{
    tabular}{
    |l||c|c|c|r|}
		\hline
		姓名 & 语文 & 数学 & 外语 & 备注 \\
		\hline \hline
		张三 & 87 & 100 & 93 & 优秀 \\
		\hline
		李四 & 75 & 64 & 52 & 补考另行通知 \\
		\hline
		王二 & 80 & 82 & 78 & \\
		\hline
	\end{
    tabular}
\end{
    document}

- 也可以删除任何不需要的表格线。
% 导言区
\documentclass{
    ctexart} % ctexbook, ctexrep

% \usepackage{
    ctex}

% 正文区(文档区)
\begin{
    document}
	\begin{
    tabular}{
    |l|c|c|c|r|}
		\hline
		姓名 & 语文 & 数学 & 外语 & 备注 \\
		\hline
		张三 & 87 & 100 & 93 & 优秀 \\
		\hline
		李四 & 75 & 64 & 52 & 补考另行通知 \\
		\hline
		王二 & 80 & 82 & 78 & \\
		\hline
	\end{
    tabular}
\end{
    document}
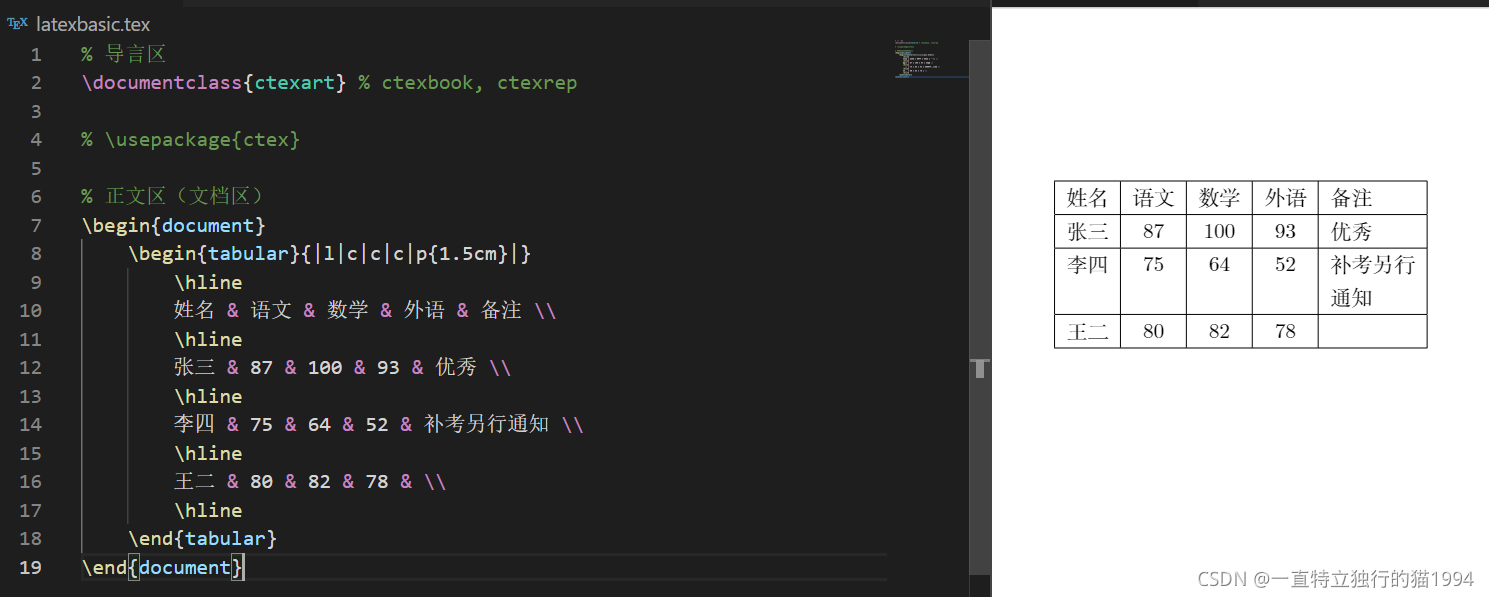
- 在列格式说明中可以使用p产生指定宽度的表列。
- 列宽度又p的参数指定。
- 由p指定的列格式,当内容超过宽度时,会自动产生换行。
% 导言区
\documentclass{
    ctexart} % ctexbook, ctexrep

% \usepackage{
    ctex}

% 正文区(文档区)
\begin{
    document}
	\begin{
    tabular}{
    |l|c|c|c|p{
    1.5cm}|}
		\hline
		姓名 & 语文 & 数学 & 外语 & 备注 \\
		\hline
		张三 & 87 & 100 & 93 & 优秀 \\
		\hline
		李四 & 75 & 64 & 52 & 补考另行通知 \\
		\hline
		王二 & 80 & 82 & 78 & \\
		\hline
	\end{
    tabular}
\end{
    document}
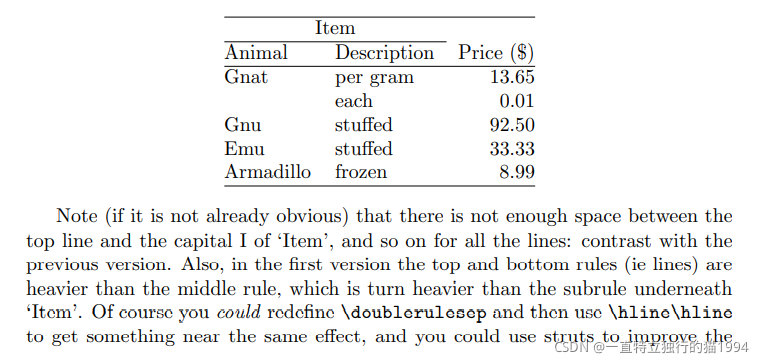
- 本次讲解主要讨论了用tabular环境创建表格的方法。
- 在tabular环境中,可以使用列格式说明符指定列格式。
- 当然,也可以使用三线表格、跨页长表格、更复杂的表格。
类似这些表格,都可以用专用的宏包来实现。可以在命令行窗口使用
texdoc booktab
打开宏包说明文件。
例如三线表
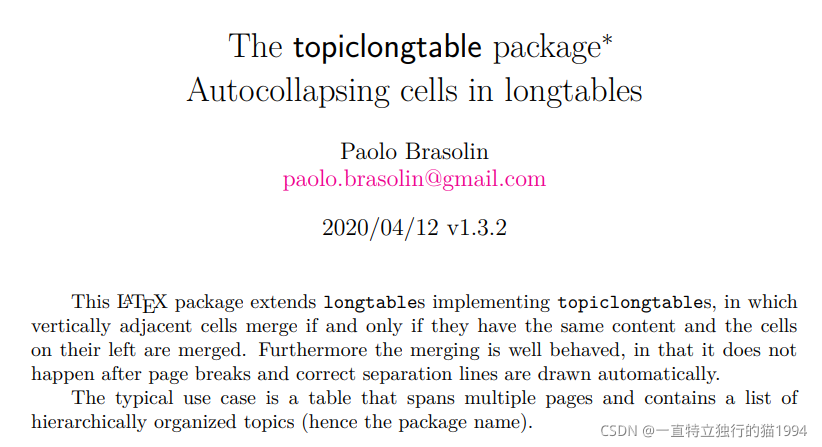
texdoc longtab
跨页长表格
综合表格宏包
texdoc tabu
利用这些宏包,就可以实现更为复杂的表格。
本节代码:
% 导言区
\documentclass{
    ctexart} % ctexbook, ctexrep

% \usepackage{
    ctex}

% \begin{
    tabular}[<垂直对齐方式>]{
    <列格式说明>}
	<表项> & <表项> & ... & <表项> \\
	......
% \end{
    tabular}
% 用\\表示换行
% 用&表示不同的列
% l-本列左对齐
% c-本列居中对齐
% r-本列右对齐
% p{
    <宽>}-本列宽度固定,能够自动换行
% 正文区(文档区)
\begin{
    document}
	\begin{
    tabular}{
    |l|c|c|c|p{
    1.5cm}|}
		\hline
		姓名 & 语文 & 数学 & 外语 & 备注 \\
		\hline
		张三 & 87 & 100 & 93 & 优秀 \\
		\hline
		李四 & 75 & 64 & 52 & 补考另行通知 \\
		\hline
		王二 & 80 & 82 & 78 & \\
		\hline
	\end{
    tabular}
\end{
    document}
latex09-LaTeX中的浮动体
这一小节,将讨论LaTeX中的浮动体问题。
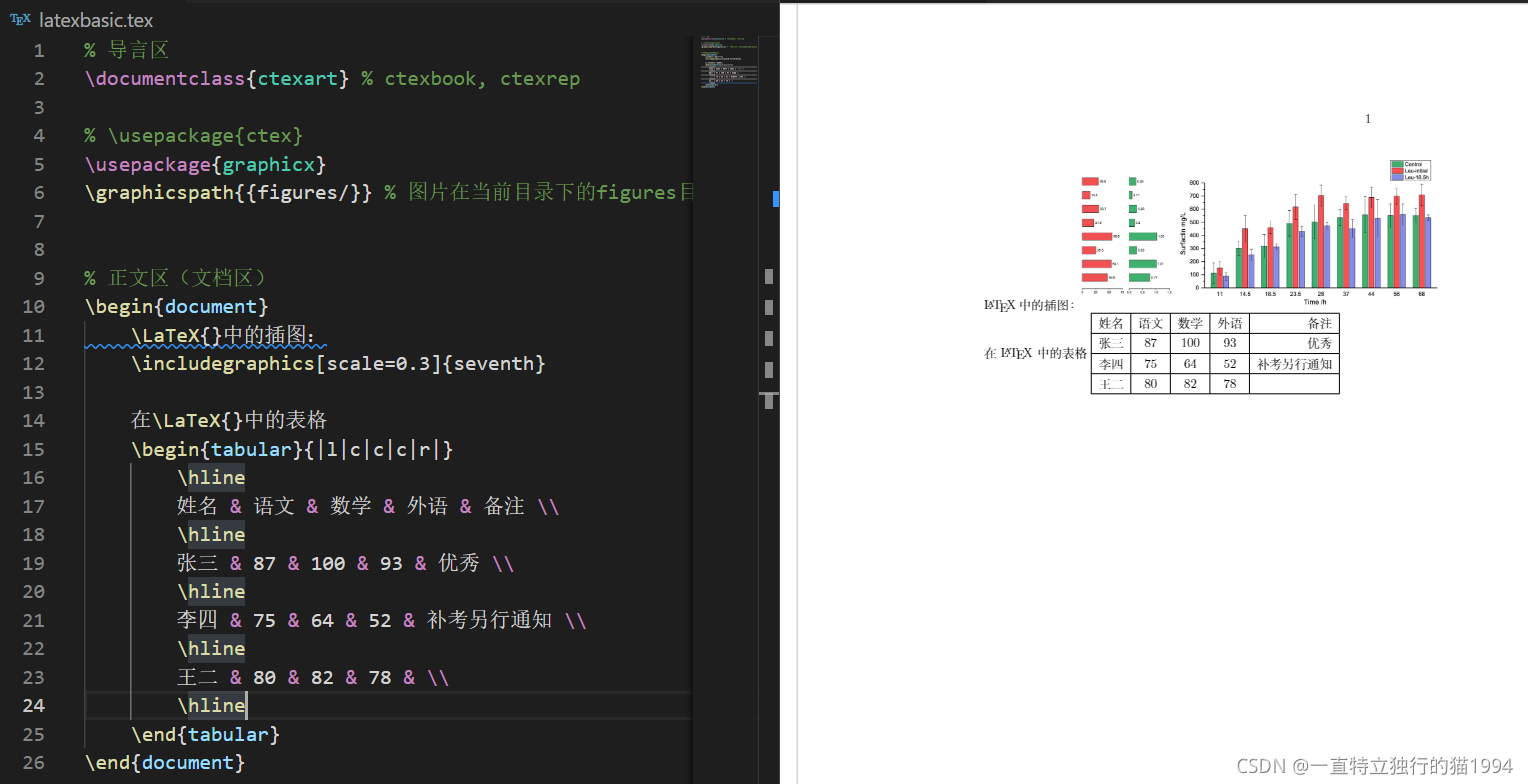
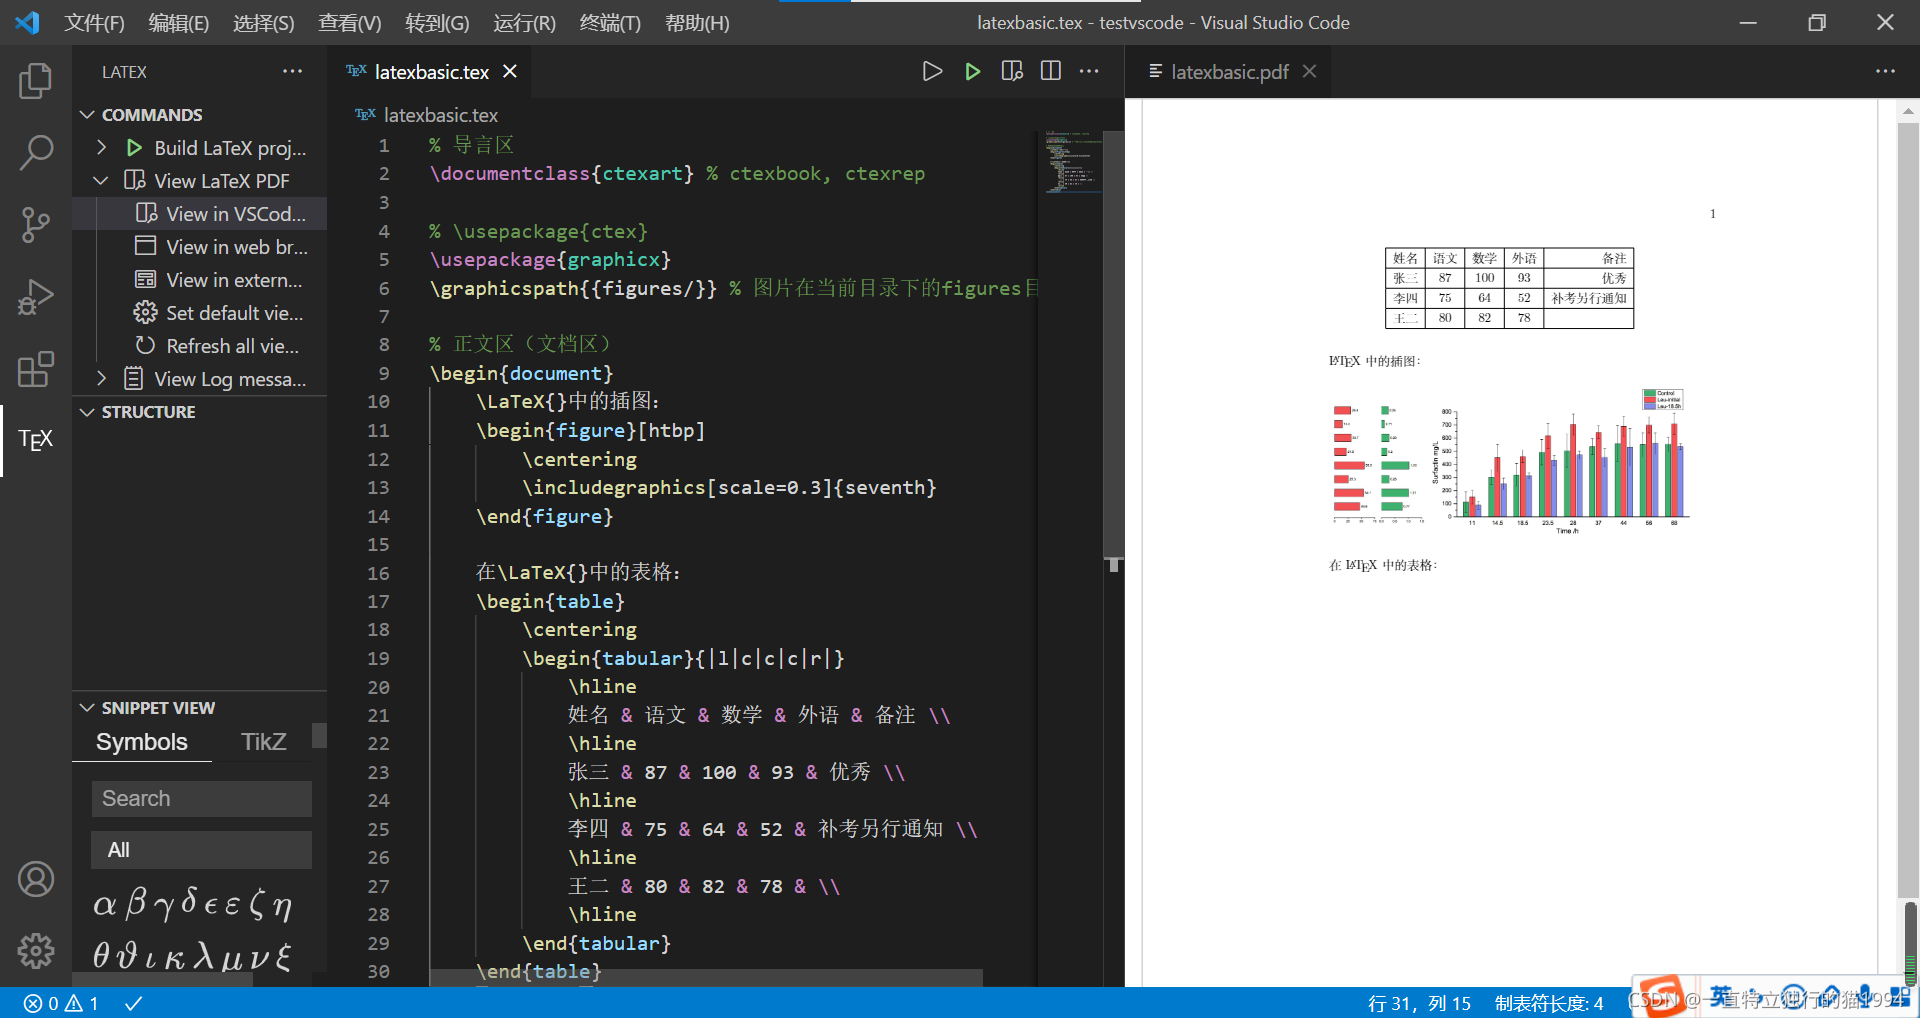
- 在LaTeX中,可以使用graphicx宏包的\includegraphics命令插入图像,使用tabular环境创建表格。
% 导言区
\documentclass{
    ctexart} % ctexbook, ctexrep

% \usepackage{
    ctex}
\usepackage{
    graphicx}
\graphicspath{
    {
    figures/}} % 图片在当前目录下的figures目录


% 正文区(文档区)
\begin{
    document}
	\LaTeX{
    }中的插图:
	\includegraphics[scale=0.3]{
    seventh}

	在\LaTeX{
    }中的表格
	\begin{
    tabular}{
    |l|c|c|c|r|}
		\hline
		姓名 & 语文 & 数学 & 外语 & 备注 \\
		\hline
		张三 & 87 & 100 & 93 & 优秀 \\
		\hline
		李四 & 75 & 64 & 52 & 补考另行通知 \\
		\hline
		王二 & 80 & 82 & 78 & \\
		\hline
	\end{
    tabular}
\end{
    document}
- 但是要灵活实现对图像和表格的管理,还需要使用浮动体环境。
- 在LaTeX中,有figure浮动体环境,可以将\includegraphics代码放在figure浮动体环境中。
- 还有table浮动体环境,可以将用于生成表格的tabular环境放在table环境中。
编译并查看结果
% 导言区
\documentclass{
    ctexart} % ctexbook, ctexrep

% \usepackage{
    ctex}
\usepackage{
    graphicx}
\graphicspath{
    {
    figures/}} % 图片在当前目录下的figures目录


% 正文区(文档区)
\begin{
    document}
	\LaTeX{
    }中的插图:
	\begin{
    figure}
		\includegraphics[scale=0.3]{
    seventh}
	\end{
    figure}


	在\LaTeX{
    }中的表格:
	\begin{
    table}
		\begin{
    tabular}{
    |l|c|c|c|r|}
			\hline
			姓名 & 语文 & 数学 & 外语 & 备注 \\
			\hline
			张三 & 87 & 100 & 93 & 优秀 \\
			\hline
			李四 & 75 & 64 & 52 & 补考另行通知 \\
			\hline
			王二 & 80 & 82 & 78 & \\
			\hline
		\end{
    tabular}
	\end{
    table}
\end{
    document}
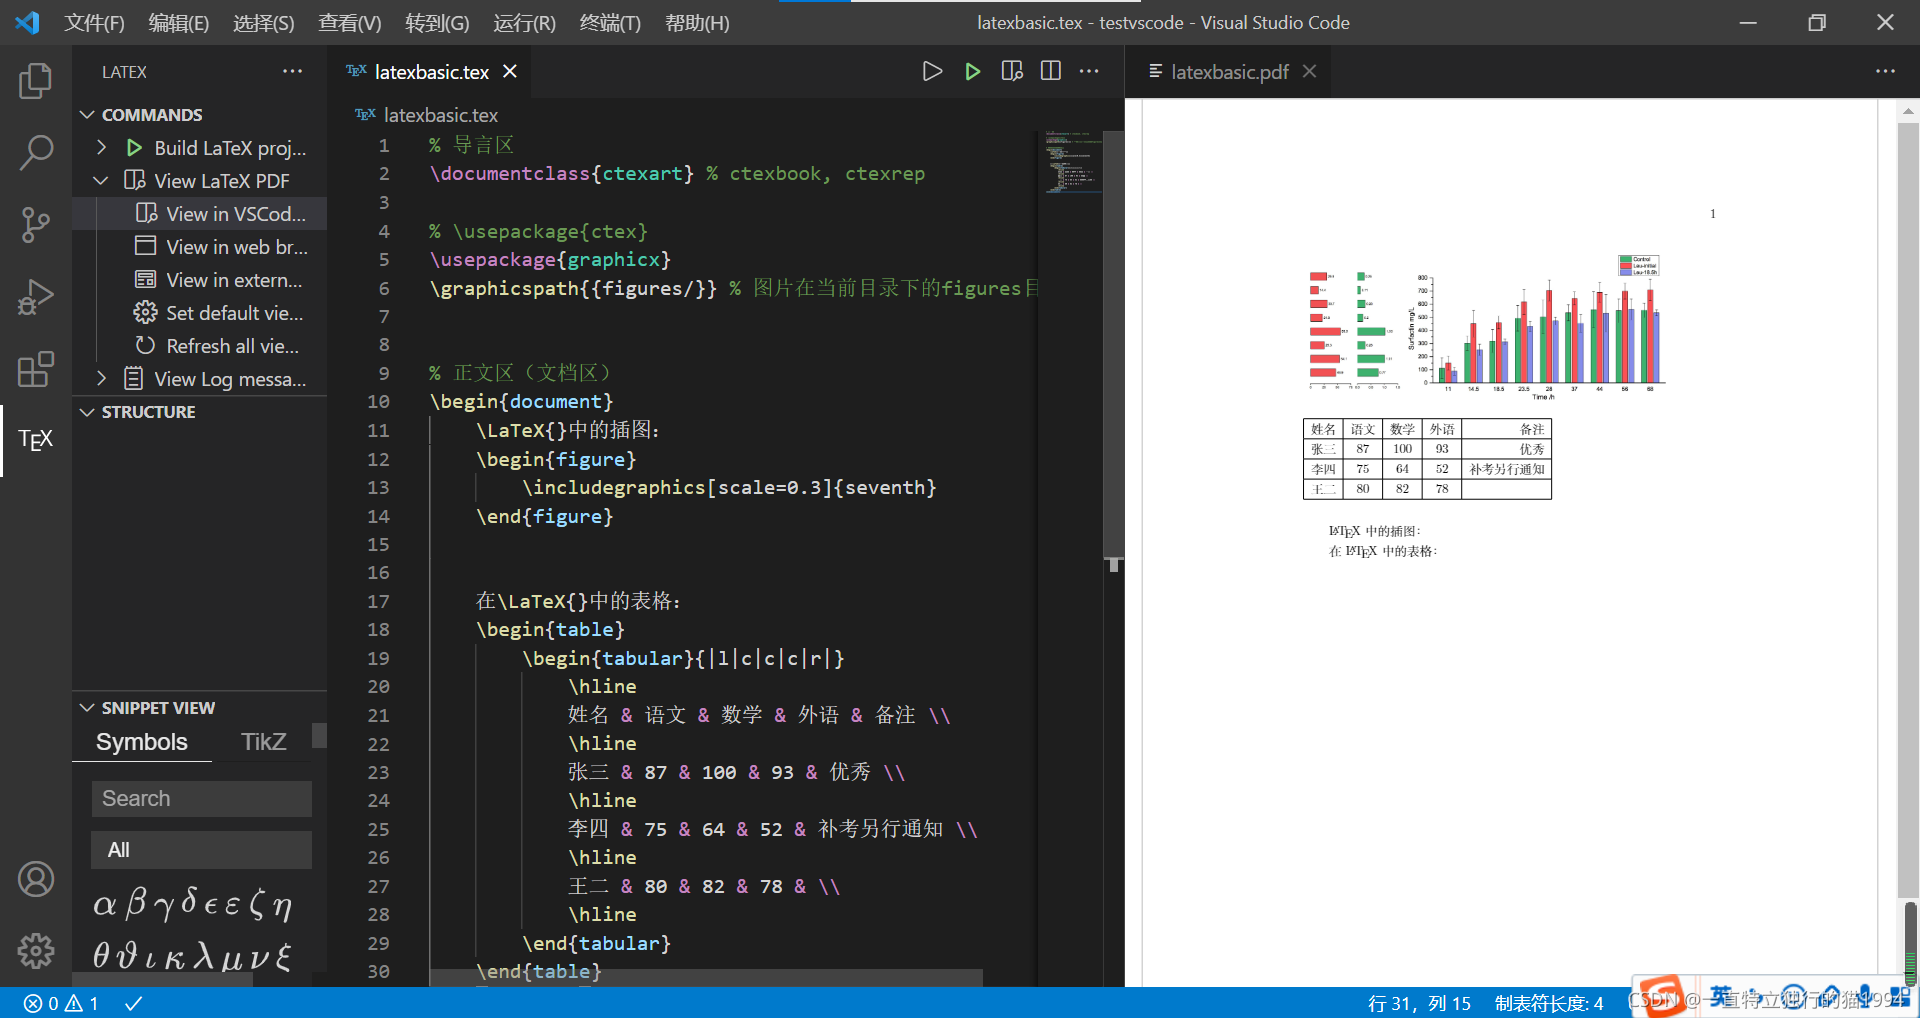
可以看到,图像与表格的位置都发生了浮动。
- 当然,也可以使用\centering命令让环境中的内容剧中排版。
% 导言区
\documentclass{
    ctexart} % ctexbook, ctexrep

% \usepackage{
    ctex}
\usepackage{
    graphicx}
\graphicspath{
    {
    figures/}} % 图片在当前目录下的figures目录

% 正文区(文档区)
\begin{
    document}
	\LaTeX{
    }中的插图:
	\begin{
    figure}
		\centering
		\includegraphics[scale=0.3]{
    seventh}
	\end{
    figure}

	在\LaTeX{
    }中的表格:
	\begin{
    table}
		\centering
		\begin{
    tabular}{
    |l|c|c|c|r|}
			\hline
			姓名 & 语文 & 数学 & 外语 & 备注 \\
			\hline
			张三 & 87 & 100 & 93 & 优秀 \\
			\hline
			李四 & 75 & 64 & 52 & 补考另行通知 \\
			\hline
			王二 & 80 & 82 & 78 & \\
			\hline
		\end{
    tabular}
	\end{
    table}
\end{
    document}
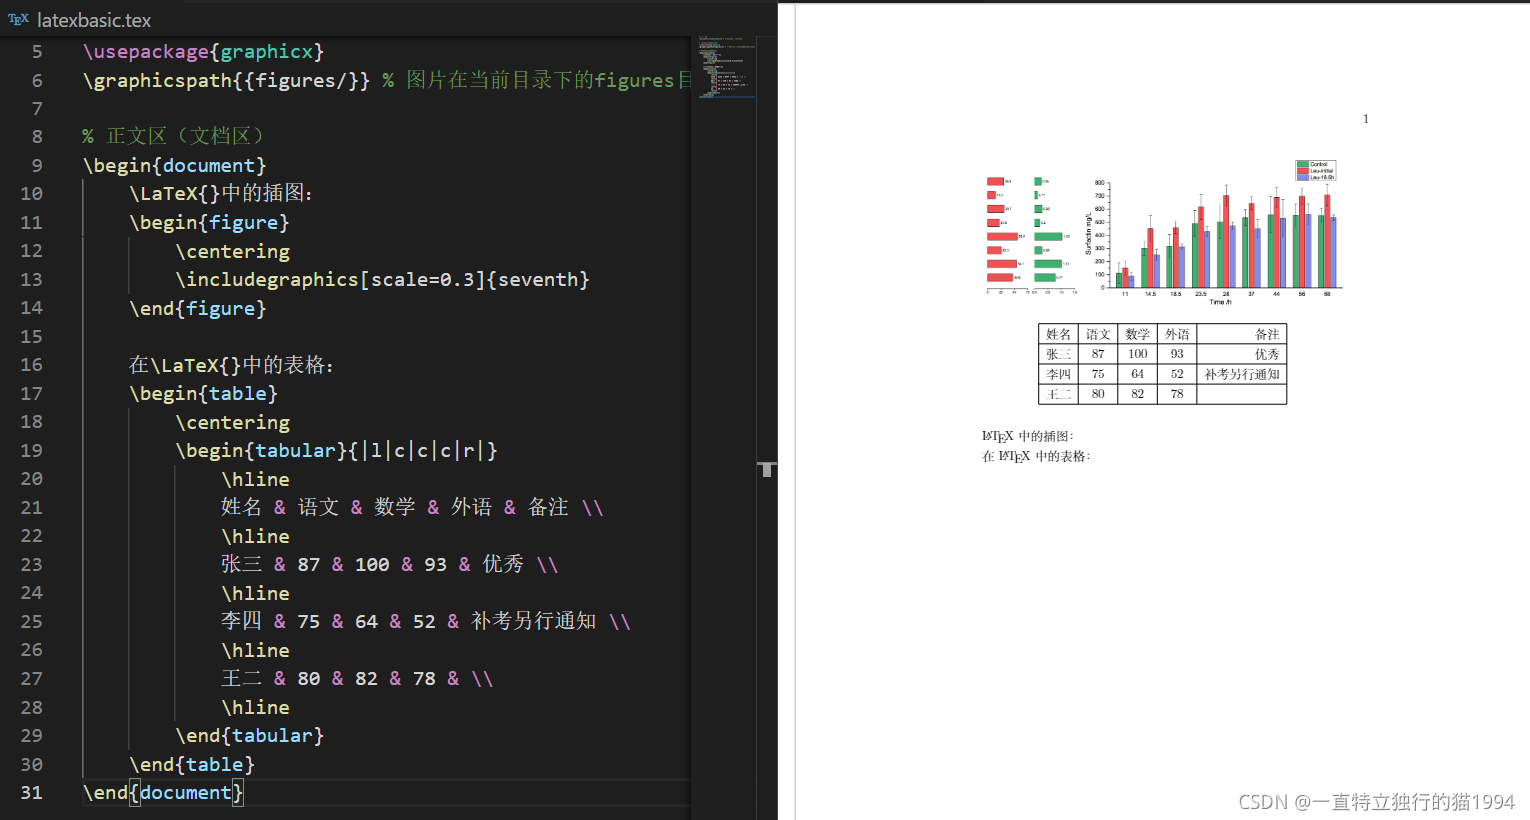
由于\centering命令是在figure环境和table环境中,所以他只影响环境中的内容。
- 还可以通过可选参数指定浮动体的排版位置
% 导言区
\documentclass{
    ctexart} % ctexbook, ctexrep

% \usepackage{
    ctex}
\usepackage{
    graphicx}
\graphicspath{
    {
    figures/}} % 图片在当前目录下的figures目录

% 正文区(文档区)
\begin{
    document}
	\LaTeX{
    }中的插图:
	\begin{
    figure}[htbp]
		\centering
		\includegraphics[scale=0.3]{
    seventh}
	\end{
    figure}

	在\LaTeX{
    }中的表格:
	\begin{
    table}
		\centering
		\begin{
    tabular}{
    |l|c|c|c|r|}
			\hline
			姓名 & 语文 & 数学 & 外语 & 备注 \\
			\hline
			张三 & 87 & 100 & 93 & 优秀 \\
			\hline
			李四 & 75 & 64 & 52 & 补考另行通知 \\
			\hline
			王二 & 80 & 82 & 78 & \\
			\hline
		\end{
    tabular}
	\end{
    table}
\end{
    document}
- 并通过\caption命令设置插图的标题
% 导言区
\documentclass{
    ctexart} % ctexbook, ctexrep

% \usepackage{
    ctex}
\usepackage{
    graphicx}
\graphicspath{
    {
    figures/}} % 图片在当前目录下的figures目录

% 正文区(文档区)
\begin{
    document}
	\LaTeX{
    }中的插图:
	\begin{
    figure}[htbp]
		\centering
		\includegraphics[scale=0.3]{
    seventh}
		\caption{
    \TeX 系统的吉祥物---小狮子}
	\end{
    figure}

	在\LaTeX{
    }中的表格:
	\begin{
    table}
		\centering
		\begin{
    tabular}{
    |l|c|c|c|r|}
			\hline
			姓名 & 语文 & 数学 & 外语 & 备注 \\
			\hline
			张三 & 87 & 100 & 93 & 优秀 \\
			\hline
			李四 & 75 & 64 & 52 & 补考另行通知 \\
			\hline
			王二 & 80 & 82 & 78 & \\
			\hline
		\end{
    tabular}
	\end{
    table}
\end{
    document}
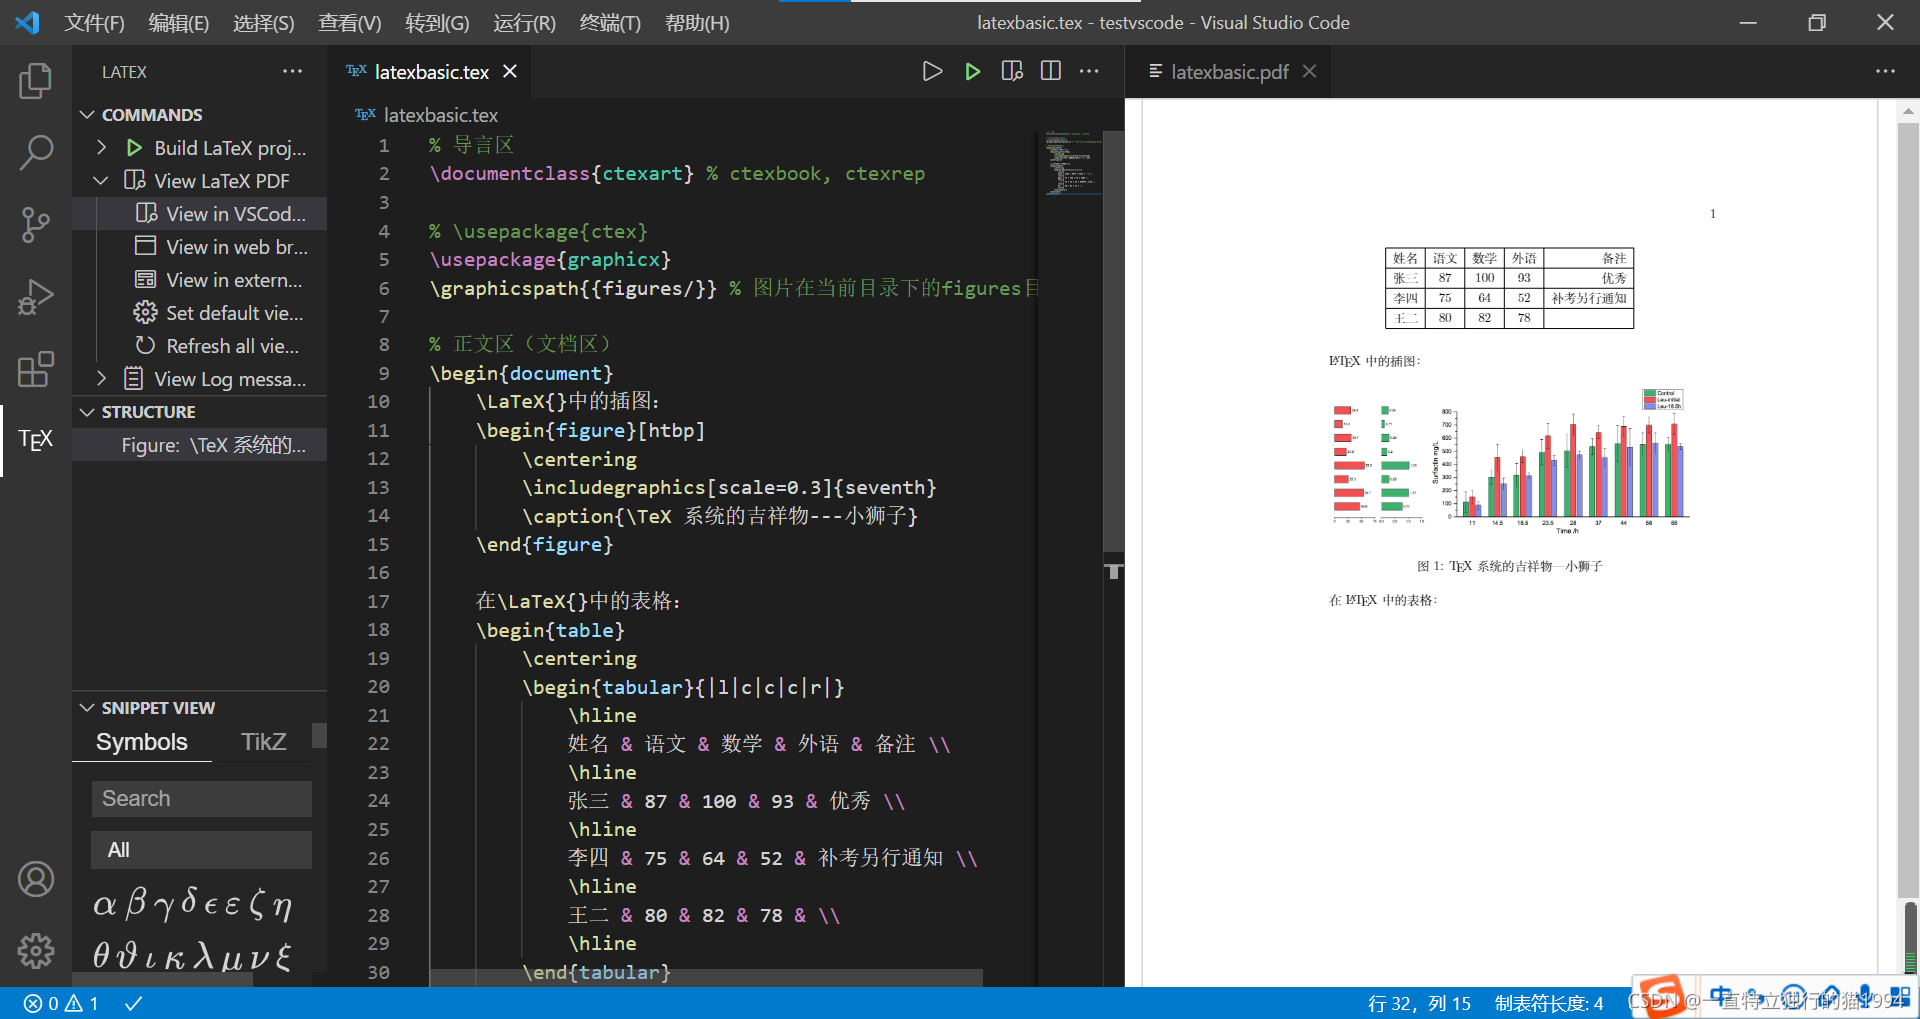
由排版结果可以看到,插图被自动进行了编号。
- 对于table环境,我们也可以做类似的处理
% 导言区
\documentclass{
    ctexart} % ctexbook, ctexrep

% \usepackage{
    ctex}
\usepackage{
    graphicx}
\graphicspath{
    {
    figures/}} % 图片在当前目录下的figures目录

% 正文区(文档区)
\begin{
    document}
	\LaTeX{
    }中的插图:
	\begin{
    figure}[htbp]
		\centering
		\includegraphics[scale=0.3]{
    seventh}
		\caption{
    \TeX 系统的吉祥物---小狮子}
	\end{
    figure}

	在\LaTeX{
    }中的表格:
	\begin{
    table}
		\centering
		\caption{
    考试成绩单}
		\begin{
    tabular}{
    |l|c|c|c|r|}
			\hline
			姓名 & 语文 & 数学 & 外语 & 备注 \\
			\hline
			张三 & 87 & 100 & 93 & 优秀 \\
			\hline
			李四 & 75 & 64 & 52 & 补考另行通知 \\
			\hline
			王二 & 80 & 82 & 78 & \\
			\hline
		\end{
    tabular}
	\end{
    table}
\end{
    document}
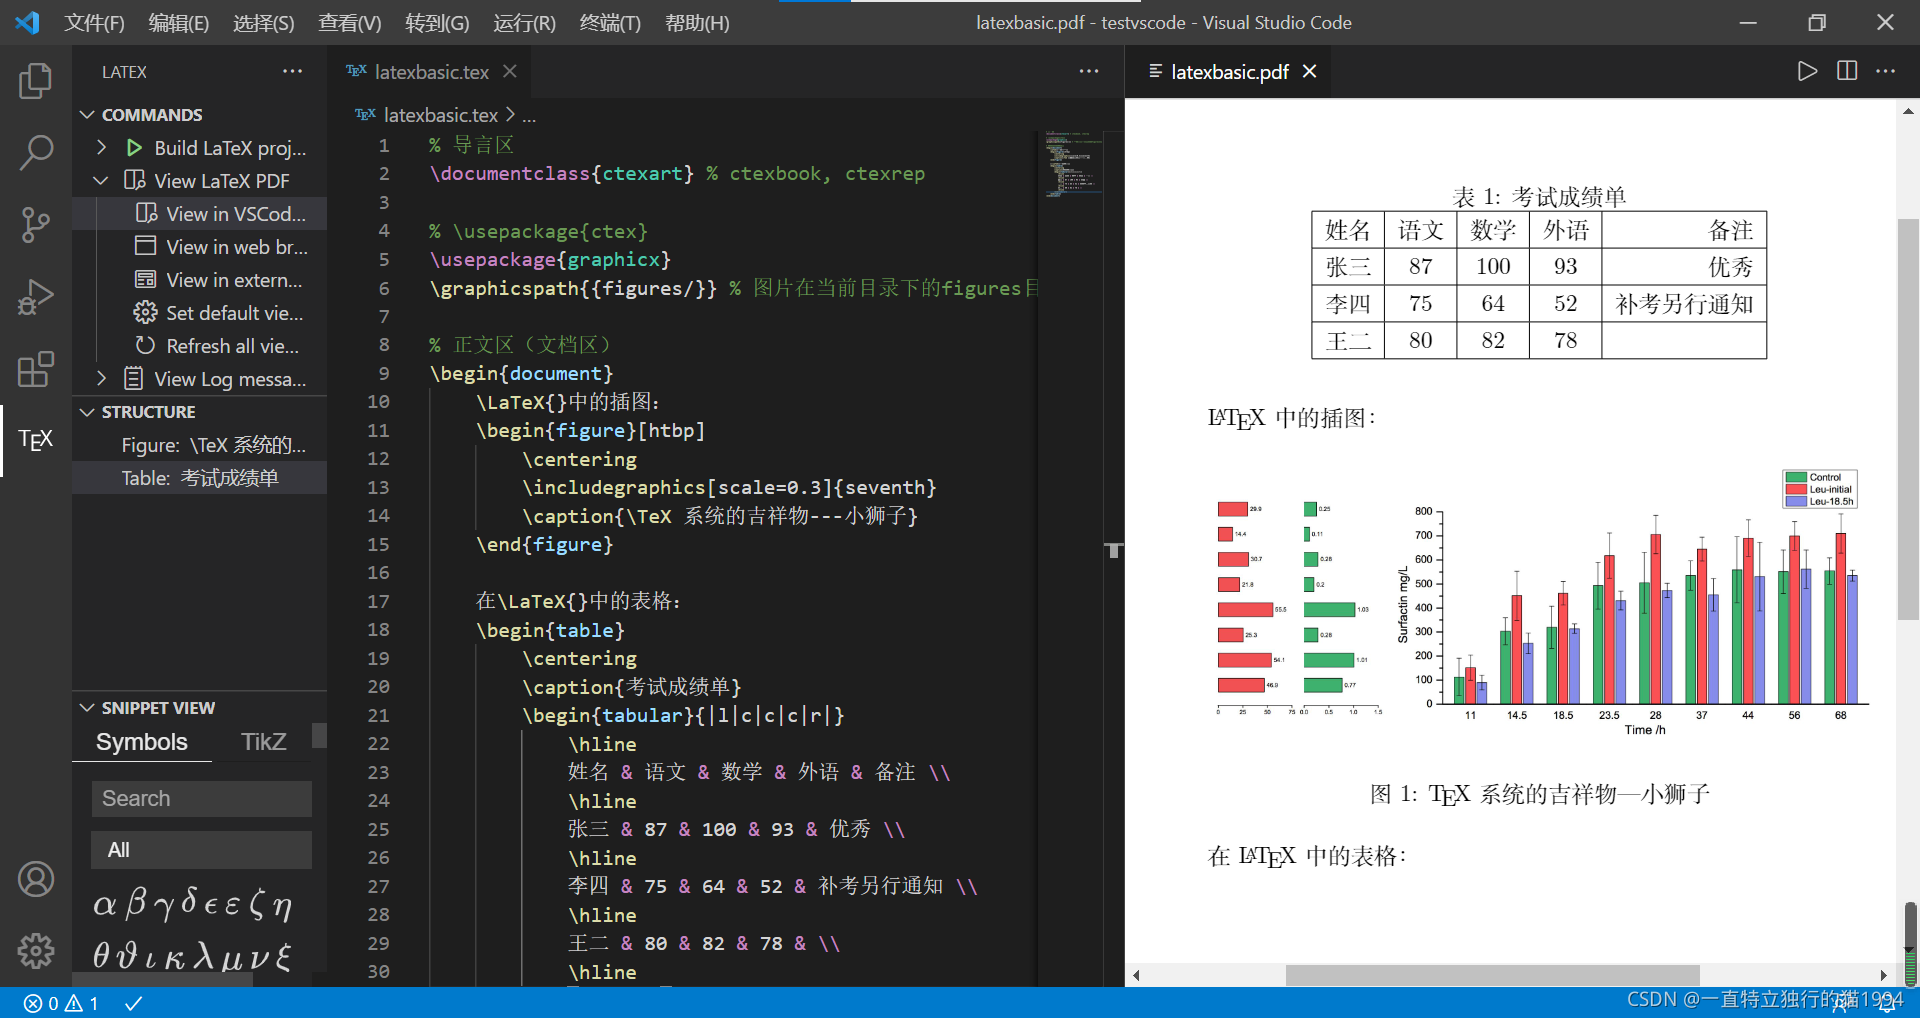
可以看到,表格也被进行了自动编号,并且与插图的编号是相互独立的。
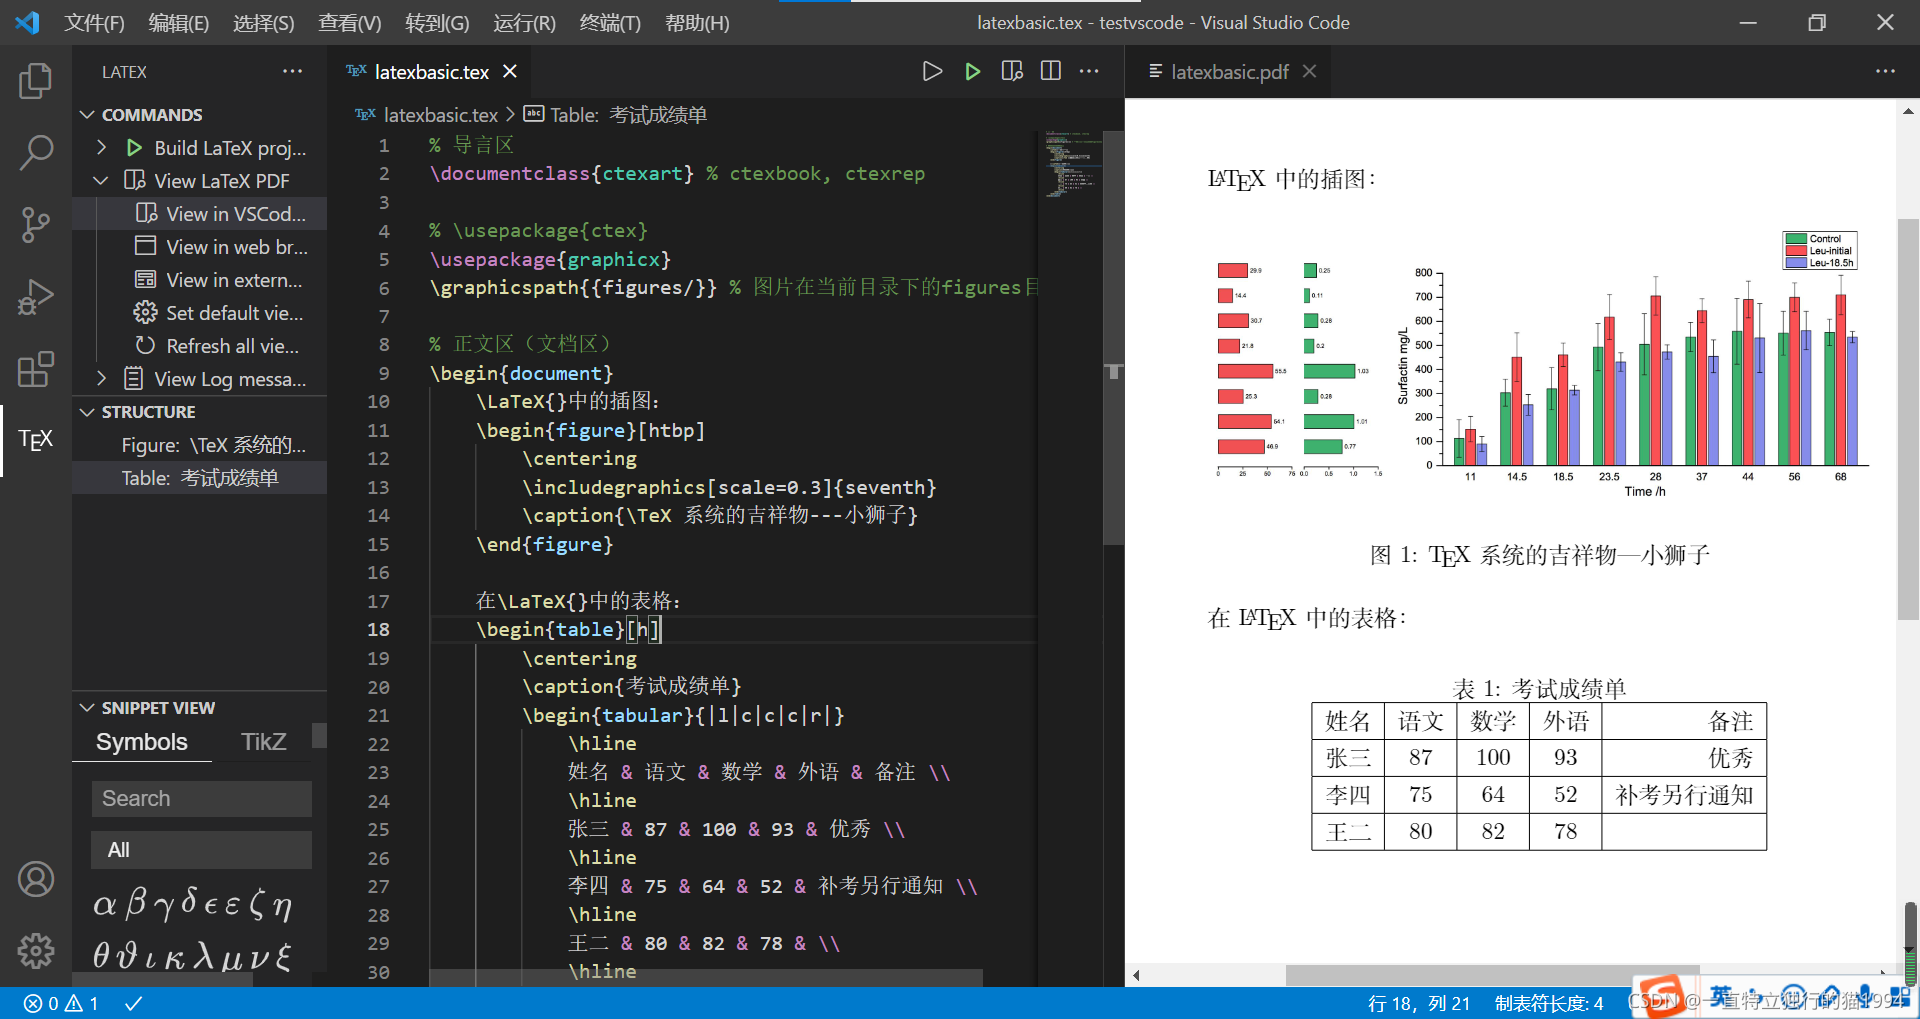
- 同样可以设置table环境的排版位置参数
% 导言区
\documentclass{
    ctexart} % ctexbook, ctexrep

% \usepackage{
    ctex}
\usepackage{
    graphicx}
\graphicspath{
    {
    figures/}} % 图片在当前目录下的figures目录

% 正文区(文档区)
\begin{
    document}
	\LaTeX{
    }中的插图:
	\begin{
    figure}[htbp]
		\centering
		\includegraphics[scale=0.3]{
    seventh}
		\caption{
    \TeX 系统的吉祥物---小狮子}
	\end{
    figure}

	在\LaTeX{
    }中的表格:
	\begin{
    table}[h]
		\centering
		\caption{
    考试成绩单}
		\begin{
    tabular}{
    |l|c|c|c|r|}
			\hline
			姓名 & 语文 & 数学 & 外语 & 备注 \\
			\hline
			张三 & 87 & 100 & 93 & 优秀 \\
			\hline
			李四 & 75 & 64 & 52 & 补考另行通知 \\
			\hline
			王二 & 80 & 82 & 78 & \\
			\hline
		\end{
    tabular}
	\end{
    table}
\end{
    document}
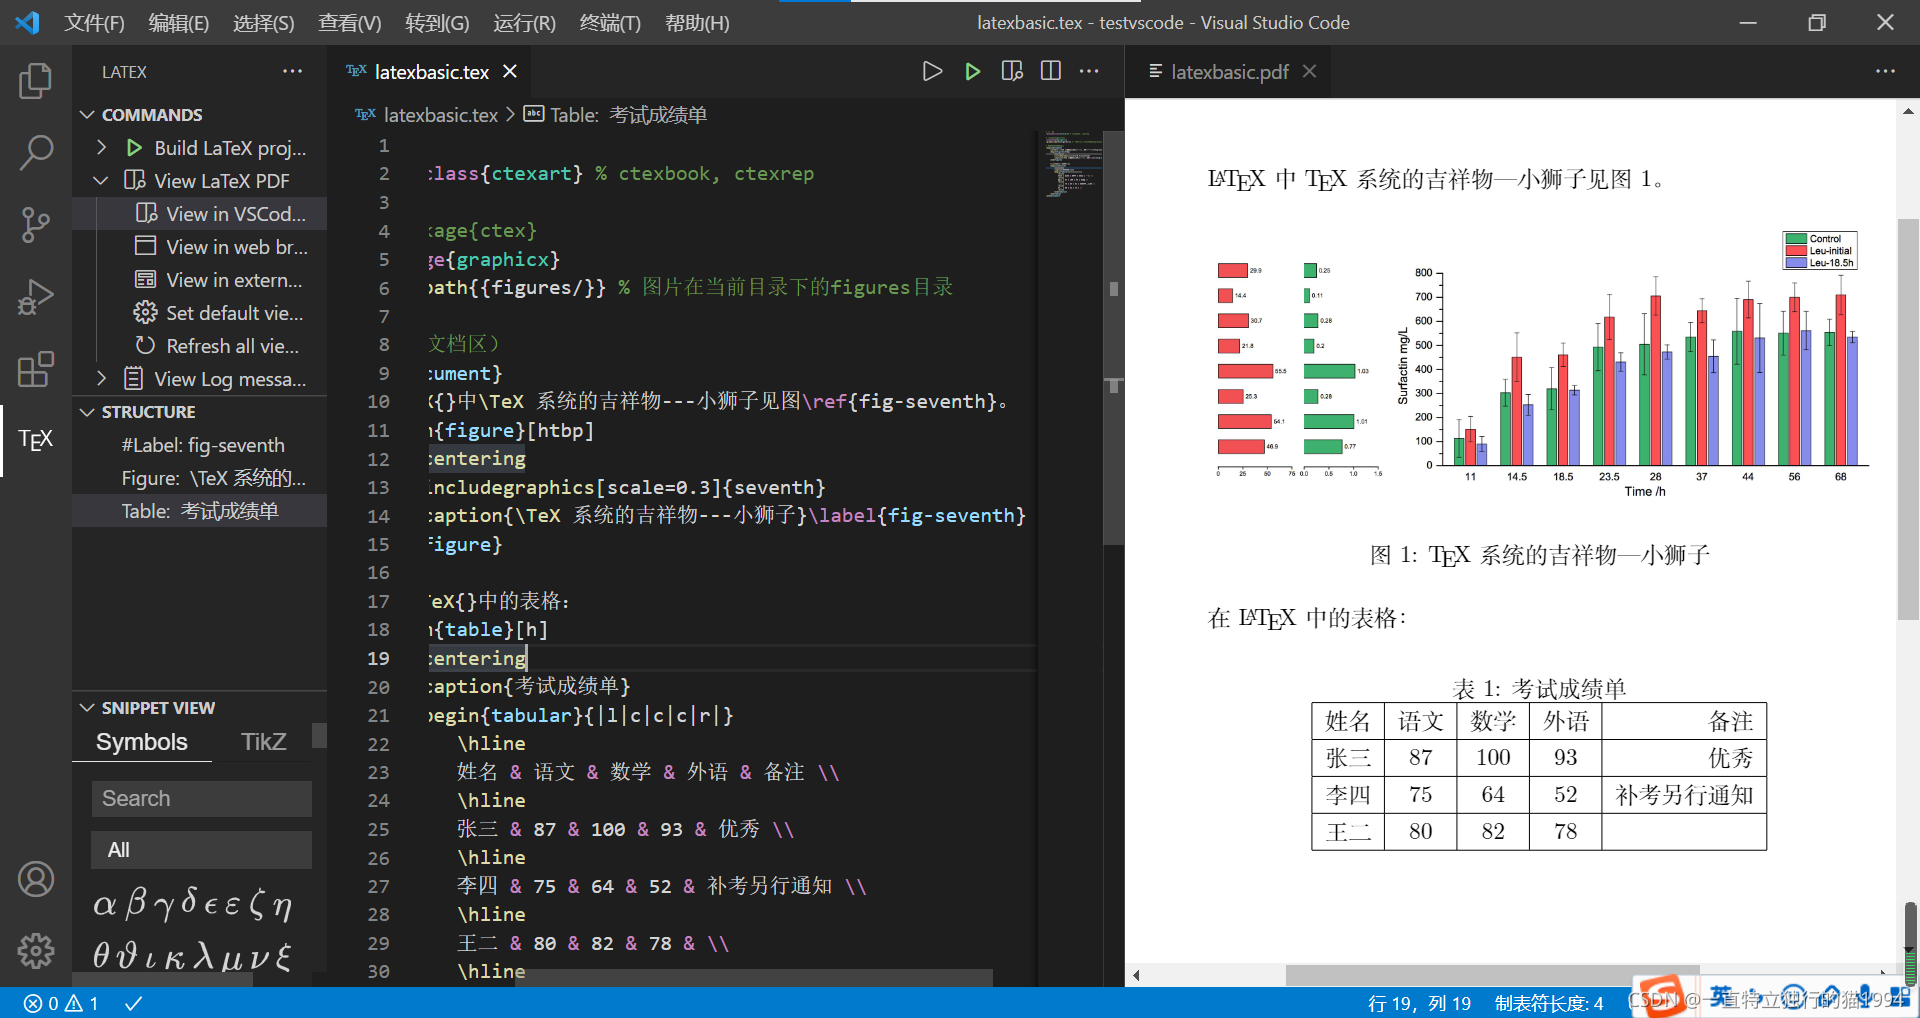
- 同时还可以使用\label命令为浮动体设定标签
- 利用\ref命令可以引用这一标签
- 从而实现交叉引用
% 导言区
\documentclass{
    ctexart} % ctexbook, ctexrep

% \usepackage{
    ctex}
\usepackage{
    graphicx}
\graphicspath{
    {
    figures/}} % 图片在当前目录下的figures目录

% 正文区(文档区)
\begin{
    document}
	\LaTeX{
    }中\TeX 系统的吉祥物---小狮子见图\ref{
    fig-seventh}。
	\begin{
    figure}[htbp]
		\centering
		\includegraphics[scale=0.3]{
    seventh}
		\caption{
    \TeX 系统的吉祥物---小狮子}\label{
    fig-seventh}
	\end{
    figure}

	在\LaTeX{
    }中的表格:
	\begin{
    table}[h]
		\centering
		\caption{
    考试成绩单}
		\begin{
    tabular}{
    |l|c|c|c|r|}
			\hline
			姓名 & 语文 & 数学 & 外语 & 备注 \\
			\hline
			张三 & 87 & 100 & 93 & 优秀 \\
			\hline
			李四 & 75 & 64 & 52 & 补考另行通知 \\
			\hline
			王二 & 80 & 82 & 78 & \\
			\hline
		\end{
    tabular}
	\end{
    table}
\end{
    document}
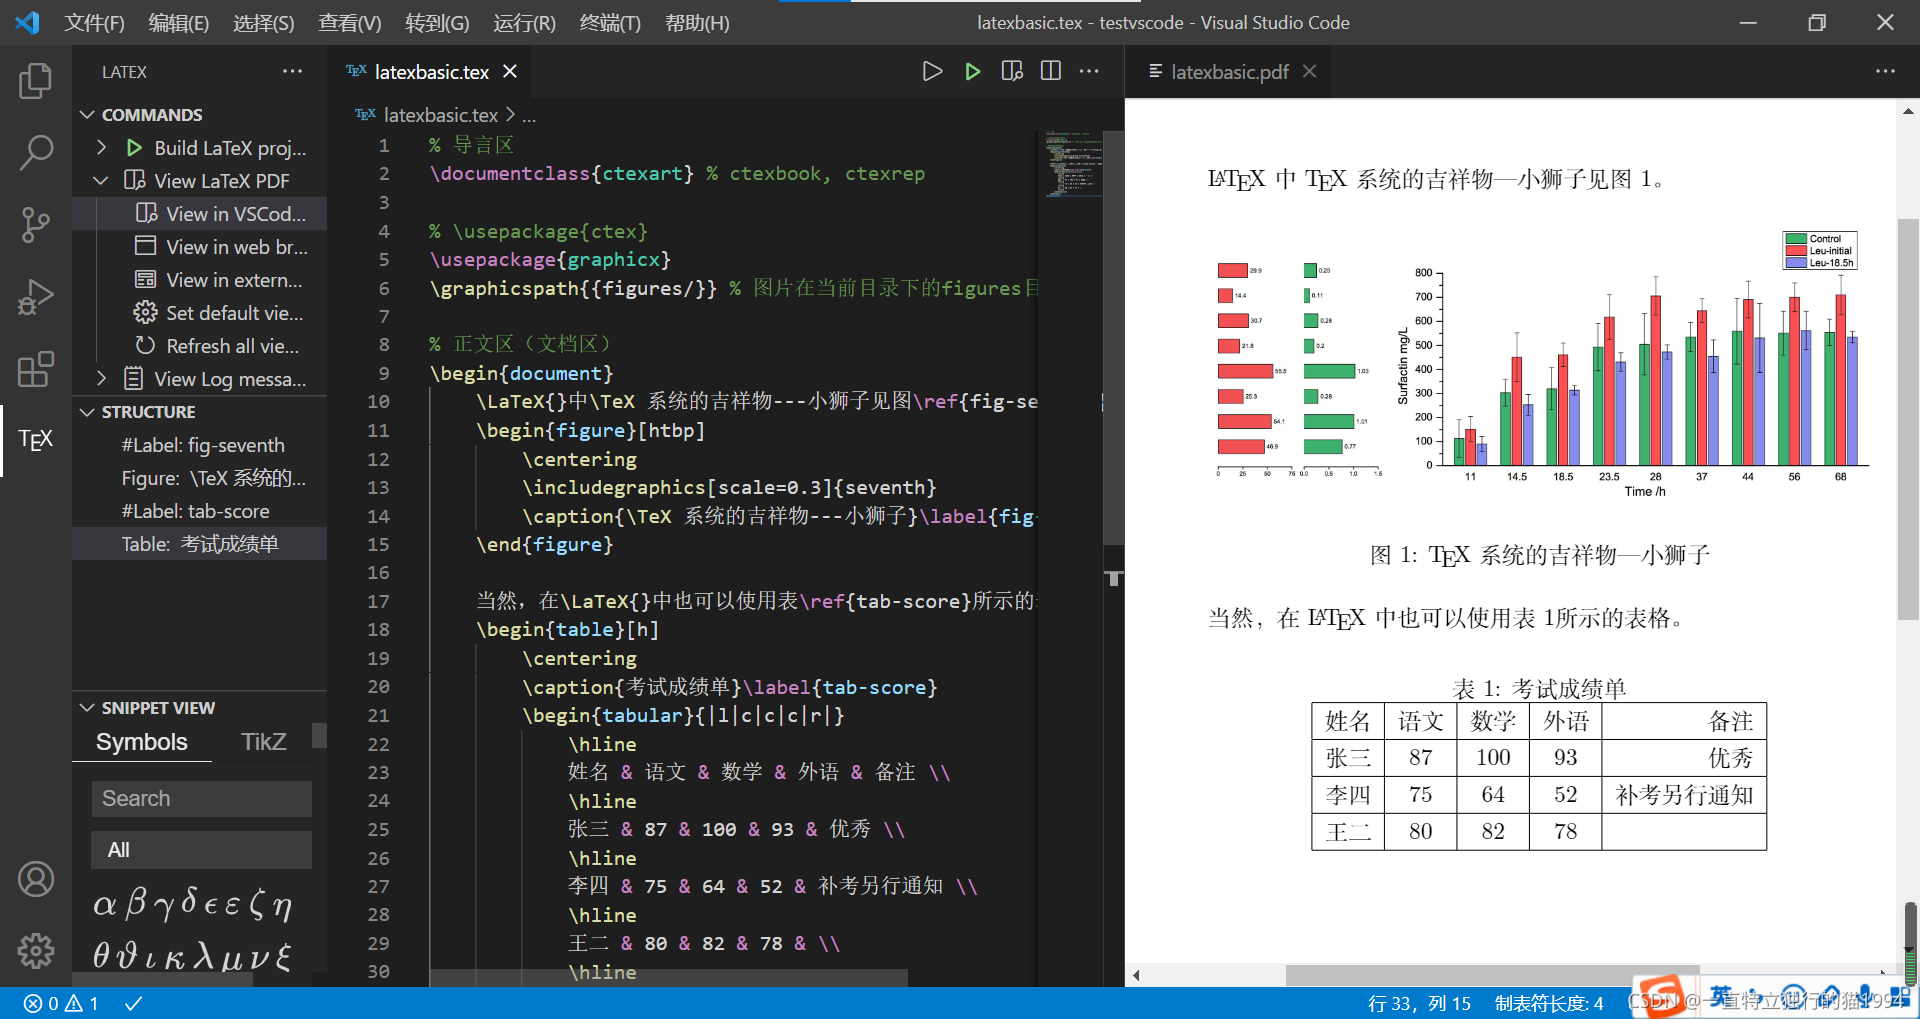
- 当然,也可以设置表格浮动体的标签
- 然后通过这个标签使用\ref命令引用这个表格
% 导言区
\documentclass{
    ctexart} % ctexbook, ctexrep

% \usepackage{
    ctex}
\usepackage{
    graphicx}
\graphicspath{
    {
    figures/}} % 图片在当前目录下的figures目录

% 正文区(文档区)
\begin{
    document}
	\LaTeX{
    }中\TeX 系统的吉祥物---小狮子见图\ref{
    fig-seventh}。
	\begin{
    figure}[htbp]
		\centering
		\includegraphics[scale=0.3]{
    seventh}
		\caption{
    \TeX 系统的吉祥物---小狮子}\label{
    fig-seventh}
	\end{
    figure}

	当然,在\LaTeX{
    }中也可以使用表\ref{
    tab-score}所示的表格。
	\begin{
    table}[h]
		\centering
		\caption{
    考试成绩单}\label{
    tab-score}
		\begin{
    tabular}{
    |l|c|c|c|r|}
			\hline
			姓名 & 语文 & 数学 & 外语 & 备注 \\
			\hline
			张三 & 87 & 100 & 93 & 优秀 \\
			\hline
			李四 & 75 & 64 & 52 & 补考另行通知 \\
			\hline
			王二 & 80 & 82 & 78 & \\
			\hline
		\end{
    tabular}
	\end{
    table}
\end{
    document}
从而实现了表格的交叉引用。
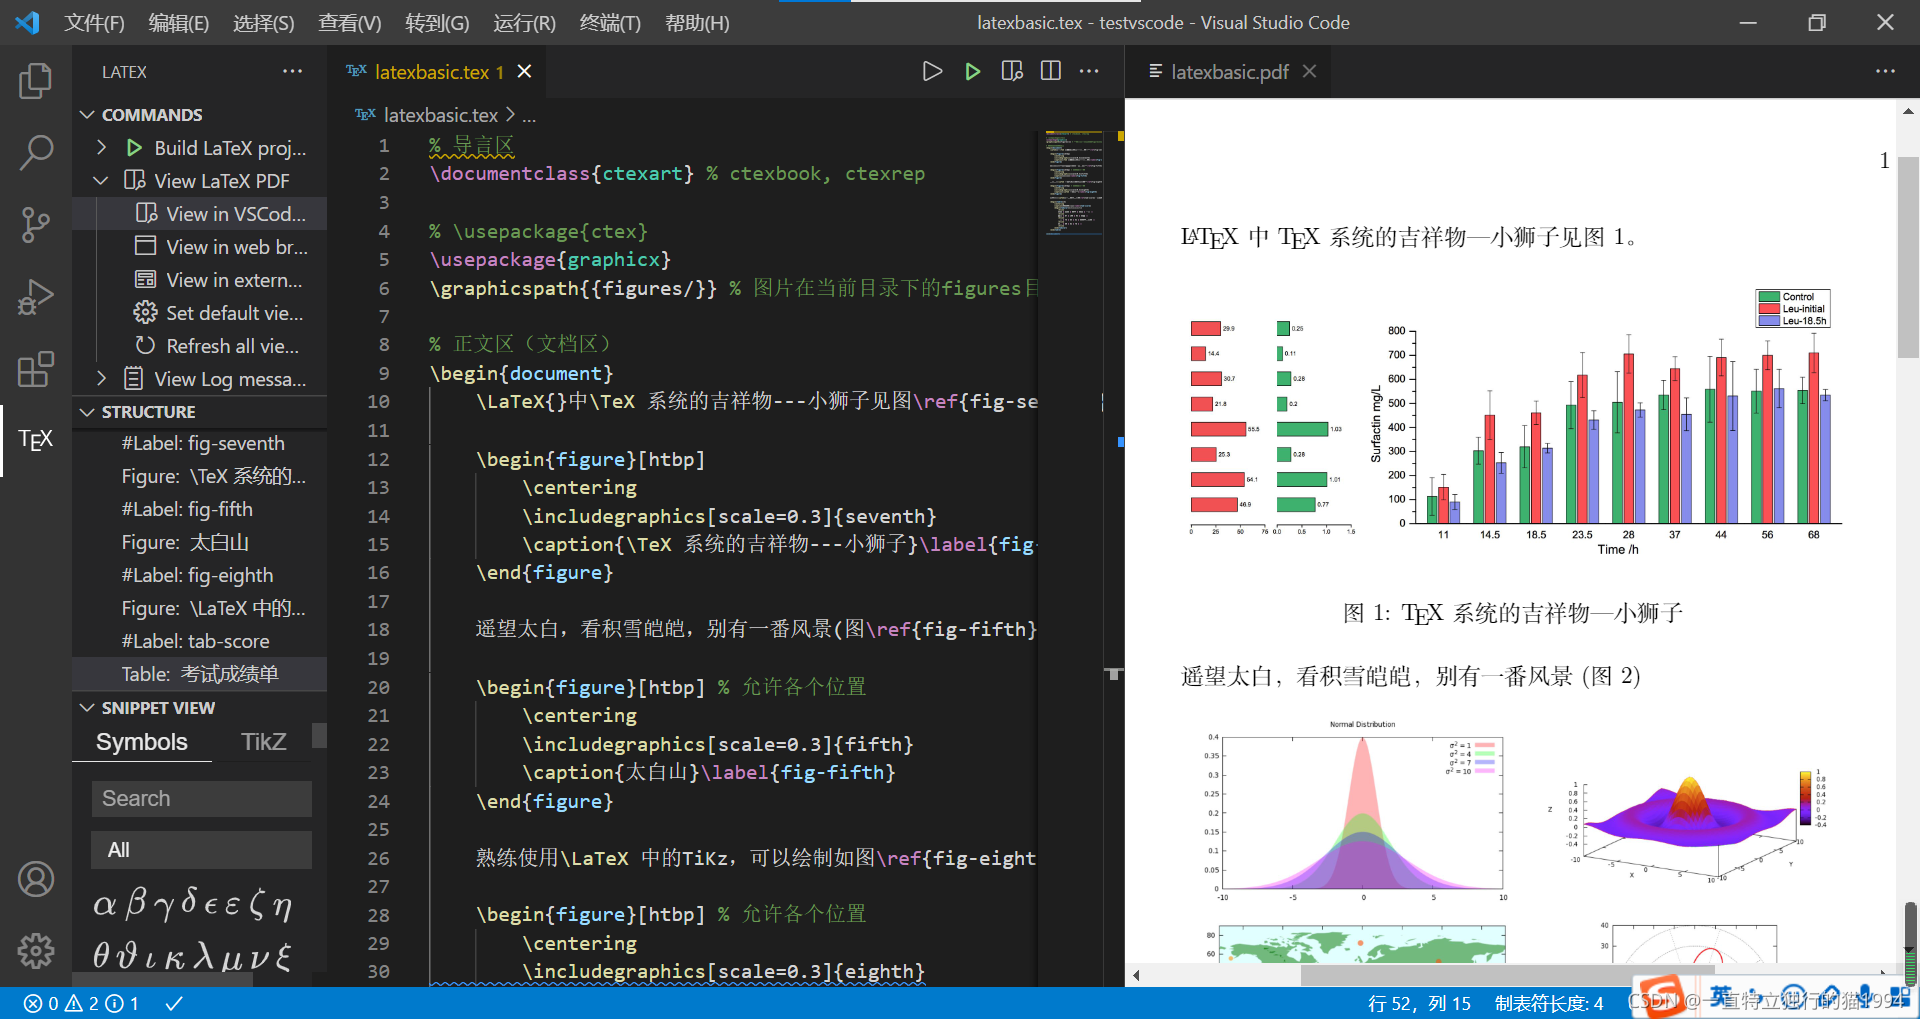
- 再插入两个插图
- 注意使用空行进行正确的分段
% 导言区
\documentclass{
    ctexart} % ctexbook, ctexrep

% \usepackage{
    ctex}
\usepackage{
    graphicx}
\graphicspath{
    {
    figures/}} % 图片在当前目录下的figures目录

% 正文区(文档区)
\begin{
    document}
	\LaTeX{
    }中\TeX 系统的吉祥物---小狮子见图\ref{
    fig-seventh}。
	\begin{
    figure}[htbp]
		\centering
		\includegraphics[scale=0.3]{
    seventh}
		\caption{
    \TeX 系统的吉祥物---小狮子}\label{
    fig-seventh}
	\end{
    figure}

	遥望太白,看积雪皑皑,别有一番风景(图\ref{
    fig-fifth})
	\begin{
    figure}[htbp] % 允许各个位置
		\centering
		\includegraphics[scale=0.3]{
    fifth}
		\caption{
    太白山}\label{
    fig-fifth}
	\end{
    figure}

	熟练使用\LaTeX 中的TiKz,可以绘制如图\ref{
    fig-eighth}所示的精美矢量图。
	\begin{
    figure}[htbp] % 允许各个位置
		\centering
		\includegraphics[scale=0.3]{
    eighth}
		\caption{
    \LaTeX 中的绘图}\label{
    fig-eighth}
	\end{
    figure}

	当然,在\LaTeX{
    }中也可以使用表\ref{
    tab-score}所示的表格。
	\begin{
    table}[h]
		\centering
		\caption{
    考试成绩单}\label{
    tab-score}
		\begin{
    tabular}{
    |l|c|c|c|r|}
			\hline
			姓名 & 语文 & 数学 & 外语 & 备注 \\
			\hline
			张三 & 87 & 100 & 93 & 优秀 \\
			\hline
			李四 & 75 & 64 & 52 & 补考另行通知 \\
			\hline
			王二 & 80 & 82 & 78 & \\
			\hline
		\end{
    tabular}
	\end{
    table}
\end{
    document}
由结果可以看出,所有的插图都进行了正确的编号,并且实现了正确的交叉引用。可以在源代码中适当的插入空行,使得源代码更加清晰。
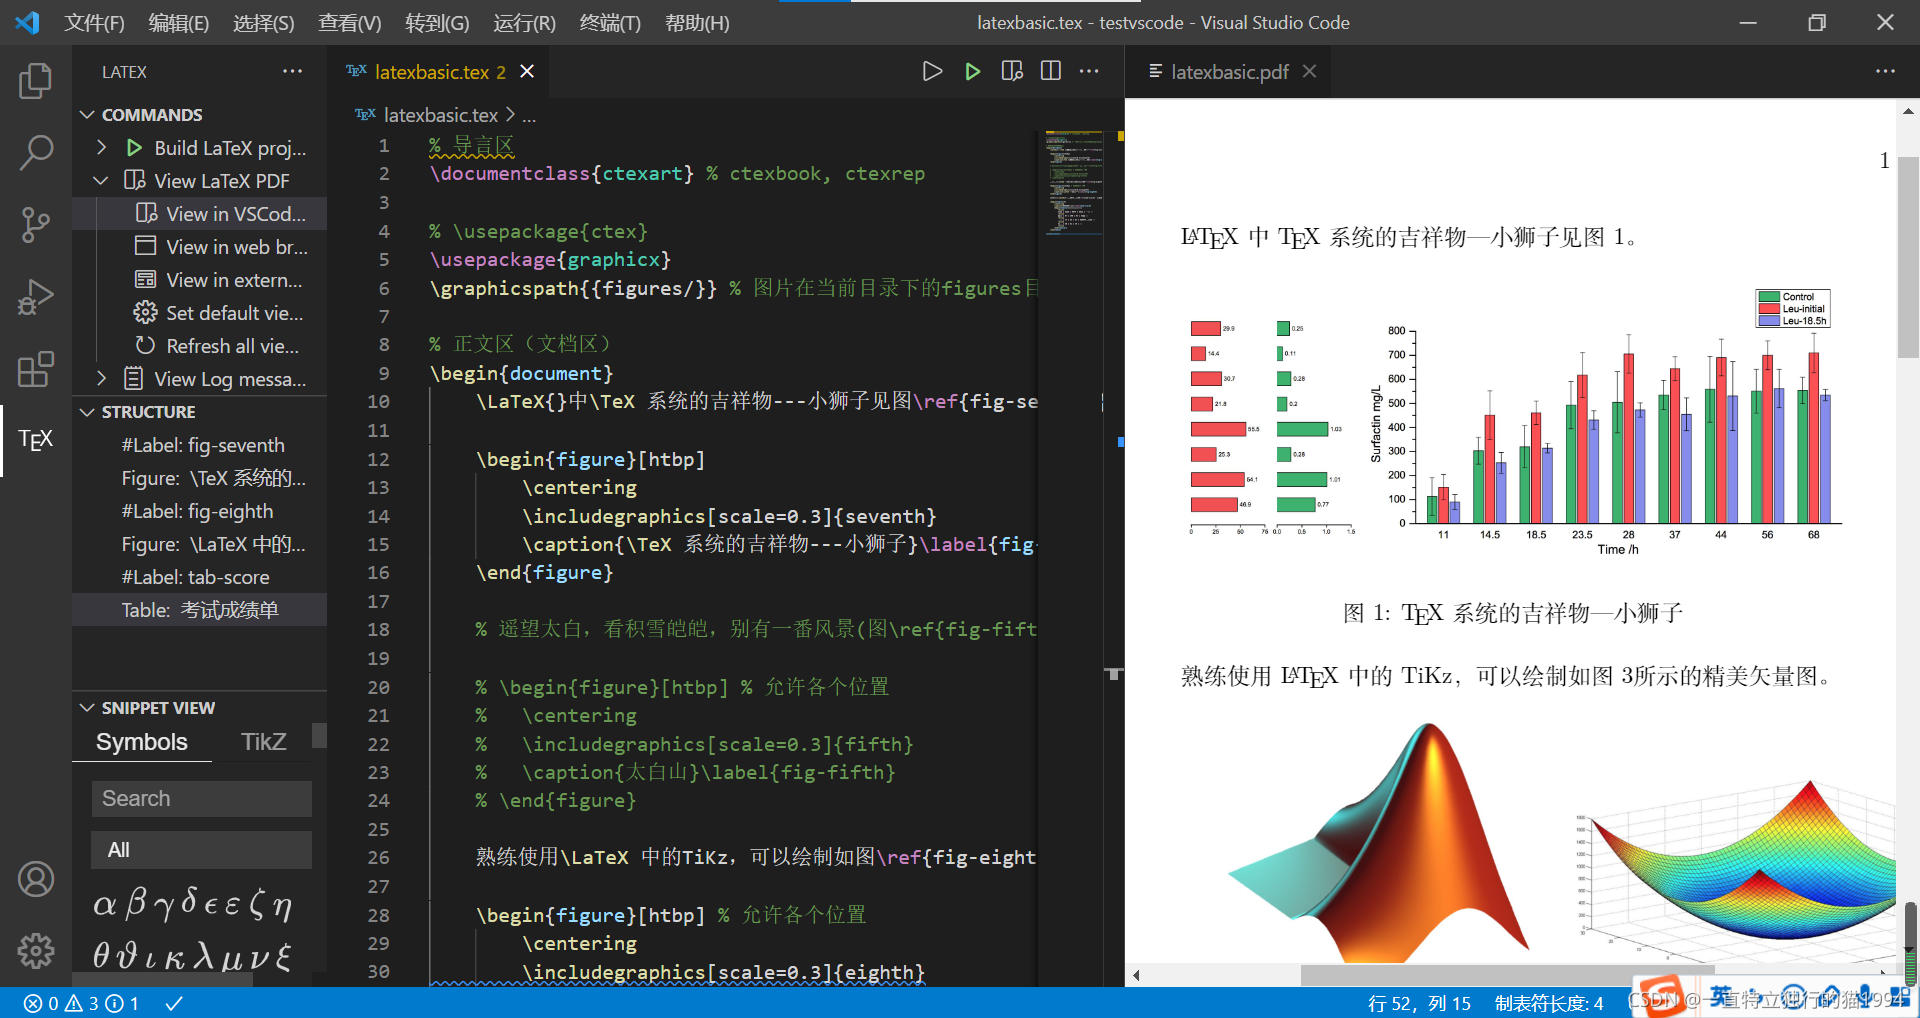
当然,如果不需要某一部分内容时,我们可以将这部分内容进行注释。
% 导言区
\documentclass{
    ctexart} % ctexbook, ctexrep

% \usepackage{
    ctex}
\usepackage{
    graphicx}
\graphicspath{
    {
    figures/}} % 图片在当前目录下的figures目录

% 正文区(文档区)
\begin{
    document}
	\LaTeX{
    }中\TeX 系统的吉祥物---小狮子见图\ref{
    fig-seventh}。

	\begin{
    figure}[htbp]
		\centering
		\includegraphics[scale=0.3]{
    seventh}
		\caption{
    \TeX 系统的吉祥物---小狮子}\label{
    fig-seventh}
	\end{
    figure}

	% 遥望太白,看积雪皑皑,别有一番风景(图\ref{
    fig-fifth})

	% \begin{
    figure}[htbp] % 允许各个位置
	% 	\centering
	% 	\includegraphics[scale=0.3]{
    fifth}
	% 	\caption{
    太白山}\label{
    fig-fifth}
	% \end{
    figure}

	熟练使用\LaTeX 中的TiKz,可以绘制如图\ref{
    fig-eighth}所示的精美矢量图。

	\begin{
    figure}[htbp] % 允许各个位置
		\centering
		\includegraphics[scale=0.3]{
    eighth}
		\caption{
    \LaTeX 中的绘图}\label{
    fig-eighth}
	\end{
    figure}

	当然,在\LaTeX{
    }中也可以使用表\ref{
    tab-score}所示的表格。

	\begin{
    table}[h]
		\centering
		\caption{
    考试成绩单}\label{
    tab-score}
		\begin{
    tabular}{
    |l|c|c|c|r|}
			\hline
			姓名 & 语文 & 数学 & 外语 & 备注 \\
			\hline
			张三 & 87 & 100 & 93 & 优秀 \\
			\hline
			李四 & 75 & 64 & 52 & 补考另行通知 \\
			\hline
			王二 & 80 & 82 & 78 & \\
			\hline
		\end{
    tabular}
	\end{
    table}

\end{
    document}
从排版结果可以看出,剩余的插图都进行了正确的编号和正确的交叉引用。如果需要找回原来的内容,只需要去掉注释即可。可以再注释一部分内容进行测试
% 导言区
\documentclass{
    ctexart} % ctexbook, ctexrep

% \usepackage{
    ctex}
\usepackage{
    graphicx}
\graphicspath{
    {
    figures/}} % 图片在当前目录下的figures目录

% 正文区(文档区)
\begin{
    document}
	% \LaTeX{
    }中\TeX 系统的吉祥物---小狮子见图\ref{
    fig-seventh}。

	% \begin{
    figure}[htbp]
	% 	\centering
	% 	\includegraphics[scale=0.3]{
    seventh}
	% 	\caption{
    \TeX 系统的吉祥物---小狮子}\label{
    fig-seventh}
	% \end{
    figure}

	遥望太白,看积雪皑皑,别有一番风景(图\ref{
    fig-fifth})

	\begin{
    figure}[htbp] % 允许各个位置
		\centering
		\includegraphics[scale=0.3]{
    fifth}
		\caption{
    太白山}\label{
    fig-fifth}
	\end{
    figure}

	熟练使用\LaTeX 中的TiKz,可以绘制如图\ref{
    fig-eighth}所示的精美矢量图。

	\begin{
    figure}[htbp] % 允许各个位置
		\centering
		\includegraphics[scale=0.3]{
    eighth}
		\caption{
    \LaTeX 中的绘图}\label{
    fig-eighth}
	\end{
    figure}

	当然,在\LaTeX{
    }中也可以使用表\ref{
    tab-score}所示的表格。

	\begin{
    table}[h]
		\centering
		\caption{
    考试成绩单}\label{
    tab-score}
		\begin{
    tabular}{
    |l|c|c|c|r|}
			\hline
			姓名 & 语文 & 数学 & 外语 & 备注 \\
			\hline
			张三 & 87 & 100 & 93 & 优秀 \\
			\hline
			李四 & 75 & 64 & 52 & 补考另行通知 \\
			\hline
			王二 & 80 & 82 & 78 & \\
			\hline
		\end{
    tabular}
	\end{
    table}

\end{
    document}
 取消注释,可以看到浮动体的编号和交叉引用是自动完成的。

这一讲,讲解了浮动体的概念、利用浮动体可以实现灵活分页、给图表添加标题以及实现交叉引用。浮动体可以通过figure环境和table环境实现,并且可以设置浮动体的允许排版位置,允许位置有:
- h,此处(here)-代码所在的上下文位置;
- t,页顶(top)-代码所在页面或之后页面的顶部;
- b,页底(bottom)-代码所在页面或之后页面的底部;
- p,独立一页(page)-浮动页面。
当然,对于标题,我们可以使用caption、bicaption等宏包进行更详细的设置;也可以使用subcaption、subfig、floatrow等宏包实现并排与子图表的排版;用picinpar、wrapfig等宏包实现绕排。其详情请查阅相关宏包手册。
本节代码:
% 导言区
\documentclass{
    ctexart} % ctexbook, ctexrep

% \usepackage{
    ctex}
\usepackage{
    graphicx}
\graphicspath{
    {
    figures/}} % 图片在当前目录下的figures目录

% 浮动体
% 实现灵活分页(避免无法分割的内容产生的页面留白
% 给图表添加标题
% 交叉引用

% figure环境(table环境与之类似)
% \begin{
    figure}[<允许位置>]
%	<任意内容>
% \end{
    figure}
% 正文区(文档区)

% <允许位置>参数(默认tbp)
% h,此处(here)-代码所在的上下文位置
% t,页顶(top)-代码所在页面或之后页面的顶部
% b,页底(bottom)-代码所在页面或之后页面的底部
% p,独立一页(page)-浮动页面

% 标题控制(caption、bicaption等宏包)
% 并排与子图表(subcaption、subfig、floatrow等宏包)
% 绕排(picinpar、wrapfig等宏包)

\begin{
    document}
	\LaTeX{
    }中\TeX 系统的吉祥物---小狮子见图\ref{
    fig-seventh}。

	\begin{
    figure}[htbp]
		\centering
		\includegraphics[scale=0.3]{
    seventh}
		\caption{
    \TeX 系统的吉祥物---小狮子}\label{
    fig-seventh}
	\end{
    figure}

	遥望太白,看积雪皑皑,别有一番风景(图\ref{
    fig-fifth})

	\begin{
    figure}[htbp] % 允许各个位置
		\centering
		\includegraphics[scale=0.3]{
    fifth}
		\caption{
    太白山}\label{
    fig-fifth}
	\end{
    figure}

	熟练使用\LaTeX 中的TiKz,可以绘制如图\ref{
    fig-eighth}所示的精美矢量图。

	\begin{
    figure}[htbp] % 允许各个位置
		\centering
		\includegraphics[scale=0.3]{
    eighth}
		\caption{
    \LaTeX 中的绘图}\label{
    fig-eighth}
	\end{
    figure}

	当然,在\LaTeX{
    }中也可以使用表\ref{
    tab-score}所示的表格。

	\begin{
    table}[h]
		\centering
		\caption{
    考试成绩单}\label{
    tab-score}
		\begin{
    tabular}{
    |l|c|c|c|r|}
			\hline
			姓名 & 语文 & 数学 & 外语 & 备注 \\
			\hline
			张三 & 87 & 100 & 93 & 优秀 \\
			\hline
			李四 & 75 & 64 & 52 & 补考另行通知 \\
			\hline
			王二 & 80 & 82 & 78 & \\
			\hline
		\end{
    tabular}
	\end{
    table}

\end{
    document}
参考文献
[1] https://blog.csdn.net/qq_36059561/article/details/113838429
智能推荐
强化学习(一)模型基础_强化学习模型介导系统总体结构-程序员宅基地
文章浏览阅读1.3k次。 从今天开始整理强化学习领域的知识,主要参考的资料是Sutton的强化学习书和UCL强化学习的课程。这个系列大概准备写10到20篇,希望写完后自己的强化学习碎片化知识可以得到融会贯通,也希望可以帮到更多的人,毕竟目前系统的讲解强化学习的中文资料不太多。 第一篇会从强化学习的基本概念讲起,对应Sutton书的第一章和UCL课程的第一讲。1. 强化学习在机器学习中的位置 强化..._强化学习模型介导系统总体结构
MyBatis整合Spring中间jar包 mybatis-spring-1.3.1.jar的官方下载(免费)_mybatis-spring-1.3.1.jar下载-程序员宅基地
文章浏览阅读1.8w次,点赞15次,收藏11次。官方网站:http://mvnrepository.com/artifact/org.mybatis/mybatis-spring/1.3.1官方下载的步骤: 1.点击上面的链接进入官方网站; 2.按照下面的步骤: 3.这是1.3.1的下载方式,其它类似..._mybatis-spring-1.3.1.jar下载
MEL转Python小工具 - ezMel2Python-程序员宅基地
文章浏览阅读1.4k次。下载地址(需要注册): https://www.highend3d.com/maya/script/ezmel2python-for-maya 使用方法: 下载后解压缩,将两个文件放到如下路径。 打开Maya,在Python脚本编辑器运行如下代码,即可打开翻译窗口。 窗..._ezmel2python
计算机本科生毕业设计题目(二)-程序员宅基地
文章浏览阅读6k次,点赞2次,收藏39次。多达六百多选题,建议同学们把不喜欢的删掉,剩下的就是比较符合自己的选题,再逐个删除,剩余5-10个自己最喜欢的,选到最后自己就会有自己的主见不一定是这里面的,一定是自己最想做的。_计算机本科生毕业设计题目
一张图看懂cpu基本结构_cpu架构图-程序员宅基地
文章浏览阅读1w次,点赞9次,收藏21次。cpucpu 中央处理器,Central Processing Unit,由运算器和控制器组成用一张思维导图,介绍cpu的具体功能,基本结构简单看CPU指令执行过程取指令,程序执行前,程序计数器会指向内存块第一条指令地址,顺序拿到指令后指令译码,知道当前指令是要我们取数还是加减操作执行指令,如果是取数,根据译码拿到的地址去内存找到数据,放到数据寄存器算术运算,ALU算术逻辑运算结果写回,根据MAR地址找到对应主存单元写回数据..._cpu架构图
无向图的邻接表_无向图的邻接表怎么画-程序员宅基地
文章浏览阅读3.8w次,点赞33次,收藏100次。 如何根据无向图画出邻接表呢?比如:第一排的v1,与v2和v4相连,因此两个黄色方框内的数字分别代表v2和v4的下标;第二排的v2,与v1、v3和v5相连,因此三个绿色方框内的数字分别代表v1和v3和v5的下标;以此类推。同时反过来推测:第一排的三个红边方框,“1” “2” “3”:代表v0与v1、v2、v3相连;第二排的两个红边方框,“0” “2”:代表v1与..._无向图的邻接表怎么画
随便推点
从Java String实例来理解ANSI、Unicode、BMP、UTF等编码概念-程序员宅基地
文章浏览阅读159次。一、前言一切的谜都解开了!在写这篇随笔之前,我的心情只能用金田一每次破案后的这句台词来表达。其实从开始写Java代码以来,遇到过无数次乱码与转码问题,比如从文本文件读入到..._java解析ansi
图片无损放大怎么做?这几种无损放大方法很简单_博客中图片放大怎么做-程序员宅基地
文章浏览阅读173次。无损放大图片还可以帮助我们在数码摄影中获得更好的结果,因为它可以增加图像的细节和清晰度,从而使得图像在观看时更加逼真和生动。给大家分享几种图片无损放大的方法,一起来学习下吧。这是一个专业的图片编辑工具,里面拥有非常全面的图片编辑功能,我们日常的图片编辑需求基本都可以在其中得以解决。3、此外,对于放大镜的形状、大小和颜色都是可以设置的,最后设置好后将图片给保存下来就可以啦,是不是非常简单方便呢。2、图片添加进来后,可以在右上角选择放大的倍数,也可以自定义倍数来设置,大家根据自己的实际需求选择就可以了。_博客中图片放大怎么做
大数据、AI“武装”企业服务:风控、检索、安全-程序员宅基地
文章浏览阅读329次。 大数据、AI“武装”企业服务:风控、检索、安全小饭桌创业课堂2017-05-06 15:26:42阅读(127)评论(0) +- 文|吴杨可月 -- 小饭桌创业研究院出品 - 两件秘闻,将美国大数据公司Palantir从幕后推向前台—— 一是,Palantir的旗下产品在整合40年的记录及海量数据并充分挖掘之后,找到了前纳斯达克主席麦道夫“庞氏骗局”的大量确凿..._企业服务+ai
Java泛型的学习和使用_java泛型需要学吗-程序员宅基地
文章浏览阅读283次。前面,由于对泛型擦除的思考,引出了对Java-Type体系的学习。本篇,就让我们继续对“泛型”进行研究:JDK1.5中引入了对Java语言的多种扩展,泛型(generics)即其中之一。1. 什么是泛型?泛型,即“参数化类型”,就跟在方法或构造函数中普通的参数一样,当一个方法被调用时,实参替换形参,方法体被执行。当一个泛型声明被调用,实际类型参数取代形式类型参数。 ..._java泛型需要学吗
在Python中,如何将一个字符串数组转换成整型数组_python 字符串数组转为整数数组-程序员宅基地
文章浏览阅读6.2k次,点赞4次,收藏12次。py1:>>> arr = ['22','44','66','88']>>> arr = map(int,arr)>>> print(arr)[22, 44, 66, 88]py2:>>> arr = ['22','44','66','88']>>> arr = list(map(int,arr))>>> print(arr)[22, 44, 66, 88]_python 字符串数组转为整数数组
u3d_6.如何销毁—nunityengine.objec及其子类-程序员宅基地
文章浏览阅读2.2k次。题目归类区(看题目字体颜色识第几部分)ps :下面题目可能稍有点多,翻页会较麻烦,根据题目的颜色辨别是第几部分吧(超链接功能不会,也懒得做了)第一部分1. 请简述值类型与引用类型的区别2.C# 中所有引用类型的基类是什么3. 请简述 ArrayList 和 List 的主要区别4. 请简述 GC (垃圾回收)产生的原因,并描述如何避免?5. _6.如何销毁—nunityengine.objec及其子类