DJI Mobile SDK初步开发-程序员宅基地
技术标签: app java android 大疆MSDK开发
大疆Mobile SDK初步开发
1. 从MSDK示例代码开始
-
配置代码运行环境
(1)下载Moblie SDK:DJI MSDK下载。
(2)准备Android开发环境,推荐使用Android Studio 2.1.1以上版本。官网下载网址:Download Android Studio或者 Android Studio -
从GitHub上下载Android demo project:Mobile-SDK-Android 。
-
在大疆官网创建APP KEY。在大疆官网的个人中心的应用一栏中可以生成APP KEY

-
在创建界面需要注意的是Package Name中需要填写的是实际代码程序中的包名,其余选项随意填写

- 创建完成后点击打开示例代码中的Manifests->AndroidManifests.xml文件,把App key粘贴到android:value后

- 连接手机,手机打开USB调试模式,如果Android Android未查询到手机可以在命令提示符中查询adb devices,没有显示连接设备则说明手机未安装adb 驱动

-
点击run运行程序。

-
手机连接无人机遥控器测试APP.
2. 进行视频流的接收
-
在大疆官网文档中详细的介绍了如何完成一个对无人机视频流进行解码:Android Video Stream Decoding Sample - DJI Mobile SDK Documentation.
-
1.初始化一个NativeHelper的实例对象,来监听来自无人机高空的视频数据。 2.将原始的H.264视频数据送入FFmpeg中解析。 3.将解析完成的视频数据从FFmpeg中取出,并将解析后的数据缓存到图像帧序列中 4.将MediaCodec作为一个解码器,然后对视频中的I帧进行捕获。 5.解码完成后,可为MediaCodec的输出数据配置一个TextureView或SurfaceView用来对视频画面进行预览,或者调用监听器对解码数据进行监听完成其他操作。 6.释放FFmpeg和MediaCodec资源。 -
通过上述流程我们能够知道要能够在设备上显示无人机相机画面大体上分为三步:接受无人机视频流、对视频流解码以及把解码后数据输出画面。那么为什么要把无人机传输过来的视频解码为YUV格式呢?
-
原因是在Android系统中,图像是以YUVImage的格式传递的,因此,在存储数据的时候我们就需要使用YUV图像格式。
-
我们可以下载官网给出的 sample project:Github Page ,在项目代码中大疆给出了两种进行解码的方式:利用大疆自己编写的DJIViedeoStreamDecoder解码器以及利用之前大疆就编写好的DJICodecManager解码器。在布局中分别在livestream_preview_ttv和livestream_preview_sf中显示画面。
-
在代码meida的DJIVideoStreamDecoder.java文件中我们可以看到初始化解码器MediaCodec的源代码:
-
/** * Initialize the hardware decoder. */ private void initCodec() { if (width == 0 || height == 0) { return; } if (codec != null) { releaseCodec(); } loge("initVideoDecoder----------------------------------------------------------"); loge("initVideoDecoder video width = " + width + " height = " + height); // create the media format MediaFormat format = MediaFormat.createVideoFormat(VIDEO_ENCODING_FORMAT, width, height); if (surface == null) { logd("initVideoDecoder: yuv output"); // The surface is null, which means that the yuv data is needed, so the color format should // be set to YUV420. format.setInteger(MediaFormat.KEY_COLOR_FORMAT, MediaCodecInfo.CodecCapabilities.COLOR_FormatYUV420Planar); } else { logd("initVideoDecoder: display"); // The surface is set, so the color format should be set to format surface. format.setInteger(MediaFormat.KEY_COLOR_FORMAT, MediaCodecInfo.CodecCapabilities.COLOR_FormatSurface); } try { // Create the codec instance. codec = MediaCodec.createDecoderByType(VIDEO_ENCODING_FORMAT); logd( "initVideoDecoder create: " + (codec == null)); // Configure the codec. What should be noted here is that the hardware decoder would not // output any yuv data if a surface is configured into, which mean that if you want the yuv // frames, you should set "null" surface when calling the "configure" method of MediaCodec. //就是说要配置解码器之前要把surface设为"null" codec.configure(format, surface, null, 0); logd( "initVideoDecoder configure"); // codec.configure(format, null, null, 0); if (codec == null) { loge("Can't find video info!"); return; } // Start the codec codec.start(); } catch (Exception e) { loge("init codec failed, do it again: " + e); e.printStackTrace(); } } -
下面是解析为YUV格式(MainActivity.java中)的源代码:
-
@Override public void onYuvDataReceived(MediaFormat format, final ByteBuffer yuvFrame, int dataSize, final int width, final int height) { //In this demo, we test the YUV data by saving it into JPG files. //DJILog.d(TAG, "onYuvDataReceived " + dataSize); if (count++ % 30 == 0 && yuvFrame != null) { final byte[] bytes = new byte[dataSize]; yuvFrame.get(bytes); //DJILog.d(TAG, "onYuvDataReceived2 " + dataSize); AsyncTask.execute(new Runnable() { @Override public void run() { // two samples here, it may has other color format. //两种像素格式 NV12或者YUV420P int colorFormat = format.getInteger(MediaFormat.KEY_COLOR_FORMAT); switch (colorFormat) { case MediaCodecInfo.CodecCapabilities.COLOR_FormatYUV420SemiPlanar: //NV12 if (Build.VERSION.SDK_INT <= 23) { //android API<=23 oldSaveYuvDataToJPEG(bytes, width, height); } else { newSaveYuvDataToJPEG(bytes, width, height); } break; case MediaCodecInfo.CodecCapabilities.COLOR_FormatYUV420Planar: //YUV420P newSaveYuvDataToJPEG420P(bytes, width, height); break; default: break; } } }); } } -
代码如果有不明白的方法调用或者类名,可以去大疆官网查询相关的API。在本次开发过程中我选择了相对更加稳定和延迟更小的livestream_preview_sf.
-
初步理解代码内容后,我们可以Run示例程序查看结果。
3. 增加对无人机的初步控制
-
本步骤参考DJI MSDK开发文档中的Simulator 模拟器功能实现部分,代码以及文件参考: Github Page.
-
在能显示无人机相机视角的基础上,我们现在的目标是添加飞机的自动起飞和降落以及能操控无人机的虚拟摇杆的功能。
-
首先自动起飞和自动降落功能在大疆API已经有了,我们只需要很简单的调用以及在Android布局中增加两个按钮即可。

-
对于按钮点击事件进行判断如下:
-
//无人机起飞动作实现 case R.id.btn_take_off: if (mFlightController != null){ mFlightController.startTakeoff( new CommonCallbacks.CompletionCallback() { @Override public void onResult(DJIError djiError) { if (djiError != null) { showToast(djiError.getDescription()); } else { showToast("Take off Success"); } } } ); } break; //无人机降落动作实现 case R.id.btn_land: if (mFlightController != null){ mFlightController.startLanding( djiError -> { if (djiError != null) { showToast(djiError.getDescription()); } else { showToast("Start Landing"); } } ); } -
我们第二步是增加两个虚拟摇杆,而为了操控杆控件,我们基于OnScreenJoystick文件实施操纵杆控制 。我们主要用到两个文件OnScreenJoystick.java和OnScreenJoystickListener.java.

-
在OnScreenJoystickListener.java中看到当我们触摸到虚拟摇杆视图时会触发的监听方法onTouch.
public interface OnScreenJoystickListener {


    /** Called when the joystick is touched.
     * @param joystick The joystick which has been touched.
     * @param pX The x coordinate of the knob. Values are between -1 (left) and 1 (right).
     * @param pY The y coordinate of the knob. Values are between -1 (down) and 1 (up).
     */
    public void onTouch(final OnScreenJoystick joystick, final float pX, final float pY);
}
方法具体的实现代码如下:
@Override public boolean onTouch(final View arg0, final MotionEvent pEvent) { final float x = pEvent.getX(); final float y = pEvent.getY(); switch (pEvent.getAction()) { //返回动作类型 case MotionEvent.ACTION_UP: //手指离开摇杆时触发 if (isAutoCentering()) { mKnobX = Math.round((mBackgroundSize - mKnobSize) * 0.5f); mKnobY = Math.round((mBackgroundSize - mKnobSize) * 0.5f); } break; default: // Check if coordinates are in bounds. If they aren't move the knob // to the closest coordinate inbounds. if (checkBounds(x, y)) { mKnobX = Math.round(x - mKnobSize * 0.5f); mKnobY = Math.round(y - mKnobSize * 0.5f); } else { final double angle = Math.atan2(y - mRadius, x - mRadius); mKnobX = (int) (Math.round(mRadius + (mRadius - mKnobSize * 0.5f) * Math.cos(angle)) - mKnobSize * 0.5f); mKnobY = (int) (Math.round(mRadius + (mRadius - mKnobSize * 0.5f) * Math.sin(angle)) - mKnobSize * 0.5f); } } if (mJoystickListener != null) { mJoystickListener.onTouch(this, (0.5f - (mKnobX / (mRadius * 2 - mKnobSize))) * -2, (0.5f - (mKnobY / (mRadius * 2 - mKnobSize))) * 2); } return true; } -
然后把需要配置文件添加到res中,在大疆文档实现UI界面的第四步配置资源中已经描述的非常清楚了,此处把内容复制在下面:
- 将示例项目中的joystick.png和joystick_bg.png文件复制并粘贴到左侧导航器的mipmap文件夹中。
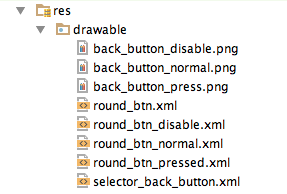
- 将以下图像和xml文件从教程Github Sample项目的drawable文件夹复制到您的项目中,它们用于按钮的UI:
- 接下来,打开"colors.xml"文件,并在底部添加以下代码以声明黑色叠加颜色:
<color name="black_overlay">#66000000</color>- 此外,打开"strings.xml"文件并添加"success"字符串:
<string name="success">Success</string>- 最后,打开"styles.xml"文件并添加以下代码以声明"common_button"样式:
<!-- Common button style --> <style name="common_button"> <item name="android:layout_width">100dp</item> <item name="android:layout_height">45dp</item> <item name="android:layout_marginTop">10dp</item> <item name="android:background">@drawable/round_btn</item> <item name="android:paddingLeft">5dp</item> <item name="android:paddingRight">5dp</item> <item name="android:textAllCaps">false</item> <item name="android:textColor">@android:color/white</item> <item name="android:textSize">14sp</item> </style> -
随后在布局中加入两个摇杆
<com.dji.simulatorDemo.OnScreenJoystick android:id="@+id/directionJoystickLeft" android:layout_width="130dp" android:layout_height="130dp" android:layout_alignParentLeft="true" android:layout_alignParentBottom="true" android:layout_marginBottom="10dp" android:layout_marginLeft="10dp" android:background="@mipmap/joystick_bg"/> <com.dji.simulatorDemo.OnScreenJoystick android:id="@+id/directionJoystickRight" android:layout_width="130dp" android:layout_height="130dp" android:layout_alignParentRight="true" android:layout_alignParentBottom="true" android:layout_marginBottom="10dp" android:layout_marginRight="10dp" android:background="@mipmap/joystick_bg"/> -
在MainActivity中我们初始化UI元素变量,重写
onTouch()和onClick()方法。 -
确认根据文档步骤无误后,Run代码查看是否出现问题。
4. 结果展示
-
后面我又加入了拍照和录象的功能,因为在大疆文档中都有很详细的介绍所以此处不过多赘述。
-
最后做出来的UI界面如下:

-
本文只是非常基础的根据大疆官方文档所做的一个练习,供大家参考。
智能推荐
[architecture]-ARMV8的一些总结-一篇就够了_arm v8架构参考手册-程序员宅基地
文章浏览阅读8.4k次,点赞5次,收藏62次。ARM、armv8、armv9、arm架构、arm视频、添加vx : arm_2023 获取更多资料, arm资料、arm下载、arm学习、arm免费、arm课程,PE - processing elementARM体系结构定义了抽象机器的行为,称为处理元素(processing element),通常缩写为PE。与ARM体系结构兼容的实现必须符合处理元素所描述的行为。RISC架构ARM架构是一个精简指令集计算机(RISC)架构,具有以下RISC架构特征:- 一个大的统一寄存器文件。- 一种_arm v8架构参考手册
多维时序 | MATLAB实现RIME-CNN-LSTM-Multihead-Attention多头注意力机制多变量时间序列预测_matlab 概率稀疏自注意力-程序员宅基地
文章浏览阅读1.1k次,点赞20次,收藏17次。多维时序 | MATLAB实现RIME-CNN-LSTM-Multihead-Attention多头注意力机制多变量时间序列预测_matlab 概率稀疏自注意力
计算机和外部通信方式,计算机和外部的通信方式-程序员宅基地
文章浏览阅读2.9k次。计算机和外部交换信息又称为通信(Communication)。按数据传送方式分为并行通信和串行通信两种基本方式。1、并行通信并行通信就是把传送数据的n位数用n条传输线同时传送。其优点是传送速度快、信息率高。并且,通常只要提供二条控制和状态线,就能完成CPU和接口及设备之间的协调、应答,实现异步传输。它是计算机系统和计算机控制系统中常常采用的通信方式。但是并行通信所需的传输线(通常为电缆线)多,增加..._分别写出计算机移动终端连接外围设备的主要方式
ThinkPHP5框架知识付费系统uniapp+mysql可以部署PC+app+公众号+小程序版本-程序员宅基地
文章浏览阅读216次。ThinkPHP5框架知识付费系统uniapp+mysql可以部署PC+app+公众号+小程序版本。导师入住,添加课程和商品,出售后分红提现。vip svip功能。
电源管理(PMIC)TPS63070RNMR、TPS650942A0RSKR、LM5175RHFR器件介绍、应用及特点。-程序员宅基地
文章浏览阅读805次。电源管理(PMIC)TPS63070RNMR、TPS650942A0RSKR、LM5175RHFR器件介绍、应用及特点。_tps63070
Flask 通过Axios库前后端交互_flask 框架下axios-程序员宅基地
文章浏览阅读4.9k次。Axios 是一个基于promise的HTTP库,该库是一个更好的替代ajax向后端发送数据或请求数据的前端组件库,其本质上也是对原生XHR的封装,只不过它是Promise的实现版本,符合最新的ES规范,如下案例运用axios向后端提交JSON字符串,后端通过Flask响应请求并处理。Python后端使用Flask接收并处理前端发送过来的JSON字符串。前端发送数据的第一种方式。前端发送数据的第二种方式。_flask 框架下axios
随便推点
自动化测试之八大元素定位方式(python3.10+selenium4)_自动化测试tag_name-程序员宅基地
文章浏览阅读7.4k次,点赞12次,收藏103次。元素的定位是自动化测试核心。要操作一个对象,首先要识别定位或找到这个对象。为了实现网页整体布局,我们先要知道,一个元素,是如何定位到页面上的某个位置的,这就是元素定位。_自动化测试tag_name
RHEL 5.1 安装Marvell Yukon网卡驱动_yk51驱动-程序员宅基地
文章浏览阅读1k次。linux下安装Marvell Yukon网卡驱动【提要】 我的主板是华硕P4P800 SE,集成Marvell Yukon网卡,安装redhat linux9后无法识别网卡,故需要费一点折腾了。。最终解决了linux中上网的问题,但引发了windows中无法连接的麻烦,暂时搁着先了。。。(2006-11-25回头圆满解决!)【内容】问题一开始就存在,我就一般在windows系统中寻找资料,下载资源,然后转到linux中,加载windows分区,获取文件。经过一段时间后,终于还是认真解决它好了。在windo_yk51驱动
Windows系统鼠标右键菜单添加打开cmd终端_we右键进入cmd-程序员宅基地
文章浏览阅读1.4k次,点赞3次,收藏2次。直接拷贝上面的一段代码,保存到文本文档,然后把.txt后缀改为.reg,然后右键该文件,点击合并即可。这样,鼠标右键菜单就有open cmd here即在当前路径打开cmd这个选项了,但是这个是普通用户运行cmd。有时候,当要在某个文件夹下打开cmd终端时,如果没有右键菜单快捷方式,就得打开cmd后,使用cd方式进入 当前目录,很麻烦。同时还会添加另一个选项,以管理员身份运行(A) ,这个是以管理员身份运行cmd。文件名:右键在此处运行cmd.reg。以下的脚本,可以帮你解决这个问题。_we右键进入cmd
python汇编语言还是机器语言_深入理解计算机系统(3.1)------汇编语言和机器语言...-程序员宅基地
文章浏览阅读136次。《深入理解计算机系统》第三章——程序的机器级表示。作者首先讲解了汇编代码和机器代码的关系,阐述了汇编承上启下的作用;接着从机器语言IA32着手,分别讲述了如何存储数据、如何访问数据、如何完成运算以及如何进行跳转。通过这些步骤,又告诉了我们分支语句、循环语句是怎么完成的,函数调用、栈帧结构以及递归过程。最后能通过编译器产生的汇编代码表示,我们要了解编译器和它的优化能力,知道编译器能为我们完成哪些工作..._phthon 汇编语言 机器语言
android毕设各种app项目,安卓毕设,android毕设_app毕业设计-程序员宅基地
文章浏览阅读3w次,点赞44次,收藏271次。闲来无事,整理了一些对之前帮同学做过的小项目,希望能 帮到正在紧张准备毕设项目的你!项目挺多总有一个适合你! 如果有问题需要帮忙 我也可以帮忙指导指导。说明: 以下项目均使用Android studio开发,代码使用java语言,布局文件使用xml,后端接口部署在自己的阿里云上面类似京东商城app首先是登录、注册,然后进入首页使用viewpager+fragment实现四个不同tab的切换,tab包括(商品列表、促销商品、购物车、我的) @Override protected vo_app毕业设计
Keil侧边工具栏(项目窗口)打开方式_keil侧边栏-程序员宅基地
文章浏览阅读3.2k次,点赞10次,收藏4次。不废话解决问题_keil侧边栏