Docker容器技术介绍(三) --- Docker容器_docker create --help-程序员宅基地
容器(Container)是Docker中最重要的概念之一,他是镜像的运行实体,是一个应用运行和所需运行环境的结合体。从现在开始,忘掉“臃肿”的虚拟机吧,对容器进行操作就跟直接操作应用一样简单、快速。
docker create
docker create 命令可以用来创建一个容器,该命令支持的参数纷繁复杂,可以输入 docker create --help 来查看该命令的使用方法
[root@localhost go]# docker create --help

Usage: docker create [OPTIONS] IMAGE [COMMAND] [ARG...]

Create a new container

  -a, --attach=[]             Attach to STDIN, STDOUT or STDERR
  --add-host=[]               Add a custom host-to-IP mapping (host:ip)
  --blkio-weight=0            Block IO (relative weight), between 10 and 1000
  -c, --cpu-shares=0          CPU shares (relative weight)
  --cap-add=[]                Add Linux capabilities
  --cap-drop=[]               Drop Linux capabilities
  --cgroup-parent=            Optional parent cgroup for the container
  --cidfile=                  Write the container ID to the file
  --cpu-period=0              Limit CPU CFS (Completely Fair Scheduler) period
  --cpu-quota=0               Limit the CPU CFS quota
  --cpuset-cpus=              CPUs in which to allow execution (0-3, 0,1)
  --cpuset-mems=              MEMs in which to allow execution (0-3, 0,1)
  --device=[]                 Add a host device to the container
  --dns=[]                    Set custom DNS servers
  --dns-search=[]             Set custom DNS search domains
  -e, --env=[]                Set environment variables
  --entrypoint=               Overwrite the default ENTRYPOINT of the image
  --env-file=[]               Read in a file of environment variables
  --expose=[]                 Expose a port or a range of ports
  -h, --hostname=             Container host name
  --help=false                Print usage
  -i, --interactive=false     Keep STDIN open even if not attached
  --ipc=                      IPC namespace to use
  -l, --label=[]              Set meta data on a container
  --label-file=[]             Read in a line delimited file of labels
  --link=[]                   Add link to another container
  --log-driver=               Logging driver for container
  --log-opt=[]                Log driver options
  --lxc-conf=[]               Add custom lxc options
  -m, --memory=               Memory limit
  --mac-address=              Container MAC address (e.g. 92:d0:c6:0a:29:33)
  --memory-swap=              Total memory (memory + swap), '-1' to disable swap
  --name=                     Assign a name to the container
  --net=bridge                Set the Network mode for the container
  --oom-kill-disable=false    Disable OOM Killer
  -P, --publish-all=false     Publish all exposed ports to random ports
  -p, --publish=[]            Publish a container's port(s) to the host
  --pid=                      PID namespace to use
  --privileged=false          Give extended privileges to this container
  --read-only=false           Mount the container's root filesystem as read only
  --restart=no                Restart policy to apply when a container exits
  --security-opt=[]           Security Options
  -t, --tty=false             Allocate a pseudo-TTY
  -u, --user=                 Username or UID (format: <name|uid>[:<group|gid>])
  --ulimit=[]                 Ulimit options
  --uts=                      UTS namespace to use
  -v, --volume=[]             Bind mount a volume
  --volumes-from=[]           Mount volumes from the specified container(s)
  -w, --workdir=              Working directory inside the container
比如我们创建一个基于centos镜像的容器
[root@localhost go]# docker images
REPOSITORY                    TAG                 IMAGE ID            CREATED             VIRTUAL SIZE
centos                        v7.0                fae454d6fc7b        2 weeks ago         434.5 MB
mysql                         5.6.37              c6d1fd492efc        3 weeks ago         299 MB
ubuntu                        14.04               b44ce450cb60        4 weeks ago         188 MB
quay.io/coreos/etcd           v3.0.4              3b17a5f34e6c        14 months ago       43.3 MB
hub.c.163.com/public/ubuntu   14.04               f6a575b7c805        19 months ago       237.1 MB
[root@localhost go]# docker create -it centos:v7.0 "/bin/bash"
20fb80443f2a6dc8b9e2eaca96301f3d89688b1013caf7b7a226041a96ebc557
-i 参数 保持标准输入打开,默认为false
-t 参数 用来分配一个伪终端并绑定到容器的标准输入上,-i 和 -t 通常配合使用,让我们可以在容器中执行shell命令
docker ps
docker ps 命令可以列出当前已经创建的容器,默认只列出正在运行的容器,加上 -a 参数可以列出所有
[root@localhost go]# docker ps --help

Usage: docker ps [OPTIONS]

List containers

  -a, --all=false       Show all containers (default shows just running)
  --before=             Show only container created before Id or Name
  -f, --filter=[]       Filter output based on conditions provided
  --help=false          Print usage
  -l, --latest=false    Show the latest created container, include non-running
  -n=-1                 Show n last created containers, include non-running
  --no-trunc=false      Don't truncate output
  -q, --quiet=false     Only display numeric IDs
  -s, --size=false      Display total file sizes
  --since=              Show created since Id or Name, include non-running
[root@localhost go]# docker ps
CONTAINER ID        IMAGE               COMMAND             CREATED             STATUS              PORTS               NAMES
[root@localhost go]# docker ps -a
CONTAINER ID        IMAGE                               COMMAND                CREATED             STATUS                     PORTS               NAMES
20fb80443f2a        centos:v7.0                         "/bin/bash"            11 minutes ago                                                     distracted_lumiere
aa670a3b8038        ubuntu:14.04                        "/bin/bash"            2 weeks ago         Exited (0) 2 weeks ago                         grave_lovelace
bf2565b8f666        hub.c.163.com/public/ubuntu:14.04   "/bin/sh -c '/usr/sb   2 weeks ago         Exited (130) 2 weeks ago                       silly_pare
3bef58fab95a        quay.io/coreos/etcd:v3.0.4          "/usr/local/bin/etcd   3 weeks ago         Exited (0) 3 weeks ago                         adoring_turing
从上面的结果也可以看出,docker create 命令只是创建了一个容器并没有启动它
docker run
当然创建和启动容器也可以一步完成,使用docker run 命令,该命令相当于docker create + docker start命令,docker run 命令支持的参数和docker create 基本一致。
docker run命令的执行步骤大致如下:
·检查本地是否存在指定的镜像,不存在就从公有仓库下载;
·利用镜像创建一个容器,并启动该容器;
·分配一个文件系统给容器,并在只读的镜像层外面挂载一层可读写层;
·从宿主主机配置的网桥接口中桥接一个虚拟接口到容器中;
·从网桥的地址池配置一个IP地址给容器;
·执行用户指定的应用程序;
·执行完毕后容器被自动终止。
例如:
[root@localhost go]# docker run centos:v7.0 /bin/echo "hello world"
hello wrold
[root@localhost go]# docker ps -a
CONTAINER ID        IMAGE                               COMMAND                CREATED             STATUS                     PORTS               NAMES
bfec95da73a6        centos:v7.0                         "/bin/echo 'hello wo   6 seconds ago       Exited (0) 5 seconds ago                       silly_sinoussi
上面的命令创建了一个centos容器,启动并执行COMMAND: /bin/echo "hello world" 命令执行完之后结束运行,可以用docker ps -a 命令查看到一个处于停止状态的容器
docker run 命令如果没有指定COMMAND,则会用镜像指定的默认COMMAND,如果镜像也没有指定COMMAND,则会抛出错误。
[root@localhost go]# docker run -d nginx:latest
3882e9573be8c85a42c4a46d3c2bd4e42c8fd01f0491ae053296bc2b517bf342
[root@localhost go]# docker ps --no-trunc
CONTAINER ID                                                       IMAGE               COMMAND                    CREATED             STATUS              PORTS               NAMES
3882e9573be8c85a42c4a46d3c2bd4e42c8fd01f0491ae053296bc2b517bf342   nginx:latest        "nginx -g 'daemon off;'"   21 seconds ago
[root@localhost go]# docker run centos:v7.0
Error response from daemon: No command specified
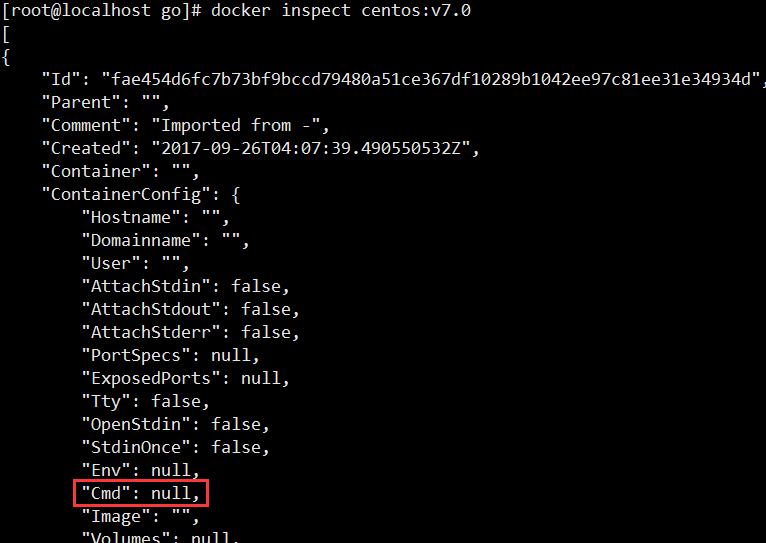
-d 参数可以让容器在后台运行。可以看到这里的nginx镜像的默认COMMAND 为 “nginx -g 'daemon off;'”,而centos镜像没有指定默认的COMMAND,所以不指定COMMAND会报错,可以用上篇提到的docker inspect 命令来查看镜像的默认COMMAND
使用前面提到的 -it 参数可以打开一个伪终端来供我们在容器中执行shell命令,像操作本地机器一样方便
[root@localhost ~]# docker exec -it centos:v7.0 /bin/bash
[root@4b9028589de7 /]# ps
  PID TTY          TIME CMD
    1 ?        00:00:00 bash
   17 ?        00:00:00 ps
[root@4b9028589de7 /]# whoami
root
[root@4b9028589de7 /]# ls
bin  boot  dev  etc  fastboot  home  lib  lib64  lost+found  media  mnt  opt  proc  root  run  sbin  srv  sys  tmp  usr  var
[root@4b9028589de7 /]# exit
exit
可以看到docker容器只运行了bash进程,也就是COMMAND指定的程序,这也是之所以Docker比虚拟机轻量级的原因之一。
docker logs
对于运行在后台的容器(使用 docker run -d),容器的标准输出会被重定向写入相应的日志文件中,这时如果我们想要看这个容器的标准输出,可以使用 docker logs 命令
[root@localhost ~]# docker logs --help

Usage: docker logs [OPTIONS] CONTAINER

Fetch the logs of a container

  -f, --follow=false        Follow log output
  --help=false              Print usage
  --since=                  Show logs since timestamp
  -t, --timestamps=false    Show timestamps
  --tail=all                Number of lines to show from the end of the logs
比如现在在我的容器中有一个shell脚本 /usr/local/bin/hello.sh 内容如下:
#!/bin/sh

while [[ 1 ]]
do
        echo "hello docker"
        sleep 2
done
就是每隔两秒打印一句 hello docker,现在我们后台启动这个容器,然后用 docker logs 命令查看输出
[root@localhost ~]# docker run -d centos:hello-docker /bin/sh /usr/local/bin/hello.sh
e2fa608635bddaca537a2a850f6d25259f6f54f98428be6a0fc96a771ad478f6
[root@localhost ~]# docker logs -f e2f
hello docker
hello docker
hello docker
hello docker
hello docker
hello docker
hello docker
hello docker
hello docker
hello docker
hello docker
hello docker
hello docker
hello docker
hello docker
hello docker
hello docker
hello docker
docker start/stop
docker stop 命令停止一个或多个容器的运行,实现机制是先向容器发送一个SIGTERM信号,过一段时间再发送一个SIGKILL信号,这样就确保了能够结束进程。
[root@localhost go]# docker stop 20f
20f
[root@localhost go]# docker ps
CONTAINER ID        IMAGE               COMMAND             CREATED             STATUS              PORTS               NAMES
docker start 命令可以重新启动停止了的一个或多个容器
[root@localhost go]# docker start --help

Usage: docker start [OPTIONS] CONTAINER [CONTAINER...]

Start one or more stopped containers

  -a, --attach=false         Attach STDOUT/STDERR and forward signals
  --help=false               Print usage
  -i, --interactive=false    Attach container's STDIN
[root@localhost go]# docker start 20fb
20fb
[root@localhost go]# docker ps
CONTAINER ID        IMAGE               COMMAND             CREATED             STATUS              PORTS               NAMES
20fb80443f2a        centos:v7.0         "/bin/bash"         25 minutes ago      Up 4 seconds                            distracted_lumiere
docker exec
对于容器来说,通常我们都是让其在后台运行,比如对于nginx来说,我们通常这样启动容器
[root@localhost ~]# docker run -d -p 8080:80 nginx:latest nginx -g 'daemon off;'
b0a3266aaf05a9b7b5a7d910716c37a32330f0a5f9a34481679619c7217b5bb9
[root@localhost ~]# curl '127.0.0.1:8080'
<!DOCTYPE html>
<html>
<head>
<title>Welcome to nginx!</title>
<style>
    body {
        width: 35em;
        margin: 0 auto;
        font-family: Tahoma, Verdana, Arial, sans-serif;
    }
</style>
</head>
<body>
<h1>Welcome to nginx!</h1>
<p>If you see this page, the nginx web server is successfully installed and
working. Further configuration is required.</p>

<p>For online documentation and support please refer to
<a href="http://nginx.org/">nginx.org</a>.<br/>
Commercial support is available at
<a href="http://nginx.com/">nginx.com</a>.</p>

<p><em>Thank you for using nginx.</em></p>
</body>
</html>
-d 参数以守护进程方式运行容器
-p 参数可以将容器的端口映射到宿主机的指定端口
我们知道,一个容器通常只能运行一个COMMAND,这时如果我还想在容器中执行其他命令该怎么办呢,比如在nginx容器中运行bash,docker exec命令可以实现该功能
[root@localhost ~]# docker exec --help

Usage: docker exec [OPTIONS] CONTAINER COMMAND [ARG...]

Run a command in a running container

  -d, --detach=false         Detached mode: run command in the background
  --help=false               Print usage
  -i, --interactive=false    Keep STDIN open even if not attached
  -t, --tty=false            Allocate a pseudo-TTY
  -u, --user=                Username or UID (format: <name|uid>[:<group|gid>])
比如我可以这样来执行shell命令
[root@localhost ~]# docker ps
CONTAINER ID        IMAGE               COMMAND                CREATED             STATUS              PORTS                  NAMES
b0a3266aaf05        nginx:latest        "nginx -g 'daemon of   13 minutes ago      Up 13 minutes       0.0.0.0:8080->80/tcp   cocky_lumiere
[root@localhost ~]# docker exec -it b0a /bin/bash
root@b0a3266aaf05:/# ls
bin  boot  dev	etc  home  lib	lib64  media  mnt  opt	proc  root  run  sbin  srv  sys  tmp  usr  var
root@b0a3266aaf05:/# cd /etc/
root@b0a3266aaf05:/etc# ls
adduser.conf		debconf.conf	fonts	  gshadow-   issue.net	    localtime	 mtab		pam.d	   rc1.d  rcS.d        shadow			  subuid
alternatives		debian_version	fstab	  host.conf  kernel	    login.defs	 nginx		passwd	   rc2.d  resolv.conf  shadow-			  systemd
apt			default		gai.conf  hostname   ld.so.cache    logrotate.d  nsswitch.conf	passwd-    rc3.d  rmt	       shells			  terminfo
bash.bashrc		deluser.conf	group	  hosts      ld.so.conf     machine-id	 opt		profile    rc4.d  securetty    skel			  timezone
bindresvport.blacklist	dpkg		group-	  init.d     ld.so.conf.d   mke2fs.conf  os-release	profile.d  rc5.d  security     staff-group-for-usr-local  ucf.conf
cron.daily		environment	gshadow   issue      libaudit.conf  motd	 pam.conf	rc0.d	   rc6.d  selinux      subgid			  update-motd.d
root@b0a3266aaf05:/etc# cat nginx/nginx.conf

user  nginx;
worker_processes  1;

error_log  /var/log/nginx/error.log warn;
pid        /var/run/nginx.pid;


events {
    worker_connections  1024;
}


http {
    include       /etc/nginx/mime.types;
    default_type  application/octet-stream;

    log_format  main  '$remote_addr - $remote_user [$time_local] "$request" '
                      '$status $body_bytes_sent "$http_referer" '
                      '"$http_user_agent" "$http_x_forwarded_for"';

    access_log  /var/log/nginx/access.log  main;

    sendfile        on;
    #tcp_nopush     on;

    keepalive_timeout  65;

    #gzip  on;

    include /etc/nginx/conf.d/*.conf;
}
root@b0a3266aaf05:/etc# exit
exit
上面我们进入到容器中,查看了nginx的配置文件然后退出,整个过程没有影响到容器的运行。
docker rm
docker rm 命令可以删除一个或多个容器,默认只能删除已停止的容器,如果想删除正在运行的容器,可以加 -f 参数,这样docker会先尝试终止容器运行,然后再删除容器
[root@localhost ~]# docker ps -a
CONTAINER ID        IMAGE                               COMMAND                CREATED             STATUS                      PORTS               NAMES
b0a3266aaf05        nginx:latest                        "nginx -g 'daemon of   17 minutes ago      Exited (0) 3 seconds ago                        cocky_lumiere
4b9028589de7        centos:v7.0                         "/bin/bash"            50 minutes ago      Exited (0) 48 minutes ago                       happy_heisenberg
aa670a3b8038        ubuntu:14.04                        "/bin/bash"            2 weeks ago         Exited (0) 2 weeks ago                          grave_lovelace
bf2565b8f666        hub.c.163.com/public/ubuntu:14.04   "/bin/sh -c '/usr/sb   3 weeks ago         Exited (130) 3 weeks ago                        silly_pare
3bef58fab95a        quay.io/coreos/etcd:v3.0.4          "/usr/local/bin/etcd   3 weeks ago         Exited (0) 3 weeks ago                          adoring_turing
[root@localhost ~]# docker rm b0a 4b9
b0a
4b9
docker commit
当我们在一个容器中做了一些更改之后,想要保存这些更改方便以后使用,我们可以使用 docker commit 提交更改,这样会在本地生成一个新的镜像,这个镜像保存了你之前所做的所有修改。
[root@localhost sshd_ubuntu]# docker commit --help

Usage: docker commit [OPTIONS] CONTAINER [REPOSITORY[:TAG]]

Create a new image from a container's changes

  -a, --author=       Author (e.g., "John Hannibal Smith <[email protected]>")
  -c, --change=[]     Apply Dockerfile instruction to the created image
  --help=false        Print usage
  -m, --message=      Commit message
  -p, --pause=true    Pause container during commit
以Nginx镜像为例,在容器中创建一个文件,然后 docker commit:
[root@localhost sshd_ubuntu]# docker run -d -p 8080:80 nginx:latest
ffa8237fe81a34e13c0ef7c13ec0dd52775fee0e2e9f377e6924929ac4eb7915
[root@localhost sshd_ubuntu]# docker ps
CONTAINER ID        IMAGE               COMMAND                CREATED             STATUS              PORTS                  NAMES
ffa8237fe81a        nginx:latest        "nginx -g 'daemon of   3 seconds ago       Up 3 seconds        0.0.0.0:8080->80/tcp   compassionate_lumiere
[root@localhost sshd_ubuntu]# docker exec -it ffa /bin/bash
root@ffa8237fe81a:/# echo "Hello,docker!" > /usr/share/nginx/html/test.html
root@ffa8237fe81a:/# ls /usr/share/nginx/html/test.html
/usr/share/nginx/html/test.html
root@ffa8237fe81a:/# exit
[root@localhost sshd_ubuntu]# curl '127.0.0.1:8080/test.html'
Hello,docker!
[root@localhost sshd_ubuntu]# docker commit -m "创建test.html" ffa nginx:myself
ffbf82fc975d8804bdd0f219e038be0c4f788303938671ae1db61be9bb6703e0
[root@localhost sshd_ubuntu]# docker images
REPOSITORY TAG IMAGE ID CREATED VIRTUAL SIZE
nginx myself ffbf82fc975d 40 seconds ago 108.3 MB
这样就把我们刚刚的修改提交生成了一个新镜像 nginx:myself
docker export/import
有时我们需要将一个容器迁移到另一个容器上,这时我们使用docker提供的导入导出命令(docker import/export)就可以很方便的将容器导出成备份文件,然后再从备份文件导入成镜像。
[root@localhost ~]# docker export --help

Usage: docker export [OPTIONS] CONTAINER

Export a filesystem as a tar archive (streamed to STDOUT by default)

  --help=false       Print usage
  -o, --output=      Write to a file, instead of STDOUT
docker export命令用来导出一个容器为镜像,-o 参数可以指定导出的镜像文件名
[root@localhost containers]# docker export -o nginx-1017.tar 1b6
[root@localhost containers]# ls
nginx-1017.tar
docker import 可以导入之前导出的镜像
[root@localhost containers]# docker import --help

Usage: docker import [OPTIONS] URL|- [REPOSITORY[:TAG]]

Create an empty filesystem image and import the contents of the
tarball (.tar, .tar.gz, .tgz, .bzip, .tar.xz, .txz) into it, then
optionally tag it.

  -c, --change=[]    Apply Dockerfile instruction to the created image
  --help=false       Print usage
docker import URL 表示从某个URL读取镜像文件
docker import - 表示从标准输入读取镜像文件
比如导入之前的nginx-1017.tar
[root@localhost containers]# cat nginx-1017.tar | docker import - nginx:backup
410962fdbc386075569f135b725baaf684708947aee2f3e0f4b4281522f73b49
[root@localhost containers]# docker images
REPOSITORY          TAG                 IMAGE ID            CREATED             VIRTUAL SIZE
nginx               backup              410962fdbc38        7 seconds ago       106.6 MB
nginx               latest              2ecc072be0ec        6 days ago          108.3 MB
ubuntu              14.04               b44ce450cb60        4 weeks ago         188 MB
[root@localhost containers]#
以上就是对docker容器操作的基本介绍,希望对大家有帮助
智能推荐
发自肺腑深入肌肤 —— 一位武汉老程序员的自白-程序员宅基地
文章浏览阅读159次。我是一个对技术没有很大热情的程序员。即使在项目忙的时候我也不会加班很长时间,因为我觉得我的身体坐了一天了,它予我以生存,我必须善待它,但步行3公里回去吃完饭我还是会在各论坛上看看解决问题的最好办法,因为公司予我以饭碗,我必须对得起他,不断的学习只是因为单纯的觉得想要更好就必须学习,出于欲望而不是热情有时会走..._饭现在只能/ 发自肺腑t呢
卷积神经网络在图像重建任务中的应用-程序员宅基地
文章浏览阅读323次,点赞4次,收藏3次。1.背景介绍卷积神经网络(Convolutional Neural Networks,CNN)是一种深度学习模型,广泛应用于图像分类、目标检测、语音识别等多个领域。在图像重建任务中,卷积神经网络能够自动学习图像特征,从而实现高效的图像重建。图像重建是指从观测到的有限信息(如噪声图像、缺失图像或压缩图像)中恢复原始图像的过程。图像重建是计算机视觉领域的一个关键任务,具有广泛的应用前景,如图像...
你是否会被人工智能哭泣的声音所打动?| Mixlab 技术前沿-程序员宅基地
文章浏览阅读179次。#音频工程#、#AI语音技术#、#AI Deepfake#AI 语音——语音识别技术,与语音合成语音识别技术是指机器自动将人的语音,转成文字的技术,即ASR技术:Automatic S..._sonantic ai
arcgis for flex api version3.7 教程:5.使用Editor对地图进行编辑-程序员宅基地
文章浏览阅读1.5k次。ArcGIS的网络编辑操作(可以认为是网页端的相关地理处理操作)需要feature service来提供符号信息和几何数据信息。feature service允许你创建自定义的REST方法节点,用来存储和查询地理数据,如点、线和面。存储自定义的渲染规则和元数据信息,例如地名,评级,地址等。对存储的数据进行分析和计算。ArcGIS API for Flex提供的Featurelayer允许你获取
查看变量类型的python内置函数名是_Python-day05-20200722-函数查看-变量类型和不可变类型参数传递-递归函数-匿名函数-排序映射筛选器-内置函数摘要-一个函数作为另一个函数的返...-程序员宅基地
文章浏览阅读316次。P115# 函数的回顾总结# 1.函数的声明 def# 2.函数的格式 def 函数名(形式参数1,形式参数2....)# 3.函数的调用 函数名(实参1,实参2.....)# 4.函数返回值 使用return 语句返回函数的执行结果# 5.函数返回多个结果 将多个数据打包成一个整体返回# 可以使用字典和列表 通常用元组# 函数名字也是一个标识符# 由字母 数字 下划线 组成 不能以数字开头 ..._查看变量类型的python内置函数为
工作压力大,如何自我调节?_压力大怎么自我调节-程序员宅基地
文章浏览阅读4.4k次。工作压力对我们有很大的不良影响。我们能否消除现代工作生活所带来的压力?不——因为这不是一件绝对的坏事,所以我们不能消除。在生活中我们需要一定的压力。压力可以刺激我们采取一些行动,挑战我们自身的能力,帮助我们达到自己认为不可能达到的目标。问题就在于我们怎么处理、安排和缓解工作中的压力而不至于因为压力过大而垮掉。 缓解压力的四原则 1.用积极的态度面对压力。 _压力大怎么自我调节
随便推点
iOS开发笔记 -- 蓝牙开发_蓝牙appendbytes-程序员宅基地
文章浏览阅读263次。简述 最近在做一个蓝牙项目,由于之前并没有接触过蓝牙开发,开发的过程中 也遇到了很多的问题,在此 记录一下基本的概念和解决的方案。一、蓝牙的基本概念在蓝牙的通讯过程中涉及了两个主要的角色 -&amp;amp;amp;gt; 中心设备和外围设备,外围设备 有其它设备所需要的数据,而中心设备 使用外围设备提供的数据完成特定的任务,简单理解 中心设备就是 扫描周围蓝牙硬件的设备,外围设备就是 被扫描的设..._蓝牙appendbytes
【Transformer-Hugging Face手册 07/10】 微调预训练模型_预训练模型的tokenizer的返回类型是batchencoding吗-程序员宅基地
文章浏览阅读983次,点赞49次,收藏12次。使用预训练模型有显着的好处。它可以降低计算成本和碳足迹,并允许您使用最先进的模型,而无需从头开始训练。 Transformers 提供了针对各种任务的数千个预训练模型的访问权限。当您使用预训练模型时,您可以在特定于您的任务的数据集上对其进行训练。这被称为微调,是一种非常强大的训练技术。_预训练模型的tokenizer的返回类型是batchencoding吗
探索Blender OSM:3D建模与OpenStreetMap的完美结合-程序员宅基地
文章浏览阅读377次,点赞3次,收藏4次。探索Blender OSM:3D建模与OpenStreetMap的完美结合项目地址:https://gitcode.com/vvoovv/blender-osm项目简介Blender OSM 是一个开源插件,它将流行的3D建模工具Blender与全球最大的地理信息数据库OpenStreetMap(OSM)相结合。通过此插件,用户可以轻松地导入和编辑基于OSM数据的3D模型,大大简化了城市景..._blender osm
遨博协作机器人ROS开发 - MoveGroup Python接口编程_moveit group python-程序员宅基地
文章浏览阅读1.7k次。大家好,欢迎关注遨博学院带来的系列技术分享文章(协作机器人ROS开发),今天我们来学习遨博机械臂MoveGroup Python接口编程。_moveit group python
运维工程师必备技能_运维工程师 技能专长 csdn-程序员宅基地
文章浏览阅读2k次。通用技能 公司与个人 公司是盈利性组织个人和公司必须双赢在认同公司理念且能够给公司创造足够价值的基础上,为个人发展而工作WHO AM I 黑客是守正出奇且具备创造力的群体 守正出奇 这条正道/底线得坚守但如果太过正就迂腐了,为了搞定任务有时得出奇招创造力 一个没有创造力的人是多么的可怜,对于团队来说也是一种耻辱本技能表的本质目的只有一个:引导你拥有足够的创造力黑客也可以是一..._运维工程师 技能专长 csdn
c盘越来越大怎么清理?C:\Windows\System32\DriverStore\FileRepository-程序员宅基地
文章浏览阅读5.7k次。c盘越来越大怎么清理?清理C:\Windows\System32\DriverStore\FileRepository c盘越来越大怎么清理?装系统时划了50G给C盘,随着使用C..._c:\windows\system32\driverstore