android实现登录,Login姿势对不对?_window.android.loginroom(mb, myroom)-程序员宅基地
技术标签: Android Base android login android-登录
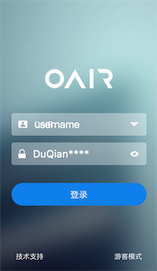
android最常见的UI之一,登录遍布各大APP,这么easy的东西还是要写写,主要是介绍下:密码的显示与隐藏,用户名和密码表单的网络请求和提交方式等细节问题。看一个简单的效果:
一,乾言
界面元素,logo,用户名,密码,登录按钮,底部两个按钮,访问有loading效果。
点击登录,获取用户和密码,简单校验,发送网络请求,然后校验请求结果,有异常做响应处理。
二,xml布局,view
布局代码,有点多,直接贴出来。需要的对应改吧改吧。
<RelativeLayout xmlns:android="http://schemas.android.com/apk/res/android"
    android:layout_width="match_parent"
    android:layout_height="match_parent"
    android:orientation="vertical"
    android:layout_gravity="center"
    android:background="@drawable/login_bg">

    <!--main content-->
    <LinearLayout
        android:id="@+id/ll_login_body"
        android:layout_width="match_parent"
        android:layout_height="wrap_content"
        android:layout_gravity="center"
        android:layout_centerVertical="true"
        android:orientation="vertical">
        <!--logo-->
        <ImageView
            android:id="@+id/iv_logo"
            android:layout_width="150dp"
            android:layout_height="wrap_content"
            android:layout_gravity="center"
            android:layout_marginBottom="30dp"
            android:src="@drawable/logo_oair" />
        <!--login username-->
        <LinearLayout
            android:id="@+id/ll_login_user"
            android:layout_width="wrap_content"
            android:layout_height="50dp"
            android:background="@drawable/input_bg"
            android:layout_gravity="center"
            android:orientation="horizontal"
            android:layout_marginLeft="30dp"
            android:layout_marginRight="30dp"
            android:layout_marginTop="20dp">

            <ImageView
                android:layout_width="wrap_content"
                android:layout_height="wrap_content"
                android:layout_gravity="center"
                android:layout_marginLeft="15dp"
                android:background="@drawable/icon_user" />

            <EditText
                android:id="@+id/et_username"
                android:layout_width="0dp"
                android:layout_height="40dp"
                android:layout_weight="5"
                android:layout_gravity="center"
                android:layout_marginLeft="15dp"
                android:singleLine="true"
                android:ellipsize="middle"
                android:background="@android:color/transparent"
                android:text="@string/login_username_default"
                android:editable="false"
                android:textColor="@color/white" />
            <ImageView
                android:id="@+id/iv_show_name"
                android:layout_width="50dp"
                android:layout_height="50dp"
                android:layout_gravity="center"
                android:layout_marginLeft="5dp"
                android:layout_marginRight="2dp"
                android:scaleType="center"
                android:clickable="true"
                android:src="@drawable/icon_down" />
        </LinearLayout>
        <!--login password-->
        <LinearLayout
            android:layout_width="wrap_content"
            android:layout_height="50dp"
            android:background="@drawable/input_bg"
            android:layout_gravity="center"
            android:orientation="horizontal"
            android:layout_marginLeft="30dp"
            android:layout_marginRight="30dp"
            android:layout_marginTop="15dp">

            <ImageView
                android:layout_width="wrap_content"
                android:layout_height="wrap_content"
                android:layout_gravity="center"
                android:layout_marginLeft="15dp"
                android:background="@drawable/icon_pwd"
                />

            <EditText
                android:id="@+id/et_password"
                android:layout_width="0dp"
                android:layout_height="40dp"
                android:layout_weight="5"
                android:layout_gravity="center"
                android:layout_marginLeft="15dp"
                android:focusable="true"
                android:inputType="textPassword"
                android:background="@android:color/transparent"
                android:textColor="@color/white" />

            <ImageView
                android:id="@+id/iv_hidden_pwd"
                android:layout_width="50dp"
                android:layout_height="50dp"
                android:layout_gravity="center"
                android:layout_marginLeft="5dp"
                android:layout_marginRight="2dp"
                android:scaleType="center"
                android:clickable="true"
                android:src="@drawable/icon_hidden" />

        </LinearLayout>
        <!--login btn-->
        <Button
            android:id="@+id/btn_login"
            android:layout_width="wrap_content"
            android:layout_height="50dp"
            android:layout_gravity="center"
            android:layout_marginTop="40dp"
            android:text="@string/login_btn"
            android:textSize="20sp"
            android:textColor="@drawable/text_select"
            android:layout_marginLeft="30dp"
            android:layout_marginRight="30dp"
            android:background="@drawable/btn_login_bg" />

    </LinearLayout>
    <!--bottom btn-->
    <RelativeLayout
        android:layout_width="match_parent"
        android:layout_height="wrap_content"
        android:layout_gravity="center"
        android:layout_marginLeft="30dp"
        android:layout_marginRight="30dp"
        android:layout_alignParentBottom="true"
        android:layout_marginBottom="20dp"
        android:layout_below="@id/ll_login_body">

        <TextView
            android:id="@+id/tv_login_contactus"
            android:text="@string/login_about"
            android:layout_width="wrap_content"
            android:layout_height="wrap_content"
            android:layout_alignParentLeft="true"
            android:layout_alignParentBottom="true"
            android:textSize="16sp"
            android:padding="10dp"
            android:clickable="true"
            android:textColor="#FFF" />

        <TextView
            android:id="@+id/tv_login_guest"
            android:text="@string/login_guest"
            android:layout_width="wrap_content"
            android:layout_height="wrap_content"
            android:layout_alignParentRight="true"
            android:layout_alignParentBottom="true"
            android:textSize="16sp"
            android:padding="10dp"
            android:clickable="true"
            android:textColor="#FFF" />
    </RelativeLayout>

    <ProgressBar
        android:id="@+id/pb_login"
        style="@style/MyCircleProgressBar"
        android:layout_width="50dp"
        android:layout_height="wrap_content"
        android:layout_centerInParent="true"
        android:visibility="gone"
        android:indeterminateDuration="700"/>
</RelativeLayout>
注册view和事件
findViewById的事情就别自己一个个复制了,使用ButterKnife依赖注入view和事件,类似的框架很多。例如:
    @Bind(R.id.et_username)
    public EditText et_username;
    @Bind(R.id.et_password)
    public EditText et_password;
在onCreate方法中,注入:
ButterKnife.bind(this);之前犯过错误,@Bind view需要使用public修饰属性。
Error:(68, 23) 错误: @Bind fields must not be private or static. (com.oair.oair_client.LoginActivity.iv_logo)三,activity登录逻辑
获取edittext中的value,判断用户名,密码是否为空,如果ok就进行网络请求,post后台登录接口。我用retrofit+okhttp+RxJava/RxAndroid实现登录,json用内部封装的gson解析。
 @OnClick(R.id.btn_login)
    public void LoginOair(){
        Login();
    }
    //Login 管理员登录
    public void Login() {
        // 点击登录的时候 拿到用户名和密码的值
        username = et_username.getText().toString();
        password = et_password.getText().toString();
        //判断密码是否为空
        if (StringUtils.isEmpty(password)) {
            showDialog(context.getResources().getString(R.string.dialog_pwd_empty));
        } else {
            //验证登录是否成功
            postLogin();
        }
    }
    private void postLogin() {
        pb_login.setVisibility(View.VISIBLE);
        MyRetrofitUtils.init().loginOair(password, new Subscriber<OairResponse>() {
            @Override
            public void onCompleted() {
                pb_login.setVisibility(View.GONE);
            }
            @Override
            public void onError(Throwable e) {
                checkLocalPwd();
                LogUtils.debug(TAG,"error "+e.toString());
                pb_login.setVisibility(View.GONE);
            }
            @Override
            public void onNext(OairResponse oairResponse) {
                LogUtils.debug(TAG,oairResponse.toString());
                if (oairResponse.result == MyConstant.RESULT_SUCCESS){
                    enterMainActivity();
                }else{       showDialog(context.getResources().getString(R.string.dialog_pwd_error));
                }
            }
        });
    }
不会用?可以使用你喜欢的网络访问方式,OKHTTP,HTTPUrlConnection,xUtils,volley都行。或者请看我的另外一篇文章,点击打开:
RxJava+Retrofit+Gson实现网络请求
四,隐藏和显示密码
EditText控件本身就封装好了显示与隐藏的方法,可以方便地将文本置为可见,或者隐藏。
 //切换输入密码的模式,明文or密文显示
    private boolean isHidden=true;
    @OnClick(R.id.iv_hidden_pwd)
    public void hiddenPassword() {
        if (isHidden) {
            //设置EditText文本为可见的
            et_password.setTransformationMethod(HideReturnsTransformationMethod.getInstance());
        } else {
            //设置EditText文本为隐藏的
            et_password.setTransformationMethod(PasswordTransformationMethod.getInstance());
        }
        isHidden = !isHidden;
        et_password.postInvalidate();
        //切换后将EditText光标置于末尾
        CharSequence charSequence = et_password.getText();
        if (charSequence!=null) {
            Spannable spanText = (Spannable) charSequence;
            Selection.setSelection(spanText, charSequence.length());
        }
    }
五,输入法弹出,布局调整
有时候手机频幕小,弹出输入法框,可能会将edittext控件挡住,影响输入。这时候我们可以配置下activity。
 <activity
            android:name="com.xx.client.LoginActivity"
            android:configChanges="keyboardHidden|orientation"
            android:label="@string/title_activity_login"
            android:launchMode="singleTask"
            android:screenOrientation="portrait"
            android:windowSoftInputMode="adjustResize"/>
重点就是android:configChanges和android:windowSoftInputMode的属性,让activity自动调整界面,输入法位于输入框的下方。
六,总结
看似简单的一个功能,细看起来,知识点还是挺多的。这里面还有很多东西没有列出,比如用户名下拉选择一个用户登录,登录保存状态下次免登录,cookie的使用等。
未完待续,欢迎交流,杜乾,Dusan,Q 291902259。
智能推荐
c# 调用c++ lib静态库_c#调用lib-程序员宅基地
文章浏览阅读2w次,点赞7次,收藏51次。四个步骤1.创建C++ Win32项目动态库dll 2.在Win32项目动态库中添加 外部依赖项 lib头文件和lib库3.导出C接口4.c#调用c++动态库开始你的表演...①创建一个空白的解决方案,在解决方案中添加 Visual C++ , Win32 项目空白解决方案的创建:添加Visual C++ , Win32 项目这......_c#调用lib
deepin/ubuntu安装苹方字体-程序员宅基地
文章浏览阅读4.6k次。苹方字体是苹果系统上的黑体,挺好看的。注重颜值的网站都会使用,例如知乎:font-family: -apple-system, BlinkMacSystemFont, Helvetica Neue, PingFang SC, Microsoft YaHei, Source Han Sans SC, Noto Sans CJK SC, W..._ubuntu pingfang
html表单常见操作汇总_html表单的处理程序有那些-程序员宅基地
文章浏览阅读159次。表单表单概述表单标签表单域按钮控件demo表单标签表单标签基本语法结构<form action="处理数据程序的url地址“ method=”get|post“ name="表单名称”></form><!--action,当提交表单时,向何处发送表单中的数据,地址可以是相对地址也可以是绝对地址--><!--method将表单中的数据传送给服务器处理,get方式直接显示在url地址中,数据可以被缓存,且长度有限制;而post方式数据隐藏传输,_html表单的处理程序有那些
PHP设置谷歌验证器(Google Authenticator)实现操作二步验证_php otp 验证器-程序员宅基地
文章浏览阅读1.2k次。使用说明:开启Google的登陆二步验证(即Google Authenticator服务)后用户登陆时需要输入额外由手机客户端生成的一次性密码。实现Google Authenticator功能需要服务器端和客户端的支持。服务器端负责密钥的生成、验证一次性密码是否正确。客户端记录密钥后生成一次性密码。下载谷歌验证类库文件放到项目合适位置(我这边放在项目Vender下面)https://github.com/PHPGangsta/GoogleAuthenticatorPHP代码示例://引入谷_php otp 验证器
【Python】matplotlib.plot画图横坐标混乱及间隔处理_matplotlib更改横轴间距-程序员宅基地
文章浏览阅读4.3k次,点赞5次,收藏11次。matplotlib.plot画图横坐标混乱及间隔处理_matplotlib更改横轴间距
docker — 容器存储_docker 保存容器-程序员宅基地
文章浏览阅读2.2k次。①Storage driver 处理各镜像层及容器层的处理细节,实现了多层数据的堆叠,为用户 提供了多层数据合并后的统一视图②所有 Storage driver 都使用可堆叠图像层和写时复制(CoW)策略③docker info 命令可查看当系统上的 storage driver主要用于测试目的,不建议用于生成环境。_docker 保存容器
随便推点
网络拓扑结构_网络拓扑csdn-程序员宅基地
文章浏览阅读834次,点赞27次,收藏13次。网络拓扑结构是指计算机网络中各组件(如计算机、服务器、打印机、路由器、交换机等设备)及其连接线路在物理布局或逻辑构型上的排列形式。这种布局不仅描述了设备间的实际物理连接方式,也决定了数据在网络中流动的路径和方式。不同的网络拓扑结构影响着网络的性能、可靠性、可扩展性及管理维护的难易程度。_网络拓扑csdn
JS重写Date函数,兼容IOS系统_date.prototype 将所有 ios-程序员宅基地
文章浏览阅读1.8k次,点赞5次,收藏8次。IOS系统Date的坑要创建一个指定时间的new Date对象时,通常的做法是:new Date("2020-09-21 11:11:00")这行代码在 PC 端和安卓端都是正常的,而在 iOS 端则会提示 Invalid Date 无效日期。在IOS年月日中间的横岗许换成斜杠,也就是new Date("2020/09/21 11:11:00")通常为了兼容IOS的这个坑,需要做一些额外的特殊处理,笔者在开发的时候经常会忘了兼容IOS系统。所以就想试着重写Date函数,一劳永逸,避免每次ne_date.prototype 将所有 ios
如何将EXCEL表导入plsql数据库中-程序员宅基地
文章浏览阅读5.3k次。方法一:用PLSQL Developer工具。 1 在PLSQL Developer的sql window里输入select * from test for update; 2 按F8执行 3 打开锁, 再按一下加号. 鼠标点到第一列的列头,使全列成选中状态,然后粘贴,最后commit提交即可。(前提..._excel导入pl/sql
Git常用命令速查手册-程序员宅基地
文章浏览阅读83次。Git常用命令速查手册1、初始化仓库git init2、将文件添加到仓库git add 文件名 # 将工作区的某个文件添加到暂存区 git add -u # 添加所有被tracked文件中被修改或删除的文件信息到暂存区,不处理untracked的文件git add -A # 添加所有被tracked文件中被修改或删除的文件信息到暂存区,包括untracked的文件...
分享119个ASP.NET源码总有一个是你想要的_千博二手车源码v2023 build 1120-程序员宅基地
文章浏览阅读202次。分享119个ASP.NET源码总有一个是你想要的_千博二手车源码v2023 build 1120
【C++缺省函数】 空类默认产生的6个类成员函数_空类默认产生哪些类成员函数-程序员宅基地
文章浏览阅读1.8k次。版权声明:转载请注明出处 http://blog.csdn.net/irean_lau。目录(?)[+]1、缺省构造函数。2、缺省拷贝构造函数。3、 缺省析构函数。4、缺省赋值运算符。5、缺省取址运算符。6、 缺省取址运算符 const。[cpp] view plain copy_空类默认产生哪些类成员函数