Android实训案例(一)——计算器的运算逻辑-程序员宅基地
Android实训案例(一)——计算器的运算逻辑
应一个朋友的邀请,叫我写一个计算器,开始觉得,就一个计算器嘛,很简单的,但是写着写着发现自己写出来的逻辑真不严谨,于是搜索了一下,看到mk(没有打广告….)上有视频,于是看了下他的逻辑,以前还真是小瞧计算器了,计算器要是高级一点的处理起来更加繁琐,这里就做了一个简单一点的,这次用的是Android Studio 开发的,毕竟自己也是一直很推崇AS,但是在之前的博客里都只是为了方便,一直在用Eclipse
一直强烈推荐大家还是转移到AS上去,虽然我工作一直在用Eclipse,不过AS的脚步一直没有落下,好处多多!

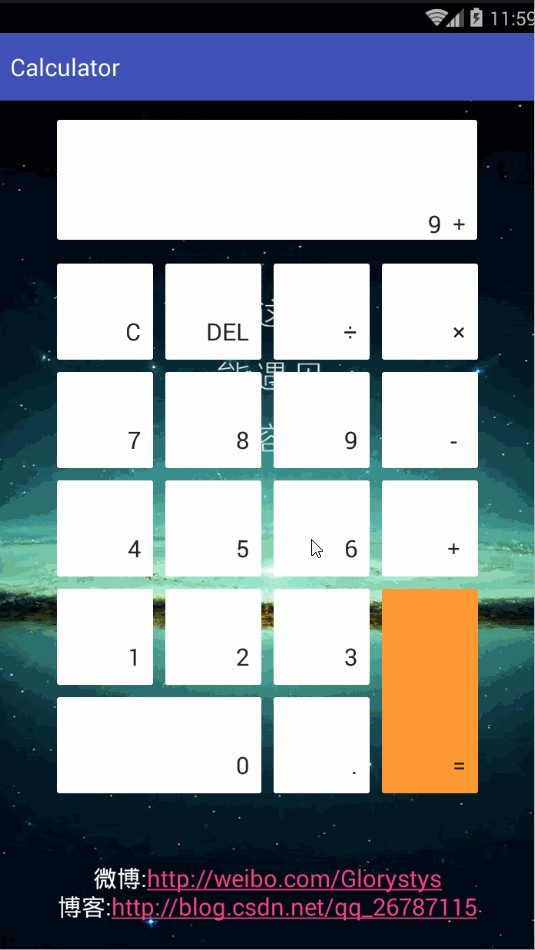
运行截图:
这个仍然还是有许多不完善的地方,如果看官觉得可以改的话,欢迎参与
activity_main.xml
<LinearLayout xmlns:android="http://schemas.android.com/apk/res/android"
    xmlns:tools="http://schemas.android.com/tools"
    android:layout_width="match_parent"
    android:layout_height="match_parent"
    android:layout_gravity="center"
    android:background="@drawable/main_bg"
    android:orientation="vertical"
    android:paddingBottom="@dimen/activity_vertical_margin"
    android:paddingLeft="@dimen/activity_horizontal_margin"
    android:paddingRight="@dimen/activity_horizontal_margin"
    android:paddingTop="@dimen/activity_vertical_margin"
    tools:context=".MainActivity">

    <RelativeLayout
        android:layout_width="fill_parent"
        android:layout_height="wrap_content"
        android:gravity="center">

        <EditText
            android:id="@+id/et_showview"
            android:layout_width="350dip"
            android:layout_height="100dip"
            android:background="@drawable/whitebg"
            android:editable="false"
            android:gravity="bottom|right"
            android:textSize="20sp" />


    </RelativeLayout>


    <LinearLayout
        android:layout_width="fill_parent"
        android:layout_height="fill_parent"
        android:layout_marginTop="20dip"
        android:gravity="center_horizontal"
        android:orientation="vertical">

        <LinearLayout
            android:layout_width="fill_parent"
            android:layout_height="wrap_content"
            android:gravity="center_horizontal"
            android:orientation="horizontal">

            <Button
                android:id="@+id/btn_clear"
                android:layout_width="80dp"
                android:layout_height="80dp"
                android:background="@drawable/white_btn_selector"
                android:gravity="bottom|right"
                android:paddingBottom="10dp"
                android:paddingRight="10dp"
                android:text="C"
                android:textSize="20sp" />

            <Button
                android:id="@+id/btn_del"
                android:layout_width="80dp"
                android:layout_height="80dp"
                android:layout_marginLeft="10dip"
                android:background="@drawable/white_btn_selector"
                android:gravity="bottom|right"
                android:paddingBottom="10dp"
                android:paddingRight="10dp"
                android:text="DEL"
                android:textSize="20sp" />

            <Button
                android:id="@+id/btn_divide"
                android:layout_width="80dp"
                android:layout_height="80dp"
                android:layout_marginLeft="10dip"
                android:background="@drawable/white_btn_selector"
                android:gravity="bottom|right"
                android:paddingBottom="10dp"
                android:paddingRight="10dp"
                android:text="÷"
                android:textSize="20sp" />

            <Button
                android:id="@+id/btn_multiply"
                android:layout_width="80dp"
                android:layout_height="80dp"
                android:layout_marginLeft="10dip"
                android:background="@drawable/white_btn_selector"
                android:gravity="bottom|right"
                android:paddingBottom="10dp"
                android:paddingRight="10dp"
                android:text="×"
                android:textSize="20sp" />
        </LinearLayout>

        <LinearLayout
            android:layout_width="fill_parent"
            android:layout_height="wrap_content"
            android:layout_marginTop="10dip"
            android:gravity="center_horizontal"
            android:orientation="horizontal">

            <Button
                android:id="@+id/btn_7"
                android:layout_width="80dp"
                android:layout_height="80dp"
                android:background="@drawable/white_btn_selector"
                android:gravity="bottom|right"
                android:paddingBottom="10dp"
                android:paddingRight="10dp"
                android:text="7"
                android:textSize="20sp" />

            <Button
                android:id="@+id/btn_8"
                android:layout_width="80dp"
                android:layout_height="80dp"
                android:layout_marginLeft="10dip"
                android:background="@drawable/white_btn_selector"
                android:gravity="bottom|right"
                android:paddingBottom="10dp"
                android:paddingRight="10dp"
                android:text="8"
                android:textSize="20sp" />

            <Button
                android:id="@+id/btn_9"
                android:layout_width="80dp"
                android:layout_height="80dp"
                android:layout_marginLeft="10dip"
                android:background="@drawable/white_btn_selector"
                android:gravity="bottom|right"
                android:paddingBottom="10dp"
                android:paddingRight="10dp"
                android:text="9"
                android:textSize="20sp" />

            <Button
                android:id="@+id/btn_minus"
                android:layout_width="80dp"
                android:layout_height="80dp"
                android:layout_marginLeft="10dip"
                android:background="@drawable/white_btn_selector"
                android:gravity="bottom|right"
                android:paddingBottom="10dp"
                android:paddingRight="10dp"
                android:text="-"
                android:textSize="20sp" />
        </LinearLayout>

        <LinearLayout
            android:layout_width="fill_parent"
            android:layout_height="wrap_content"
            android:layout_marginTop="10dip"
            android:gravity="center_horizontal"
            android:orientation="horizontal">

            <Button
                android:id="@+id/btn_4"
                android:layout_width="80dp"
                android:layout_height="80dp"
                android:background="@drawable/white_btn_selector"
                android:gravity="bottom|right"
                android:paddingBottom="10dp"
                android:paddingRight="10dp"
                android:text="4"
                android:textSize="20sp" />

            <Button
                android:id="@+id/btn_5"
                android:layout_width="80dp"
                android:layout_height="80dp"
                android:layout_marginLeft="10dip"
                android:background="@drawable/white_btn_selector"
                android:gravity="bottom|right"
                android:paddingBottom="10dp"
                android:paddingRight="10dp"
                android:text="5"
                android:textSize="20sp" />

            <Button
                android:id="@+id/btn_6"
                android:layout_width="80dp"
                android:layout_height="80dp"
                android:layout_marginLeft="10dip"
                android:background="@drawable/white_btn_selector"
                android:gravity="bottom|right"
                android:paddingBottom="10dp"
                android:paddingRight="10dp"
                android:text="6"
                android:textSize="20sp" />

            <Button
                android:id="@+id/btn_pluse"
                android:layout_width="80dp"
                android:layout_height="80dp"
                android:layout_marginLeft="10dip"
                android:background="@drawable/white_btn_selector"
                android:gravity="bottom|right"
                android:paddingBottom="10dp"
                android:paddingRight="10dp"
                android:text="+"
                android:textSize="20sp" />
        </LinearLayout>

        <LinearLayout
            android:layout_width="fill_parent"
            android:layout_height="wrap_content"
            android:layout_marginTop="10dip"
            android:gravity="center_horizontal"
            android:orientation="horizontal">

            <LinearLayout
                android:layout_width="wrap_content"
                android:layout_height="wrap_content"
                android:orientation="vertical">

                <LinearLayout
                    android:layout_width="wrap_content"
                    android:layout_height="wrap_content"
                    android:orientation="horizontal">

                    <Button
                        android:id="@+id/btn_1"
                        android:layout_width="80dp"
                        android:layout_height="80dp"
                        android:background="@drawable/white_btn_selector"
                        android:gravity="bottom|right"
                        android:paddingBottom="10dp"
                        android:paddingRight="10dp"
                        android:text="1"
                        android:textSize="20sp" />

                    <Button
                        android:id="@+id/btn_2"
                        android:layout_width="80dp"
                        android:layout_height="80dp"
                        android:layout_marginLeft="10dip"
                        android:background="@drawable/white_btn_selector"
                        android:gravity="bottom|right"
                        android:paddingBottom="10dp"
                        android:paddingRight="10dp"
                        android:text="2"
                        android:textSize="20sp" />

                    <Button
                        android:id="@+id/btn_3"
                        android:layout_width="80dp"
                        android:layout_height="80dp"
                        android:layout_marginLeft="10dip"
                        android:background="@drawable/white_btn_selector"
                        android:gravity="bottom|right"
                        android:paddingBottom="10dp"
                        android:paddingRight="10dp"
                        android:text="3"
                        android:textSize="20sp" />
                </LinearLayout>

                <LinearLayout
                    android:layout_width="wrap_content"
                    android:layout_height="wrap_content"
                    android:layout_marginTop="10dip"
                    android:orientation="horizontal">

                    <Button
                        android:id="@+id/btn_0"
                        android:layout_width="170dp"
                        android:layout_height="80dp"
                        android:background="@drawable/white_btn_selector"
                        android:gravity="bottom|right"
                        android:paddingBottom="10dp"
                        android:paddingRight="10dp"
                        android:text="0"
                        android:textSize="20sp" />

                    <Button
                        android:id="@+id/btn_point"
                        android:layout_width="80dp"
                        android:layout_height="80dp"
                        android:layout_marginLeft="10dip"
                        android:background="@drawable/white_btn_selector"
                        android:gravity="bottom|right"
                        android:paddingBottom="10dp"
                        android:paddingRight="10dp"
                        android:text="."
                        android:textSize="20sp" />
                </LinearLayout>
            </LinearLayout>

            <Button
                android:id="@+id/btn_equal"
                android:layout_width="80dp"
                android:layout_height="170dip"
                android:layout_marginLeft="10dip"
                android:background="@drawable/orange_btn_selector"
                android:gravity="bottom|right"
                android:paddingBottom="10dp"
                android:paddingRight="10dp"
                android:text="="
                android:textSize="20sp" />
        </LinearLayout>

        <TextView
            android:gravity="center"
            android:autoLink="web"
            android:layout_width="350dp"
            android:layout_height="0dp"
            android:layout_marginTop="20dp"
            android:layout_weight="1"
            android:text="微博:http://weibo.com/Glorystys
             博客:http://blog.csdn.net/qq_26787115"
            android:textColor="@android:color/white"
            android:textSize="20sp" />
    </LinearLayout>

</LinearLayout>
MainActivity
package com.lgl.calculator;

import android.os.Bundle;
import android.support.v7.app.AppCompatActivity;
import android.view.View;
import android.widget.Button;
import android.widget.EditText;

/**
 * 计算器
 */
public class MainActivity extends AppCompatActivity implements View.OnClickListener {


    private Button btn_0;
    private Button btn_1;
    private Button btn_2;
    private Button btn_3;
    private Button btn_4;
    private Button btn_5;
    private Button btn_6;
    private Button btn_7;
    private Button btn_8;
    private Button btn_9;

    private Button btn_point;// 小数点
    private Button btn_divide;// 除以
    private Button btn_multiply;// 乘以
    private Button btn_minus;// 减去
    private Button btn_pluse;// 加
    private Button btn_equal;// 等于

    private Button btn_clear;  //清空
    private Button btn_del;  //取消

    private EditText et_showview;  //输入框
    private double dou = 0;  //接收结果

    /**
     * 加一个标识
     * 需求就是我们运算出结果的时候,再次点击数字及你选哪个下一次运算,这个时候,输入框应该自动为空
     */
    private boolean flag;  //清空标识


    @Override
    protected void onCreate(Bundle savedInstanceState) {
        super.onCreate(savedInstanceState);
        setContentView(R.layout.activity_main);

        initView();
    }

    private void initView() {
        btn_0 = (Button) findViewById(R.id.btn_0);
        btn_1 = (Button) findViewById(R.id.btn_1);
        btn_2 = (Button) findViewById(R.id.btn_2);
        btn_3 = (Button) findViewById(R.id.btn_3);
        btn_4 = (Button) findViewById(R.id.btn_4);
        btn_5 = (Button) findViewById(R.id.btn_5);
        btn_6 = (Button) findViewById(R.id.btn_6);
        btn_7 = (Button) findViewById(R.id.btn_7);
        btn_8 = (Button) findViewById(R.id.btn_8);
        btn_9 = (Button) findViewById(R.id.btn_9);
        btn_point = (Button) findViewById(R.id.btn_point);// 小数点
        btn_divide = (Button) findViewById(R.id.btn_divide);// 除以
        btn_multiply = (Button) findViewById(R.id.btn_multiply);// 乘以
        btn_minus = (Button) findViewById(R.id.btn_minus);// 减去
        btn_pluse = (Button) findViewById(R.id.btn_pluse);// 加
        btn_equal = (Button) findViewById(R.id.btn_equal);// 等于

        btn_clear = (Button) findViewById(R.id.btn_clear);
        btn_del = (Button) findViewById(R.id.btn_del);
        et_showview = (EditText) findViewById(R.id.et_showview);

        btn_0.setOnClickListener(this);
        btn_1.setOnClickListener(this);
        btn_2.setOnClickListener(this);
        btn_3.setOnClickListener(this);
        btn_4.setOnClickListener(this);
        btn_5.setOnClickListener(this);
        btn_6.setOnClickListener(this);
        btn_7.setOnClickListener(this);
        btn_8.setOnClickListener(this);
        btn_9.setOnClickListener(this);

        btn_point.setOnClickListener(this);
        btn_divide.setOnClickListener(this);
        btn_multiply.setOnClickListener(this);
        btn_minus.setOnClickListener(this);
        btn_pluse.setOnClickListener(this);
        btn_equal.setOnClickListener(this);

        btn_clear.setOnClickListener(this);
        btn_del.setOnClickListener(this);
    }

    @Override
    public void onClick(View v) {
        //我们在这里实现业务逻辑
        String str = et_showview.getText().toString();
        switch (v.getId()) {
            //我们点击数字键,输入框就收到我们的计算数字
            case R.id.btn_0:
            case R.id.btn_1:
            case R.id.btn_2:
            case R.id.btn_3:
            case R.id.btn_4:
            case R.id.btn_5:
            case R.id.btn_6:
            case R.id.btn_7:
            case R.id.btn_8:
            case R.id.btn_9:
            case R.id.btn_point:
                //再次输入的时候判断,把前面的清空,再把点击的按钮放在输入框上
                if (flag) {
                    flag = false;
                    str = "";
                    et_showview.setText("");
                }
                //我们只要点击键盘,相应的数字添加在EditText上
                et_showview.setText(str + ((Button) v).getText());
                break;
            //运算符也是一样需要添加的
            case R.id.btn_pluse:
            case R.id.btn_minus:
            case R.id.btn_multiply:
            case R.id.btn_divide:
                //再次输入的时候判断,把前面的清空,再把点击的按钮放在输入框上
                if (flag) {
                    flag = false;
                    str = "";
                    et_showview.setText("");
                }
                //为了计算方便,我们可以在前后添加空格
                et_showview.setText(str + " " + ((Button) v).getText() + " ");
                break;
            case R.id.btn_del:
                //再次输入的时候判断,把前面的清空,再把点击的按钮放在输入框上
                if (flag) {
                    flag = false;
                    str = "";
                    et_showview.setText("");
                } else if (str != null && !str.equals(" ")) {
     //判断,因为我们需要一个个删,首先确定是不是空或者""
                    //用substring()截取字符长度-1 再设置回去 形成删一个的效果
                    et_showview.setText(str.substring(0, str.length() - 1));
                }
                break;
            //清除按钮,直接把输入框设置成空
            case R.id.btn_clear:
                flag = false;
                str = "";
                et_showview.setText(" ");
                break;
            //计算结果
            case R.id.btn_equal:
                getResult();
                break;
        }
    }

    //等号计算结果
    private void getResult() {
        //首先取一下你输入完后现在输入框的内容
        String result = et_showview.getText().toString();
        //当我们的输入框是null或者""时我们不进行操作
        if (result == null || result.equals(" ")) {
            return;
        }
        //我们要计算结果,必须知道输入框是否有操作符,判断条件就是前后是否在空格,否则不进行操作
        if (!result.contains(" ")) {
            //没有运算符,所以不用运算
            return;
        }
        //当我点击等号的时候,清空标识设置为true,但是如果之前有的话,设置成false
        if (flag) {
            flag = false;
            return;
        }
        flag = true;
        //如果有空格,我们就截取前后段再获取运算符进行计算
        String str1 = result.substring(0, result.indexOf(" "));  //运算符前面字段
        String op = result.substring(result.indexOf(" ") + 1, result.indexOf(" ") + 2);  //截取运算符
        String str2 = result.substring(result.indexOf(" ") + 3);  //运算符后面字段

        //这里我们还是要判断str1和str2都不是空才
        if (!str1.equals("") && !str2.equals("")) {  //第一种情况:都不是空
            //强转
            double d1 = Double.parseDouble(str1);
            double d2 = Double.parseDouble(str2);
            //开始计算,定义一个double变量接收结果,定义为全局
            if (op.equals("+")) {  //加
                dou = d1 + d2;
            } else if (op.equals("-")) { //减
                dou = d1 - d2;
            } else if (op.equals("×")) { //乘
                dou = d1 * d2;
            } else if (op.equals("÷")) {  //除
                //除数为0不计算
                if (d2 == 0) {
                    dou = 0;
                } else {
                    dou = d1 / d2;
                }
            }
            //我们之前把他强转为double类型了,但是如果没有小数点,我们就是int类型
            if (!str1.contains(".") && !str2.contains(".") && !op.equals("÷")) {
                int i = (int) dou;
                et_showview.setText(i + "");
            } else {  //如果有小数点
                et_showview.setText(dou + "");
            }
        } else if (!str1.equals("") && str2.equals("")) {  //第二种情况:str2是空
            //这种情况就不运算了
            et_showview.setText(result);
        } else if (str1.equals("") && !str2.equals("")) {  //第三种情况:str1是空
            //这种情况我们就需要判断了,因为此时str1 = 0;
            double d3 = Double.parseDouble(str2);
            if (op.equals("+")) {  //加
                dou = 0 + d3;
            } else if (op.equals("-")) { //减
                dou = 0 - d3;
            } else if (op.equals("×")) { //乘
                dou = 0;
            } else if (op.equals("÷")) {  //除
                //除数为0不计算
                dou = 0;
            }
            //我们之前把他强转为double类型了,但是如果没有小数点,我们就是int类型
            if (!str2.contains(".")) {
                int i = (int) dou;
                et_showview.setText(i + "");
            } else {  //如果有小数点
                et_showview.setText(dou + "");
            }
        } else {  //最后一种情况,他们两个都是空
            //我们清空掉
            et_showview.setText("");
        }
    }
}
有兴趣的你也可以试试
Demo下载:http://download.csdn.net/detail/qq_26787115/9393665
智能推荐
Linux查看登录用户日志_怎么记录linux设备 发声的登录和登出-程序员宅基地
文章浏览阅读8.6k次。一、Linux记录用户登录信息文件1 /var/run/utmp----记录当前正在登录系统的用户信息;2 /var/log/wtmp----记录当前正在登录和历史登录系统的用户信息;3 /var/log/btmp:记录失败的登录尝试信息。二、命令用法1.命令last,lastb---show a listing of la_怎么记录linux设备 发声的登录和登出
第四章笔记:遍历--算法学中的万能钥匙-程序员宅基地
文章浏览阅读167次。摘要:1. 简介 2. 公园迷宫漫步 3. 无线迷宫与最短(不加权)路径问题 4. 强连通分量1. 简介在计算机科学裡,树的遍历(也称为树的搜索)是圖的遍歷的一种,指的是按照某种规则,不重复地访问某种樹的所有节点的过程。具体的访问操作可能是检查节点的值、更新节点的值等。不同的遍历方式,其访问节点的顺序是不一样的。两种著名的基本遍历策略:深度优先搜索(DFS) 和 广度优先搜索(B...
【案例分享】使用ActiveReports报表工具,在.NET MVC模式下动态创建报表_activereports.net 实现查询报表功能-程序员宅基地
文章浏览阅读591次。提起报表,大家会觉得即熟悉又陌生,好像常常在工作中使用,又似乎无法准确描述报表。今天我们来一起了解一下什么是报表,报表的结构、构成元素,以及为什么需要报表。什么是报表简单的说:报表就是通过表格、图表等形式来动态显示数据,并为使用者提供浏览、打印、导出和分析的功能,可以用公式表示为:报表 = 多样的布局 + 动态的数据 + 丰富的输出报表通常包含以下组成部分:报表首页:在报表的开..._activereports.net 实现查询报表功能
Ubuntu18.04 + GNOME xrdp + Docker + GUI_docker xrdp ubuntu-程序员宅基地
文章浏览阅读6.6k次。最近实验室需要用Cadence,这个软件的安装非常麻烦,每一次配置都要几个小时,因此打算把Cadence装进Docker。但是Cadence运行时需要GUI,要对Docker进行一些配置。我们实验室的服务器运行的是Ubuntu18.04,默认桌面GNOME,Cadence装进Centos的Docker。安装Ubuntu18.04服务器上安装Ubuntu18.04的教程非常多,在此不赘述了安装..._docker xrdp ubuntu
iOS AVFoundation实现相机功能_ios avcapturestillimageoutput 兼容性 ios17 崩溃-程序员宅基地
文章浏览阅读1.8k次,点赞2次,收藏2次。首先导入头文件#import 导入头文件后创建几个相机必须实现的对象 /** * AVCaptureSession对象来执行输入设备和输出设备之间的数据传递 */ @property (nonatomic, strong) AVCaptureSession* session; /** * 输入设备 */_ios avcapturestillimageoutput 兼容性 ios17 崩溃
Oracle动态性能视图--v$sysstat_oracle v$sysstat视图-程序员宅基地
文章浏览阅读982次。按照OracleDocument中的描述,v$sysstat存储自数据库实例运行那刻起就开始累计全实例(instance-wide)的资源使用情况。 类似于v$sesstat,该视图存储下列的统计信息:1>.事件发生次数的统计(如:user commits)2>._oracle v$sysstat视图
随便推点
Vue router报错:NavigationDuplicated {_name: "NavigationDuplicated", name: "NavigationDuplicated"}的解决方法_navigationduplicated {_name: 'navigationduplicated-程序员宅基地
文章浏览阅读7.6k次,点赞2次,收藏9次。我最近做SPA项目开发动态树的时候一直遇到以下错误:当我点击文章管理需要跳转路径时一直报NavigationDuplicated {_name: “NavigationDuplicated”, name: “NavigationDuplicated”}这个错误但是当我点击文章管理后,路径跳转却是成功的<template> <div> 文章管理页面 <..._navigationduplicated {_name: 'navigationduplicated', name: 'navigationduplic
Webrtc回声消除模式(Aecm)屏蔽舒适噪音(CNG)_webrtc aecm 杂音-程序员宅基地
文章浏览阅读3.9k次。版本VoiceEngine 4.1.0舒适噪音生成(comfort noise generator,CNG)是一个在通话过程中出现短暂静音时用来为电话通信产生背景噪声的程序。#if defined(WEBRTC_ANDROID) || defined(WEBRTC_IOS)static const EcModes kDefaultEcMode = kEcAecm;#elsestati..._webrtc aecm 杂音
医学成像原理与图像处理一:概论_医学成像与图像处理技术知识点总结-程序员宅基地
文章浏览阅读6.3k次,点赞9次,收藏19次。医学成像原理与图像处理一:概论引言:本系列博客为医学成像原理与图像处理重要笔记,由于是手写,在此通过扫描录入以图片的形式和电子版增补内容将其进行组织和共享。前半部分内容为图像处理基础内容,包括图像的灰度级处理、空间域滤波、频率域滤波、图像增强和分割等;后半部分内容为医学影象技术,包括常规胶片X光机、CR、DR、CT、DSA等X射线摄影技术、超声成像技术、磁共振成像(MRI)技术等。本篇主要内容是概论。_医学成像与图像处理技术知识点总结
notepad++ v8.5.3 安装插件,安装失败怎么处理?下载进度为0怎么处理?_nodepa++-程序员宅基地
文章浏览阅读591次,点赞13次,收藏10次。notepad++ v8.5.3 安装插件,下载进度为0_nodepa++
hive某个字段中包括\n(和换行符冲突)_hive sql \n-程序员宅基地
文章浏览阅读2.1w次。用spark执行SQL保存到Hive中: hiveContext.sql("insert overwrite table test select * from aaa")执行完成,没报错,但是核对结果的时候,发现有几笔数据超出指定范围(实际只包含100/200)最终排查到是ret_pay_remark 字段包含换行符,解决方案:执行SQL中把特殊字符替换掉regexp_replace(..._hive sql \n
印象笔记05:如何打造更美的印象笔记超级笔记_好的印象笔记怎么做的-程序员宅基地
文章浏览阅读520次,点赞10次,收藏8次。印象笔记05:如何打造更美的印象笔记超级笔记本文介绍印象笔记的具体使用,如何打造更美更实用的笔记。首先想要笔记更加好看和实用,我认为要使用超级笔记。所谓超级笔记就是具有很多便捷功能的笔记。_好的印象笔记怎么做的