编码规范(一)----JAVA注释规范_java 注释规范-程序员宅基地
一、前言
好的代码规范是一个程序员的基本修炼,好的代码注释更能体现一个程序员的思维逻辑,虽然代码是用来给机器运行的,我们只要能写出能让编译器运行的代码就行了,但是如果没有好的编码规范,到项目后期,加入开发的人员逐渐增多时,每个人的编码风格都不一样,这就会让项目维护者很难维护,所以开始就要制定一些好的规范来让大家遵守,这样才能写出可维护,健壮的项目,这就是接下来要做的事情。第一节从要从代码注释这一块说起,包含: 版权注释、类注释(Class)、构造函数注释(Constructor)、方法注释(Methods)、代码块注释(Block)、单句注释、字段名注释,然后分别为eclipse、IDEA创建注释模块等。
二、约定
下面就是一些常见的注释示例:
1、版权注释
版权注释主要用来声明公司的一些基本信息等:
/**
 * projectName: xxx
 * fileName: Tk.java
 * packageName: xxxx
 * date: 2017年12月18日下午12:28:39
 * copyright(c) 2017-2020 xxx公司
 */
2、类注释(Class)
类注释(Class)主要用来声明该类用来做什么,以及创建者、创建日期版本、包名等一些信息:
/**
 * @version: V1.0
 * @author: fendo
 * @className: user
 * @packageName: user
 * @description: 这是用户类
 * @data: 2017-07-28 12:20
 **/
3、构造函数注释(Constructor)
构造函数注释(Constructor)主要用来声明该类的构造函数、入参等信息:
**
* @description: 构造函数
* @param: [sid, pid]
*/
4、方法注释(Methods)
方法注释(Methods)主要用来声明该类的作用、入参、返回值、异常等信息:
/**
* @author:  fendo
* @methodsName: addUser
* @description: 添加一个用户
* @param:  xxxx
* @return: String
* @throws:
*/
5、代码块注释(Block)
/**
 * 实例化一个用户
 * xxxxxxx
 */
User user=new User();
6、单句注释
User user=new User(); //实例化一个用户7、字段名注释
/**
 * 用户名
 */
public String name;
或者使用如下格式:
/**用户名**/
public String name;
三、IDE模板
接下来就是分别在Eclipse和IDEA中实现上面的注释,然后分别生成模板:
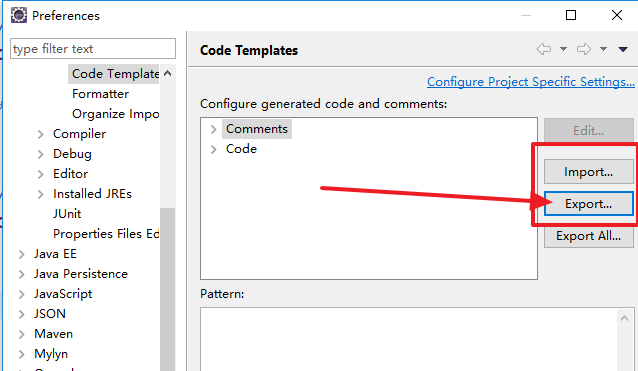
3.1、Eclipse代码注释
在Eclipse中可以通过CodeTemplates进行设置,具体步骤如下: Window->Preference->Java->Code Style->Code Template

其中有两类一类是Comments、主要是类中的一些通用模板:
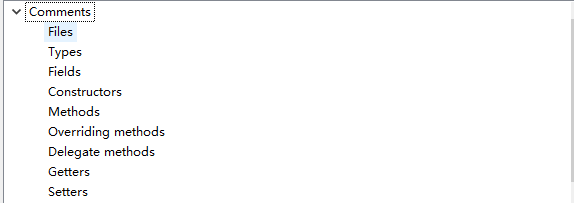
1.文件(Files)注释标签:
设置版权信息:
/**
 * projectName: ${project_name}
 * fileName: ${file_name}
 * packageName: ${package_name}
 * date: ${date}${time}
 * copyright(c) 2017-2020 xxx公司
 */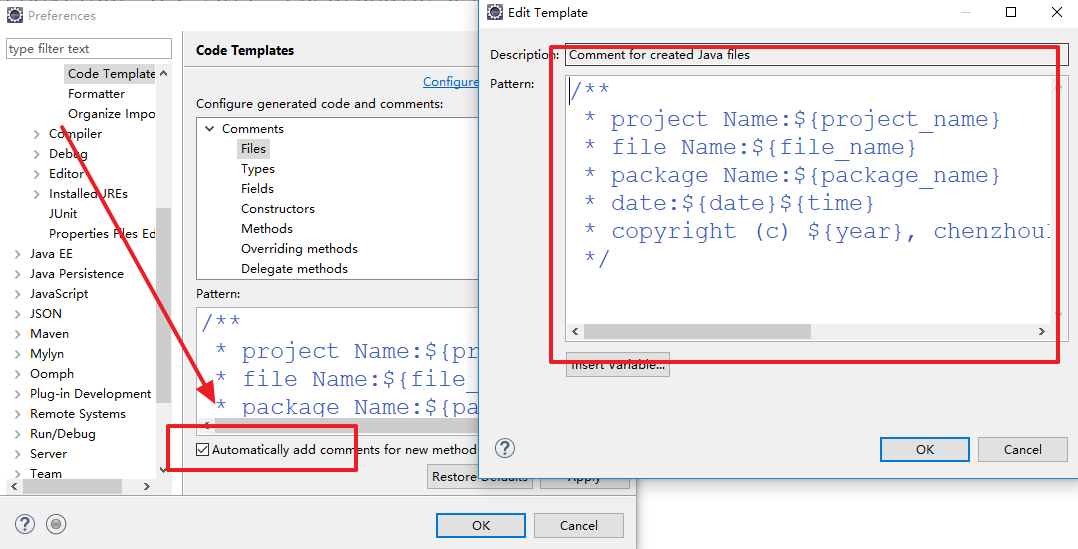
注意: 要打上勾!!
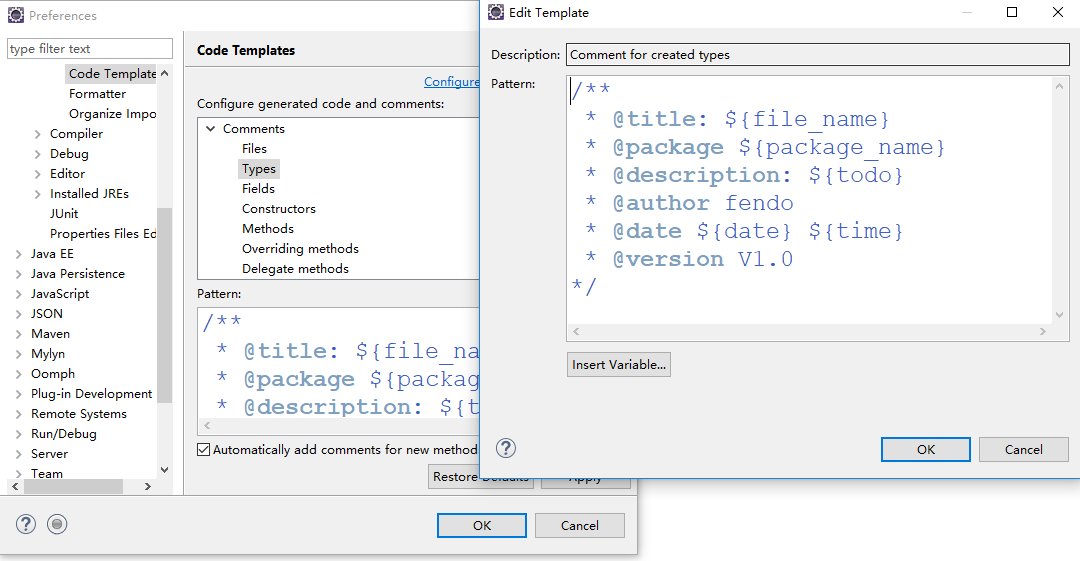
2.类型(Types)注释标签(类的注释):
/**
 * @title: ${file_name}
 * @package ${package_name}
 * @description: ${todo}
 * @author: fendo
 * @date: ${date} ${time}
 * @version: V1.0
*/
3.字段(Fields)注释标签:
/**
 * @Fields ${field} : ${todo}(用一句话描述这个变量表示什么)
 */
4.构造函数(Constructors)标签:
/**
 * @title: ${enclosing_type}
 * @description: ${todo}(这里用一句话描述这个方法的作用)
 * @param: ${tags}
 * @throws:
 */
5.方法(Methods)标签:
/**
 *@title: ${enclosing_method}
 *@description: ${todo}
 *@author: fendo
 *@date: ${date} ${time}
 *${tags}
 *@throws:
 */
6.覆盖方法(Overriding Methods)标签:
/**
 * @title: ${enclosing_method}
 * @description: ${todo}
 * ${tags}
 * ${see_to_overridden}
 */
7.代表方法(Delegate Methods)标签:
/**
 * ${tags}
 * ${see_to_target}
 */
8.Getter方法标签:
/**
 * @title: ${enclosing_method}
 * @description: ${todo}
 * @return: ${field_type}
 */
9.Setter方法标签:
/**
 * @title: ${enclosing_method}
 * @description: ${todo}
 * @return: ${field_type}
 */
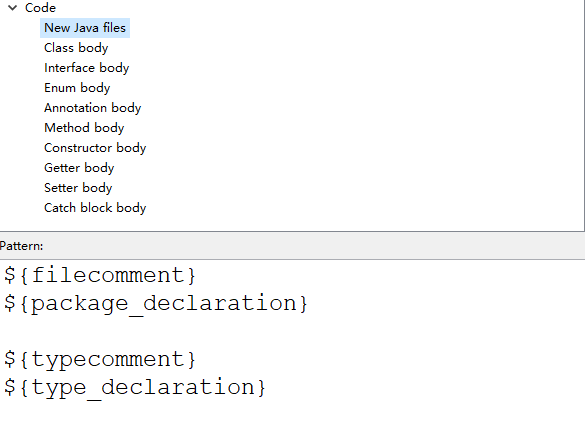
由于基本的在上面的已经设置好了,所以这里也不需要设置什么,然后就是把这个模板导出来,分发给各开发人员,让他们导进来就行了。
完整的模板如下:
<?xml version="1.0" encoding="UTF-8" standalone="no"?><templates><template autoinsert="false" context="gettercomment_context" deleted="false" description="Comment for getter method" enabled="true" id="org.eclipse.jdt.ui.text.codetemplates.gettercomment" name="gettercomment">/**
 * @title: ${enclosing_method}
 * @description: ${todo}
 * @return: ${field_type}
 */  </template><template autoinsert="false" context="constructorcomment_context" deleted="false" description="Comment for created constructors" enabled="true" id="org.eclipse.jdt.ui.text.codetemplates.constructorcomment" name="constructorcomment">/**
 * @title: ${enclosing_type}
 * @description: ${todo}
 * @param: ${tags}
 * @throws
 */ </template><template autoinsert="false" context="filecomment_context" deleted="false" description="Comment for created Java files" enabled="true" id="org.eclipse.jdt.ui.text.codetemplates.filecomment" name="filecomment">/**
 * projectName:${project_name}
 * fileName:${file_name}
 * packageName:${package_name}
 * date:${date}${time}
 * copyright(c) 2017-2020 xxx公司
 */</template><template autoinsert="false" context="typecomment_context" deleted="false" description="Comment for created types" enabled="true" id="org.eclipse.jdt.ui.text.codetemplates.typecomment" name="typecomment">/**
 * @title: ${file_name}
 * @package ${package_name}
 * @description: ${todo}
 * @author: fendo
 * @date: ${date} ${time}
 * @version: V1.0
*/</template><template autoinsert="false" context="methodcomment_context" deleted="false" description="Comment for non-overriding methods" enabled="true" id="org.eclipse.jdt.ui.text.codetemplates.methodcomment" name="methodcomment">/**
 *@title ${enclosing_method}
 *@description: ${todo}
 *@author: fendo
 *@date: ${date} ${time}
 *${tags}
 *@throws
 */ </template><template autoinsert="false" context="overridecomment_context" deleted="false" description="Comment for overriding methods" enabled="true" id="org.eclipse.jdt.ui.text.codetemplates.overridecomment" name="overridecomment">/**
 * @title: ${enclosing_method}
 * @description: ${todo}
 * ${tags}
 * ${see_to_overridden}
 */ </template><template autoinsert="false" context="settercomment_context" deleted="false" description="Comment for setter method" enabled="true" id="org.eclipse.jdt.ui.text.codetemplates.settercomment" name="settercomment">/**
 * @title: ${enclosing_method}
 * @description: ${todo}
 * @return: ${field_type}
 */</template><template autoinsert="false" context="fieldcomment_context" deleted="false" description="Comment for fields" enabled="true" id="org.eclipse.jdt.ui.text.codetemplates.fieldcomment" name="fieldcomment">/**
 * @Fields ${field} : ${todo}
 */  </template><template autoinsert="false" context="delegatecomment_context" deleted="false" description="Comment for delegate methods" enabled="true" id="org.eclipse.jdt.ui.text.codetemplates.delegatecomment" name="delegatecomment">/**
 * ${tags}
 * ${see_to_target}
 */  </template></templates>
3.2、IDEA代码注释
idea有两种快捷方式,一个是live templates,一个是file and code templates。
3.2.1、file and code templates
IDEA的code templates仅限于类文件头和所有文件头。配置如下图:
File -- Settings -- Editor -- Code Style -- File and Code Templates
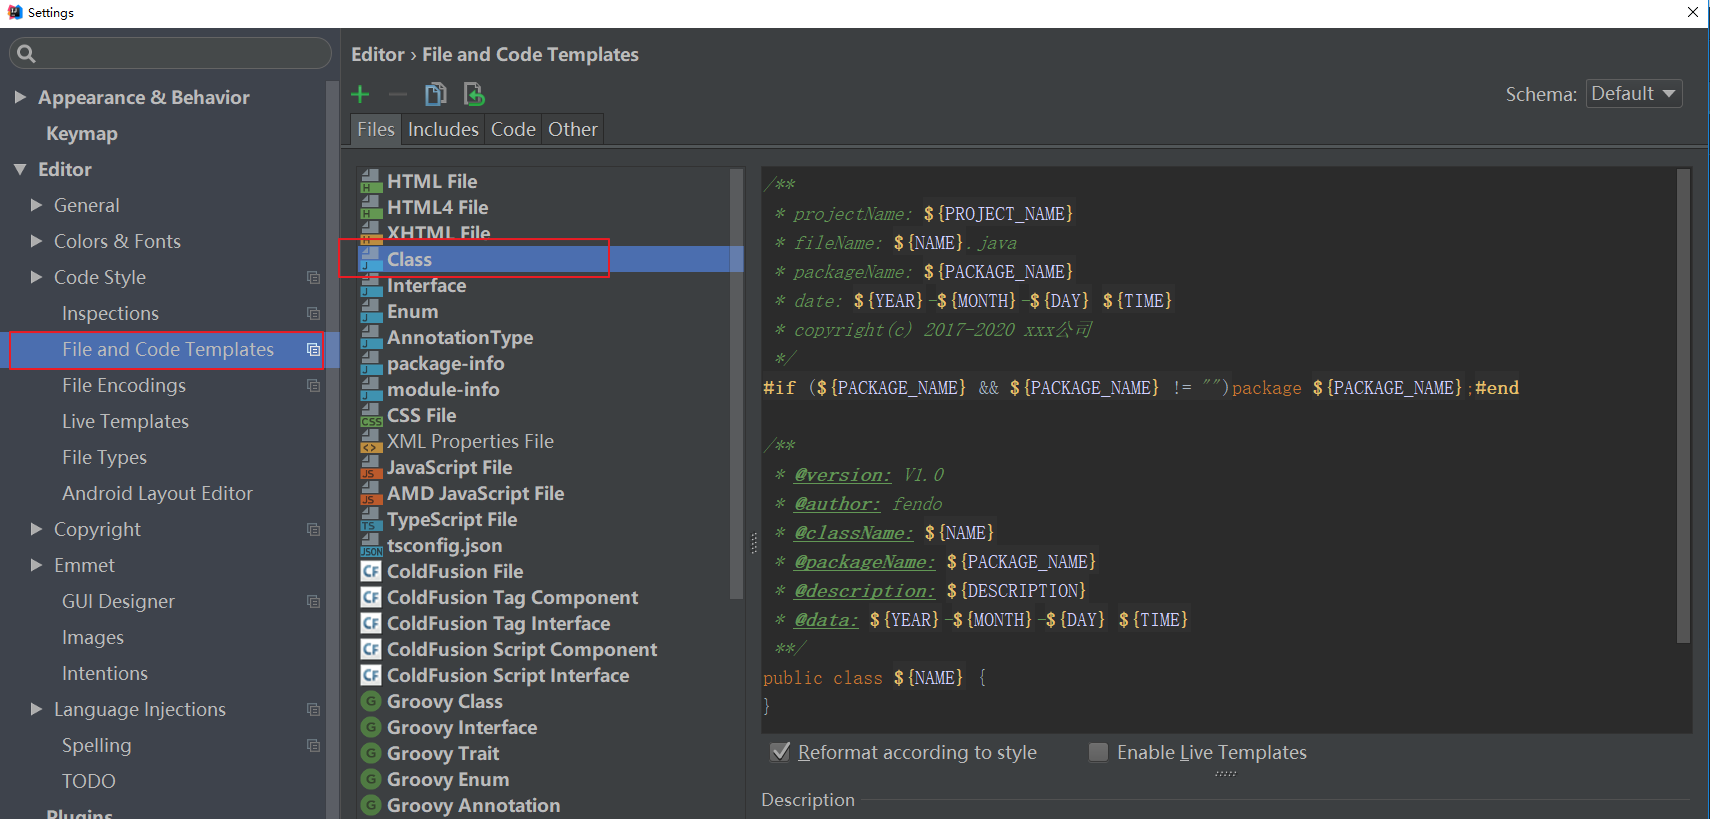
模板如下,只能实现类注释,方法注释只能用live templates
/**
 * projectName: ${PROJECT_NAME}
 * fileName: ${NAME}.java
 * packageName: ${PACKAGE_NAME}
 * date: ${YEAR}-${MONTH}-${DAY} ${TIME}
 * copyright(c) 2017-2020 xxx公司
 */
#if (${PACKAGE_NAME} && ${PACKAGE_NAME} != "")package ${PACKAGE_NAME};#end

/**
 * @version: V1.0
 * @author: fendo
 * @className: ${NAME}
 * @packageName: ${PACKAGE_NAME}
 * @description: ${DESCRIPTION}
 * @data: ${YEAR}-${MONTH}-${DAY} ${TIME}
 **/
public class ${NAME} {
}
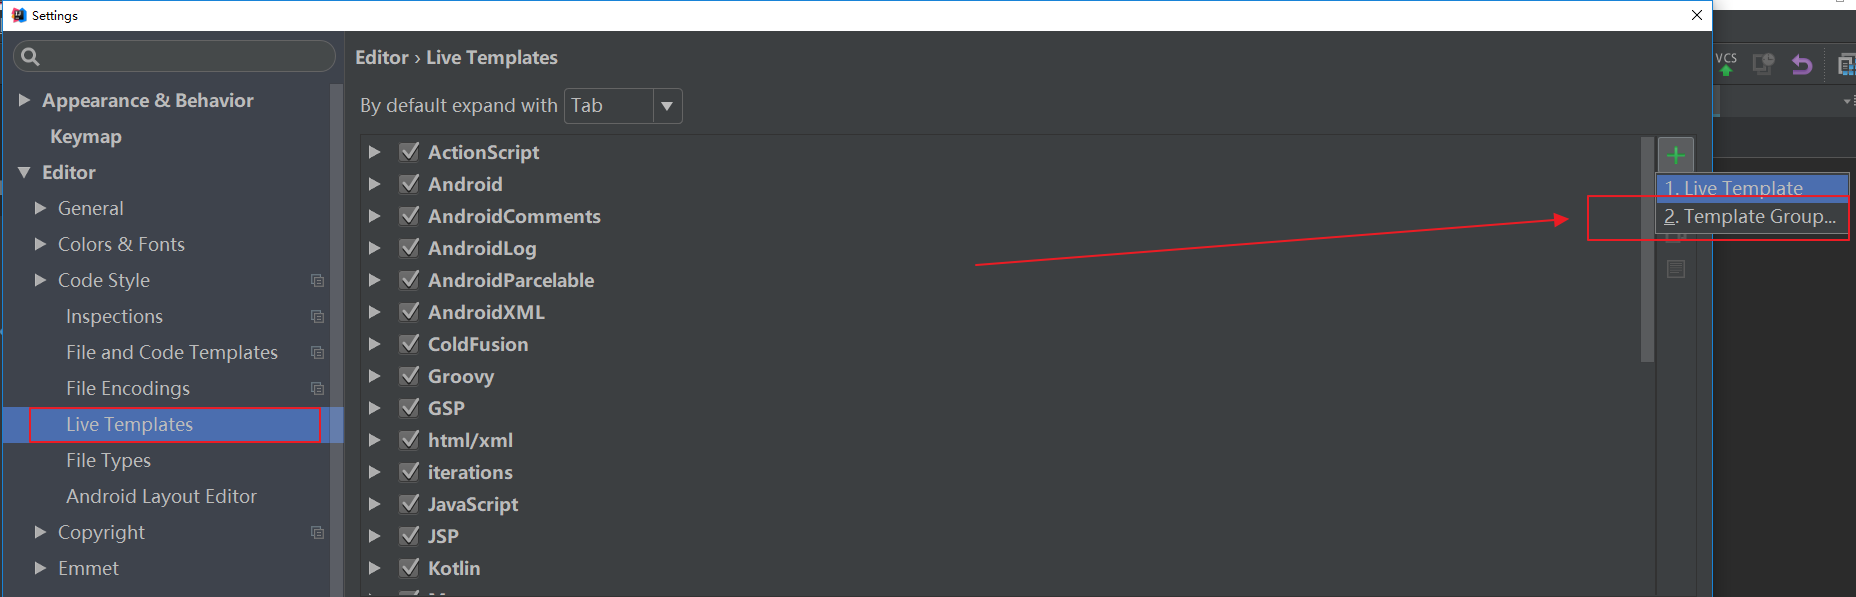
3.2.1、live templates
Live Template用中文应该叫做热加载模板。它的原理就是配置一些常用代码字母缩写,在输入简写时可以出现你预制的模板内容,使得开发效率大大提高。
在配置当中找到Live Template,右边加号先添加一个TemplateGroup
选中该分组再点击加号添加一个Live Template.Abbreviation中填写命令,Description填写描述,Template text填写你的配置模板。
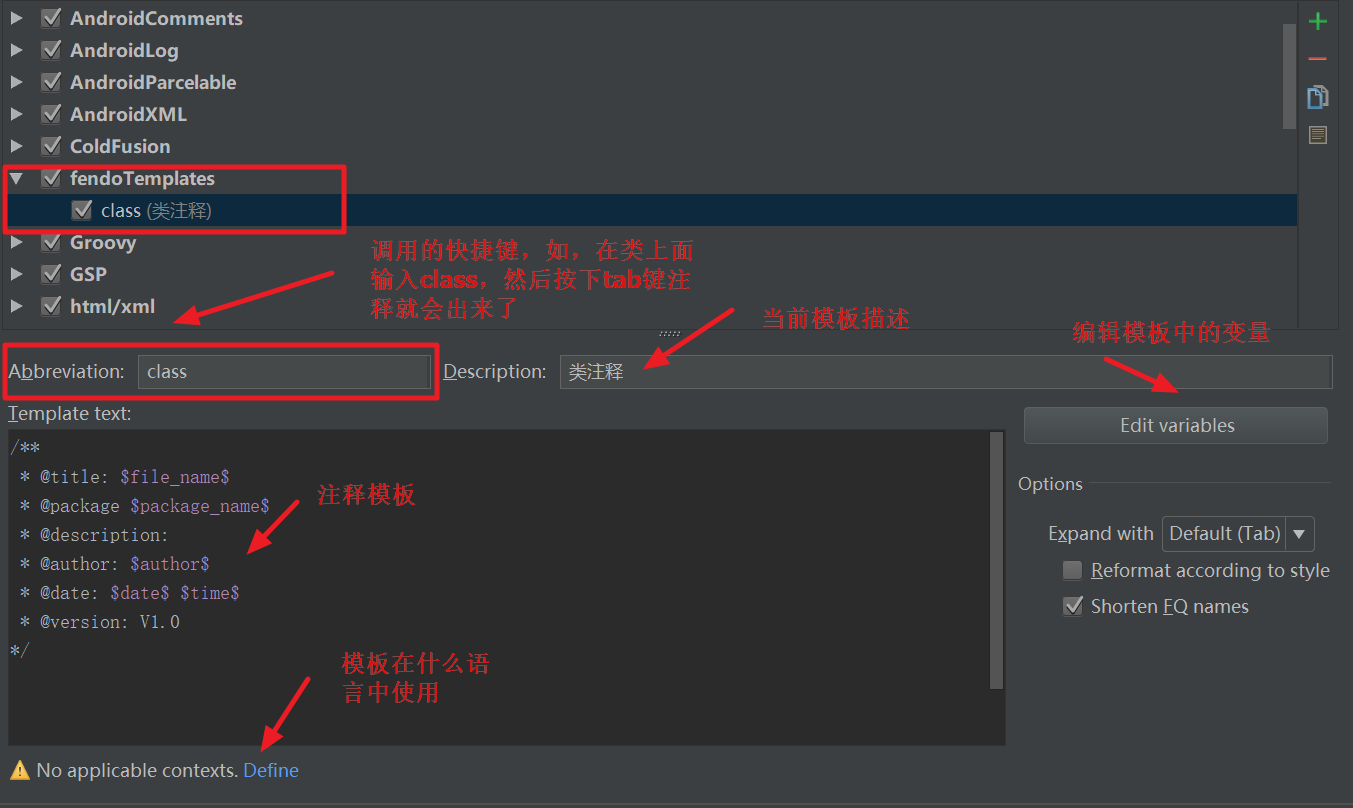
代码注释模板如下:
/**
 * @title: $file_name$
 * @package $package_name$
 * @description:
 * @author: $author$
 * @date: $date$ $time$
 * @version: V1.0
*/
这里的变量是$$括起来的!!
然后点击
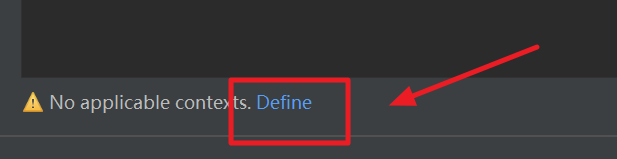
选择Everywhere
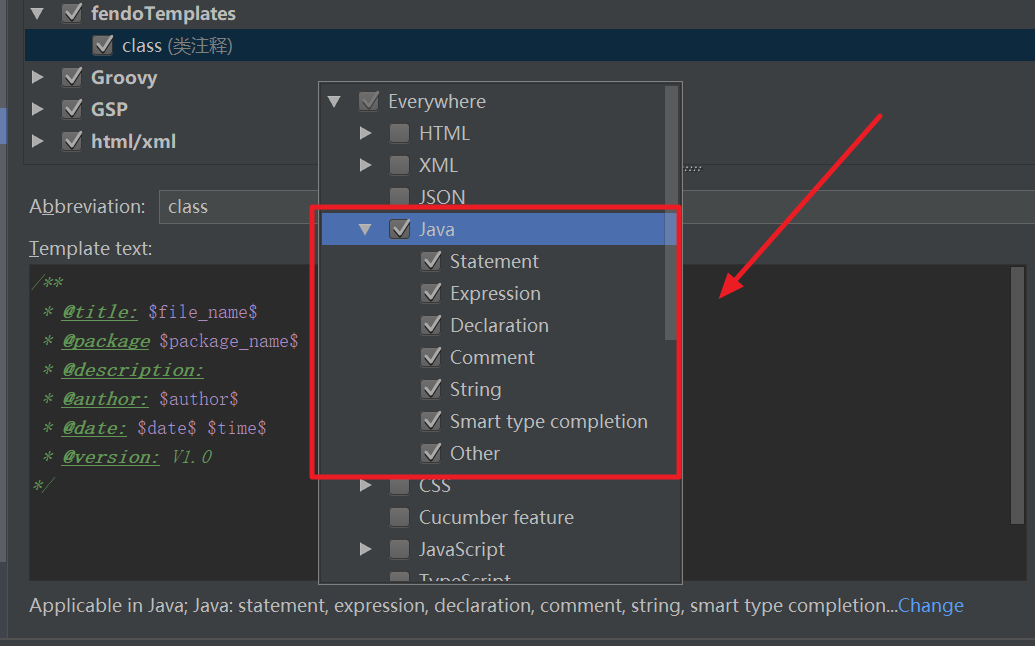
然后选择JAVA
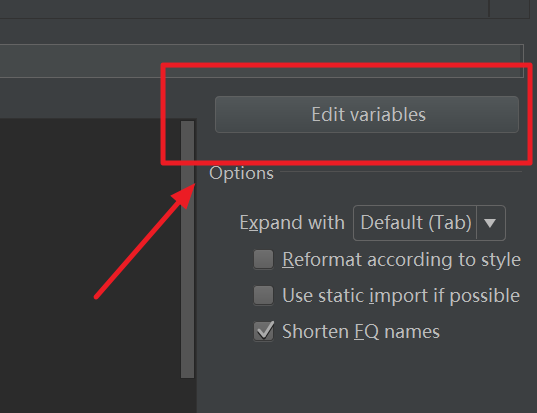
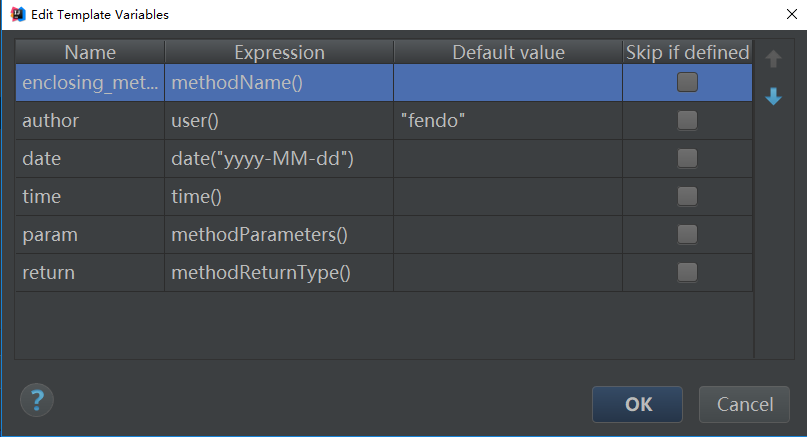
最后点击右下角的Edit variables 按钮,然后弹出一个窗口,如下:

注意:
默认值需要用""括起来!!
内置函数详细请参考:https://www.jetbrains.com/help/idea/live-template-variables.html
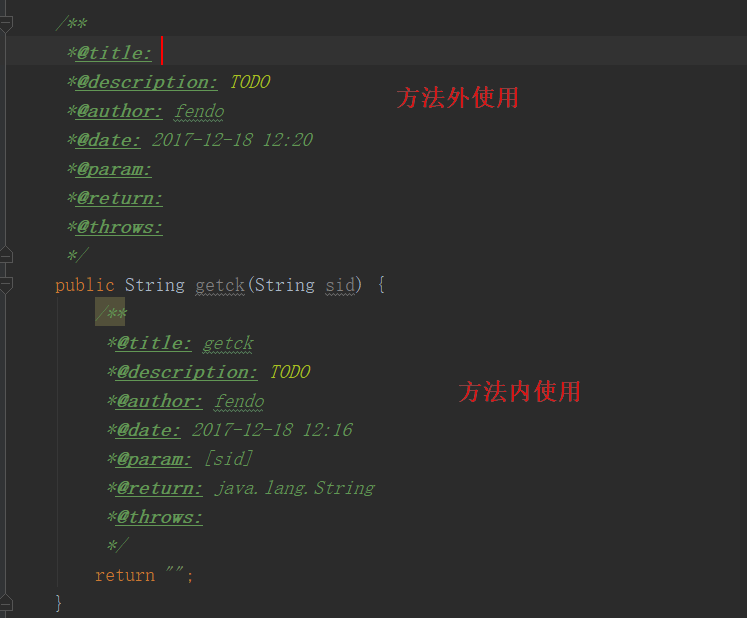
方法注释如下:
/**
 *@title: $enclosing_method$
 *@description: TODO
 *@author: $author$
 *@date: $date$ $time$
 *@param: $param$
 *@return: $return$
 *@throws:
*/ 
其中的param也可以使用:
groovyScript("def result=''; def params=\"${_1}\".replaceAll('[\\\\[|\\\\]|\\\\s]', '').split(',').toList(); for(i = 0; i < params.size(); i++) {result+=' * @param ' + params[i] + ((i < params.size() - 1) ? '\\n\\b' : '')}; return result", methodParameters())
这种生成的会换行。
注意:
有个很坑的地方就是,使用这个注释的时候,必须在方法内使用,如果在方法外使用有些参数就会获取不到。。。
不足之处:
1、live template中的函数方法是读取当前函数体的属性,所以只有在该方法内使用该命令才能获取,如果想获取其他一些信息,如项目名,字段名,根本获取不到,这是个比较鸡肋的地方。
2、Template variables的Expression不能叠加方法。定制化程度不够好。
IntelliJ IDEA 的实时代码模板保存在 /templates 目录下,其他系统目录位置如下:
Windows: C:\Users\xxxx\.IntelliJIdea2017.2\config
Linux: ~/.<product name><version number>/config/templates
OS X: ~/Library/Preferences/IdeaIC2017.2/templates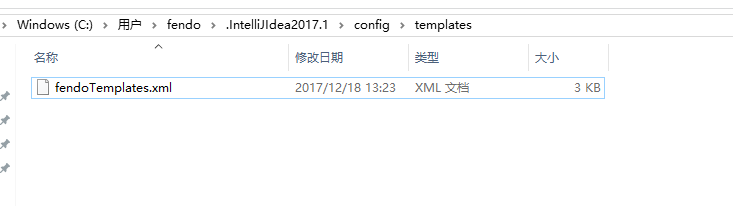
一些常用的模板:
1.logger
private static final Logger logger = LoggerFactory.getLogger($CLASS_NAME$.class);2.loggerout
logger.info("op=start_$METHOD_NAME$, $PARAMS_FORMAT$", $PARAMS$);3.test
@Test
public void test() {

}智能推荐
攻防世界_难度8_happy_puzzle_攻防世界困难模式攻略图文-程序员宅基地
文章浏览阅读645次。这个肯定是末尾的IDAT了,因为IDAT必须要满了才会开始一下个IDAT,这个明显就是末尾的IDAT了。,对应下面的create_head()代码。,对应下面的create_tail()代码。不要考虑爆破,我已经试了一下,太多情况了。题目来源:UNCTF。_攻防世界困难模式攻略图文
达梦数据库的导出(备份)、导入_达梦数据库导入导出-程序员宅基地
文章浏览阅读2.9k次,点赞3次,收藏10次。偶尔会用到,记录、分享。1. 数据库导出1.1 切换到dmdba用户su - dmdba1.2 进入达梦数据库安装路径的bin目录,执行导库操作 导出语句:./dexp cwy_init/[email protected]:5236 file=cwy_init.dmp log=cwy_init_exp.log 注释: cwy_init/init_123..._达梦数据库导入导出
js引入kindeditor富文本编辑器的使用_kindeditor.js-程序员宅基地
文章浏览阅读1.9k次。1. 在官网上下载KindEditor文件,可以删掉不需要要到的jsp,asp,asp.net和php文件夹。接着把文件夹放到项目文件目录下。2. 修改html文件,在页面引入js文件:<script type="text/javascript" src="./kindeditor/kindeditor-all.js"></script><script type="text/javascript" src="./kindeditor/lang/zh-CN.js"_kindeditor.js
STM32学习过程记录11——基于STM32G431CBU6硬件SPI+DMA的高效WS2812B控制方法-程序员宅基地
文章浏览阅读2.3k次,点赞6次,收藏14次。SPI的详情简介不必赘述。假设我们通过SPI发送0xAA,我们的数据线就会变为10101010,通过修改不同的内容,即可修改SPI中0和1的持续时间。比如0xF0即为前半周期为高电平,后半周期为低电平的状态。在SPI的通信模式中,CPHA配置会影响该实验,下图展示了不同采样位置的SPI时序图[1]。CPOL = 0,CPHA = 1:CLK空闲状态 = 低电平,数据在下降沿采样,并在上升沿移出CPOL = 0,CPHA = 0:CLK空闲状态 = 低电平,数据在上升沿采样,并在下降沿移出。_stm32g431cbu6
计算机网络-数据链路层_接收方收到链路层数据后,使用crc检验后,余数为0,说明链路层的传输时可靠传输-程序员宅基地
文章浏览阅读1.2k次,点赞2次,收藏8次。数据链路层习题自测问题1.数据链路(即逻辑链路)与链路(即物理链路)有何区别?“电路接通了”与”数据链路接通了”的区别何在?2.数据链路层中的链路控制包括哪些功能?试讨论数据链路层做成可靠的链路层有哪些优点和缺点。3.网络适配器的作用是什么?网络适配器工作在哪一层?4.数据链路层的三个基本问题(帧定界、透明传输和差错检测)为什么都必须加以解决?5.如果在数据链路层不进行帧定界,会发生什么问题?6.PPP协议的主要特点是什么?为什么PPP不使用帧的编号?PPP适用于什么情况?为什么PPP协议不_接收方收到链路层数据后,使用crc检验后,余数为0,说明链路层的传输时可靠传输
软件测试工程师移民加拿大_无证移民,未受过软件工程师的教育(第1部分)-程序员宅基地
文章浏览阅读587次。软件测试工程师移民加拿大 无证移民,未受过软件工程师的教育(第1部分) (Undocumented Immigrant With No Education to Software Engineer(Part 1))Before I start, I want you to please bear with me on the way I write, I have very little gen...
随便推点
Thinkpad X250 secure boot failed 启动失败问题解决_安装完系统提示secureboot failure-程序员宅基地
文章浏览阅读304次。Thinkpad X250笔记本电脑,装的是FreeBSD,进入BIOS修改虚拟化配置(其后可能是误设置了安全开机),保存退出后系统无法启动,显示:secure boot failed ,把自己惊出一身冷汗,因为这台笔记本刚好还没开始做备份.....根据错误提示,到bios里面去找相关配置,在Security里面找到了Secure Boot选项,发现果然被设置为Enabled,将其修改为Disabled ,再开机,终于正常启动了。_安装完系统提示secureboot failure
C++如何做字符串分割(5种方法)_c++ 字符串分割-程序员宅基地
文章浏览阅读10w+次,点赞93次,收藏352次。1、用strtok函数进行字符串分割原型: char *strtok(char *str, const char *delim);功能:分解字符串为一组字符串。参数说明:str为要分解的字符串,delim为分隔符字符串。返回值:从str开头开始的一个个被分割的串。当没有被分割的串时则返回NULL。其它:strtok函数线程不安全,可以使用strtok_r替代。示例://借助strtok实现split#include <string.h>#include <stdio.h&_c++ 字符串分割
2013第四届蓝桥杯 C/C++本科A组 真题答案解析_2013年第四届c a组蓝桥杯省赛真题解答-程序员宅基地
文章浏览阅读2.3k次。1 .高斯日记 大数学家高斯有个好习惯:无论如何都要记日记。他的日记有个与众不同的地方,他从不注明年月日,而是用一个整数代替,比如:4210后来人们知道,那个整数就是日期,它表示那一天是高斯出生后的第几天。这或许也是个好习惯,它时时刻刻提醒着主人:日子又过去一天,还有多少时光可以用于浪费呢?高斯出生于:1777年4月30日。在高斯发现的一个重要定理的日记_2013年第四届c a组蓝桥杯省赛真题解答
基于供需算法优化的核极限学习机(KELM)分类算法-程序员宅基地
文章浏览阅读851次,点赞17次,收藏22次。摘要:本文利用供需算法对核极限学习机(KELM)进行优化,并用于分类。
metasploitable2渗透测试_metasploitable2怎么进入-程序员宅基地
文章浏览阅读1.1k次。一、系统弱密码登录1、在kali上执行命令行telnet 192.168.26.1292、Login和password都输入msfadmin3、登录成功,进入系统4、测试如下:二、MySQL弱密码登录:1、在kali上执行mysql –h 192.168.26.129 –u root2、登录成功,进入MySQL系统3、测试效果:三、PostgreSQL弱密码登录1、在Kali上执行psql -h 192.168.26.129 –U post..._metasploitable2怎么进入
Python学习之路:从入门到精通的指南_python人工智能开发从入门到精通pdf-程序员宅基地
文章浏览阅读257次。本文将为初学者提供Python学习的详细指南,从Python的历史、基础语法和数据类型到面向对象编程、模块和库的使用。通过本文,您将能够掌握Python编程的核心概念,为今后的编程学习和实践打下坚实基础。_python人工智能开发从入门到精通pdf