uni-app微信小程序知识点 项目知识点_uniapp微信小程序开发-程序员宅基地
小程序进阶
一、uni-app
1.介绍
uni-app 是一个使用**Vue.js **开发所有前端应用的框架,开发者编写一套代码,可发布到iOS、Android、Web(响应式)、以及各种小程序(微信/支付宝/百度/头条/QQ/钉钉/淘宝)、快应用等多个平台
选择 uni-app 框架两个主要原因:
- 使用 Vue.js 语法开发
- 支持编译成多端
官网地址:https://uniapp.dcloud.net.cn/
2.安装步骤
1.全局安装脚手架
npm install -g @vue/cli@4 (这里安装的是4.x版本)
2.使用脚手架创建 uni-app 项目
vue create -p dcloudio/uni-preset-vue my-project(项目名)
3.编译uni-app 项目
npm run serve
4.Vscode 插件安装 uni-helper / uniapp-snippet(可选)
或者

3.项目启动
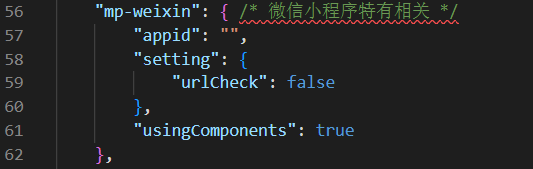
1.填入appid
// src/manifest.json
"mp-weixin": {
     /* 微信小程序特有相关 */
  "appid": "", // 这里填入appid
  "setting": {

    "urlCheck": false
  },
  "usingComponents": true
},
2.运行编译uni-app项目
在项目根目录下运行
npm run dev:mp-weixin
3.微信开发者工具导入uniapp项目
打开微信开发者工具导入uni app项目
路径是 /dist/dev/mp-weixin
4.目录结构
在这里插入图片描述
5.uni-app生命周期
官方文档:https://zh.uniapp.dcloud.io/collocation/App.html
作用
生命周期是一堆会在特定时期执行的函数
分类
1.应用生命周期 使用小程序的规范
- onLaunch
2.页面生命周期 使用小程序的规范
- onLoad
3.组件生命周期 使用vue的规范
- created
6.uni-app的api
与原生api区别
1.解决了原生的小程序api不支持promise形式的调用(需要自己封装)
2.解决了原生的微信小程序api不支持跨平台
特点
1.前缀不一样。如 wx.request 修改 为 uni.request 即可。
2.如果该方法有返回值,那么 返回值是一个数组,第1项为错误信息,第2项才是想要的返回结果
示例
async onLoad() {

  // 如果模拟器报错    [Symbol.iterator]()  含有这些字段, 那么就不能使用解构赋值
  // async  await调用时返回的是一个数组,数组的第一项表示错误信息,第2项表示返回结果
  const [error, res] = await uni.request({

  url: ''
  });
  console.log(res);
}
7.自定义组件
传统导入
1.创建组件
src>components>MyImage.vue
2.引入组件
import MyImage from '@/components/MyImage.vue'
3.注册组件
components:{

  MyImage
}
4.使用组件
<template>
  <view>
    <my-image/>
  </view>
</template>

easycom
简介
easycom是uni-app提供的一种更加简单使用组件的规范,允许你在页面中直接使用自定义组件而无需显式引入。
步骤
1.创建组件
必须按照固定格式创建组件 /components/组件名称/组件名称.vue
src>components>EasyImage>EasyImage.vue
2.使用组件
<template>
  <view>
    <easy-image/>
  </view>
</template>

二、组件库uViewUI
1.介绍
uView UI,是uni-app生态最优秀的UI框架
官方文档:https://www.uviewui.com/
官方推荐的是 uni-ui
官方文档:https://uniapp.dcloud.net.cn/component/uniui/uni-ui.html
2.使用步骤
1.安装依赖 (注意:项目名称不能有中文字符)
// 安装sass
npm i sass -D

// 安装sass-loader,注意需要版本10,否则可能会导致vue与sass的兼容问题而报错
npm i sass-loader@10 -D

// 安装uview-ui
npm install [email protected]
2.全局引入uview js库
//src>main.js
import uView from "uview-ui";
Vue.use(uView);

3.全局引入uView的全局SCSS主题文件
//src>uni.scss
/* uni.scss */
@import 'uview-ui/theme.scss';

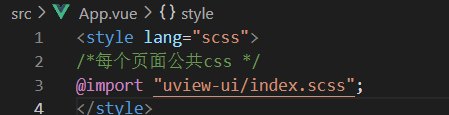
4.全局引入uview 基础样式
// 在App.vue中首行的位置引入,注意给style标签加入lang="scss"属性
<style lang="scss">
  /* 注意要写在第一行,同时给style标签加入lang="scss"属性 */
  @import "uview-ui/index.scss";
</style>
5.配置easycom模式引入uview组件
// pages.json
{

  "easycom": {

    "^u-(.*)": "uview-ui/components/u-$1/u-$1.vue"
  },
  // 此为本身已有的内容
  "pages": [
    // ......
  ]
}

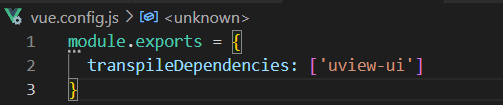
6.配置vue.config.js文件
// vue.config.js,如没有此文件则手动创建 放入项目根目录下
module.exports = {

    transpileDependencies: ['uview-ui']
}
7.使用uview组件
<u-button type="primary" :disabled="disabled" text="禁用"></u-button>
<u-button type="primary" loading loadingText="加载中"></u-button>
<u-button type="primary" icon="map" text="图标按钮"></u-button>
<u-button type="primary" shape="circle" text="按钮形状"></u-button>
<u-button type="primary" size="small" text="大小尺寸"></u-button>
三、项目技术点
1.http请求封装
参考文档:https://www.uviewui.com/js/http.html
核心步骤
1.配置请求基地址
// src>main.js
uni.$u.http.setConfig((config) => {

  /* config 为默认全局配置*/
  config.baseURL = '基地址';
  return config
})
2.设置请求拦截器,显示加载提示
// src>main.js
// 设置请求拦截器
uni.$u.http.interceptors.request.use((config) => {
     // 可使用async await 做异步操作
  uni.showLoading();
  return config
}, config => {
     // 可使用async await 做异步操作
  return Promise.reject(config)
})
3.设置响应拦截器,关闭加载提示
// src>main.js
// 设置响应拦截器
uni.$u.http.interceptors.response.use((response) => {

  uni.hideLoading();
  return response
}, (response) => {

  return Promise.reject(response)
});
4.将请求更换为$u.http的形式
uni.$u.http.request({
    xxxxx})

//示例
methods: {

    async getNavList() {

      const res = await uni.$u.http.request({

        url: "url",
      });
       this.navList = res.data.message;
    },
  },
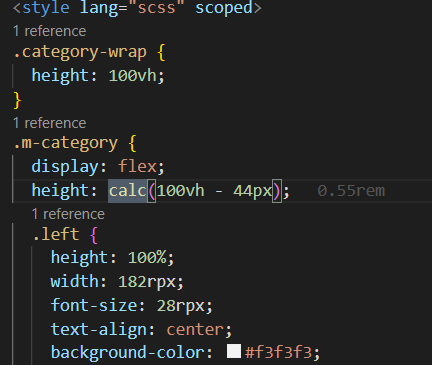
2.小程序中的视口高度
面试题:100vh在小程序中的高度与浏览器中的高度有何不同?
区别
打开检查工具就会发现

计算公式
- 100vh在浏览器中 = 屏幕的高度
- 100vh在小程序中 = 屏幕的高度 - 导航栏的高度 - tabbar的高度
状态栏高度
uni.getSystemInfoSync().statusBarHeight
微信小程序导航栏高度在大部分机型上都是44px
结论
浏览器中,100vh 通常指整个浏览器窗口的可视高度。
小程序中,100vh 通常会考虑导航栏、状态栏和底部 tabBar 的高度。实际的视口高度要减去这些元素的高度。
css中的calc计算函数
介绍
calc() 此 CSS函数允许在声明 CSS 属性值时执行一些计算。
width: calc(100% - 50px)
height: calc(100vh - 20rpx - 50px)
3.返回顶部
问题
切换tab后页面没有回到顶部

分析
多个tab间相互切换时,scroll-top并没有被重置为0,而是上一个scroll-view的滚动值
解决方案示例
<!-- 分类页左边滚动区 -->
      <scroll-view scroll-y class="left">
        <view
          @click="changeActiveIndex(index)"
          v-for="(item, index) in cateLeft"
          :key="item.cat_id"
          class="item"
          :class="{ active: activeIndex === index }"
          >{
   { item.cat_name }}</view
        >
      </scroll-view>
// 更改选中的分类
changeActiveIndex(index) {

  // 其他操作
  ...
  // 将其重置为-1,然后再下一次更新时重置为0,这样scroll-view就能每次都监测到变化
  this.scrollTop = -1;
  // 使用 $nextTick 来确保 DOM 更新后再设置 scrollTop
  this.$nextTick(() => {

    this.scrollTop = 0;
  });
}

4.下拉刷新

示例步骤
1.开启下拉刷新并监听下拉事件
{

  "enablePullDownRefresh": true
}
2.重置数据,重新发送请求
async onPullDownRefresh() {

    // 重置商品数据
    this.goodsList = [];
    // 重置页码及总条数
    this.queryParams.pagenum = 1;
    this.total = 0;
    // 重新发送数据请求
    await this.getGoodsList();
  },
3.关闭下拉刷新效果
async onPullDownRefresh() {

   	// 其他操作
   	...
    // 关闭下拉刷新效果
    uni.stopPullDownRefresh();
  },
5.全屏大图预览

官方文档:https://developers.weixin.qq.com/miniprogram/dev/api/media/image/wx.previewImage.html
<script>
    methods: {

        // 预览图片
        previewImage(current) {

            const urls = this.goodsDetail.pics.map((v) => v.pics_big);
            uni.previewImage({

                urls,
                current,
            });
        },
    }
</script>
6.富文本方案

在uniapp+uview的项目架构中,有三种渲染富文本标签的方法。
1.使用vue语法的 v-html
示例
<!-- 使用v-html渲染富文本 -->
  <view v-html="goodsDetail.goods_introduce"></view> -->
2.使用小程序标签 rich-text 原生小程序/uni-app
uni-app文档:https://uniapp.dcloud.net.cn/component/rich-text.html
原生文档:https://developers.weixin.qq.com/miniprogram/dev/component/rich-text.html
<!-- 富文本组件展示html标签 rich-text -->
  <rich-text
  class="goods_introduce-content"
  :nodes="goodsDetail.goods_introduce"
  ></rich-text> -->
3.使用uview 内置的 u-parse 组件 官网
官网文档:https://www.uviewui.com/components/parse.html
<!-- 使用uview中的u-parse渲染富文本 -->
  <u-parse
  :content="goodsDetail.goods_introduce"
  :tagStyle="{ img: 'width:100%;height:auto;vertical-align:middle' }"
  ></u-parse>
7.使用vuex
1.导入vuex
新建 store/index.js
// store/index.js
// 导入 vue 和 vuex
import Vue from 'vue'
import Vuex from 'vuex'
2.以插件形式使用vuex
// store/index.js
// 导入 vue 和 vuex
import Vue from 'vue'
import Vuex from 'vuex'

// 以插件形式使用 vuex
Vue.use(Vuex)
3.创建store实例
// 导入 vue 和 vuex
import Vue from 'vue'
import Vuex from 'vuex'

// 以插件形式使用 vuex
Vue.use(Vuex)

// Vuex.Store 构造器选项
const store = new Vuex.Store({

  state: {

    username: 'foo',
    age: 18,
  },
})
// 导出实例
export default store
4.导入并注册store实例
// src>main.js
import Vue from 'vue'
import App from './App'
// 导入 store 实例
import store from './store'

const app = new Vue({

    // 把 store 的实例注入所有的子组件
	store,
	...App
})
app.$mount()
注意
小程序端模板不支持 $store.xxx 写法
<!-- 不支持的写法 -->
<view>{
   { $store.state.username }} </view>
解决方案
通过 computed 计算出新的变量在当前页面使用
computed: {

	...mapState(['username'])
}
示例
注意:为了防止对象的修改影响到了原始对象,所有一定要深拷贝
<script>
export default {

  computed: {

    cartList() {

      // 一定要深拷贝
      return JSON.parse(JSON.stringify(this.$store.state.cartList));
    }
  },
};
</script>
8.全选反选
示例步骤
1.绑定点击事件
<radio
 class="select-radio"
 :checked="isAllSelected"
 @click="allSelectFn"
 color="#EB4450">
2.更新所有商品状态
// 全选按钮
allSelectFn() {

// 将购物车数组中所有的item选中状态设置为isAllSelected的值取反
// isAllSelected控制全选按钮状态,初始为false
  this.cartList.forEach((item) => {

    item.goods_select = !this.isAllSelected;
  });
  // 提交 Vuex mutation,更新购物车状态
  this.$store.commit("addCartMutation", this.cartList);
    },
3.更新Vuex和本地数据
// src>store>index.js
 mutations: {

   addCartMutation(state, payload) {

     state.cartList = payload
       // 本地存储购物车内容
       uni.setStorage({

         key: 'cart',
         data: payload
         })
      },
    },
4.getting动态修改全选状态
// src>store>index.js
 getters:{

    isAllSelected(state){

        return state.cartList.every(item => item.goods_select)
    },
}
9.获取微信收货地址
wx.chooseAddress
由于小程序是运行在微信上的一个程序,因此可以获取微信的收货地址,所有微信小程序都能调用。
自 2022 年 7 月 14 日后发布的小程序,若使用该接口,需要在 app.json 中进行声明
原生小程序声明方式,app.json中
"tabBar": {

},
"requiredPrivateInfos": [
  "chooseAddress"
],
uni-app声明方式,mainfest.json中
"mp-weixin": {

  "appid": "xxxx",
  "setting": {

    "urlCheck": false
  },
  "requiredPrivateInfos": [
    "chooseAddress"
  ],
  "usingComponents": true
},
调用wx.chooseAddress获取收货地址
addAddress() {

  uni.chooseAddress({

    success: (res) => {

      console.log(res);
      this.address = res
      }
    })
  },
10.Vuex命名空间模块
vuex中的模块
const moduleA = {

  state: () => ({
     ... }),
  mutations: {
     ... },
  actions: {
     ... },
  getters: {
     ... }
}

const moduleB = {

  state: () => ({
     ... }),
  mutations: {
     ... },
  actions: {
     ... }
}

const store = createStore({

  modules: {

    a: moduleA,
    b: moduleB
  }
})

store.state.a // -> moduleA 的状态
store.state.b // -> moduleB 的状态
命名空间模块
默认情况
默认情况下,模块内部的 action 和 mutation 仍然是注册在全局命名空间的——这样使得多个模块能够对同一个 action 或 mutation 作出响应。
getter 同样也默认注册在全局命名空间,但是目前这并非出于功能上的目的(仅仅是维持现状来避免非兼容性变更)。
必须注意,不要在不同的、无命名空间的模块中定义两个相同的 getter 从而导致错误。
命名空间模块
如果希望你的模块具有更高的封装度和复用性,你可以通过添加 namespaced: true 的方式使其成为带命名空间的模块。
当模块被注册后,它的所有 getter、action 及 mutation 都会自动根据模块注册的路径调整命名
const store = createStore({

  modules: {

    account: {

      namespaced: true,

      // 模块内容(module assets)
      state: () => ({
     ... }), // 模块内的状态已经是嵌套的了,使用 `namespaced` 属性不会对其产生影响
      getters: {

        isAdmin () {
     ... } // -> getters['account/isAdmin']
      },
      actions: {

        login () {
     ... } // -> dispatch('account/login')
      },
      mutations: {

        login () {
     ... } // -> commit('account/login')
      },
   }
 }
});
11.小程序登录
1.调用uni.getUserInfo获取加密的用户信息
// 用户登录
    async wxLogin() {

      // 获取用户信息
      const [error, res] = await uni.getUserInfo();
      // const res2 = await wx.getUserProfile({ desc: '获取用户信息用于登录' });
      // 使用上面的api也可以,但是要注意,版本号要在 2.27.1以下
      // console.log(res);
      // 解构res
      const {
     encryptedData, iv, rawData, signature } = res;
    },
2.调用uni.login获取code码
// 用户登录
    async wxLogin() {

      // 获取用户信息
      const [error, res] = await uni.getUserInfo();
      // const res2 = await wx.getUserProfile({ desc: '获取用户信息用于登录' });
      // 使用上面的api也可以,但是要注意,版本号要在 2.27.1以下
      // console.log(res);
      // 解构res
      const {
     encryptedData, iv, rawData, signature } = res;

      // 获取code码
      const [error1, {
     code }] = await uni.login();

    },
3.根据以上两个api的返回作为参数发送请求
// 用户登录
    async wxLogin() {

      // 获取用户信息
      const [error, res] = await uni.getUserInfo();
      // const res2 = await wx.getUserProfile({ desc: '获取用户信息用于登录' });
      // 使用上面的api也可以,但是要注意,版本号要在 2.27.1以下
      // console.log(res);
      // 解构res
      const {
     encryptedData, iv, rawData, signature } = res;

      // 获取code码
      const [error1, {
     code }] = await uni.login();
      console.log(code);

      // 定义请求参数
      const data = {

        code, // 用户登录凭证
		encryptedData, // 用户信息中获取的加密数据
		iv, // 用户信息中获取的初始向量
		rawData, // 用户信息中获取的不包括敏感信息的数据
		signature // 用户信息中获取的用于校验用户信息真实性的签名
      };

      // 发送请求
      const resData = await uni.$u.http.post("后端登录url", data);
	  console.log(resData);
    },
12.小程序的支付
1.判断是否已经有收货地址
// 去支付
    async gotoPay() {

    // 判断是
      if (!this.addressDetail.trim()) {

        return uni.showToast({

          icon: 'none',
          title: '请填写详细地址~'
        });
      }
      // 获取订单编号
      ...
  },
2.创建订单获取订单编号
// 去支付
    async gotoPay() {

      if (!this.addressDetail.trim()) {

        return uni.showToast({

          icon: 'none',
          title: '请填写详细地址~'
        });
      }
      // 获取订单编号
      // 定义请求参数
      const data = {

        order_price: this.selectedCartListPrice,
        consignee_addr: this.detailAddress,
        goods: this.selectedCartList.map((v) => {

          return {

            goods_id: v.goods_id,
            goods_number: v.goods_count,
            goods_price: v.goods_price,
          };
        }),
      };
      const res = await uni.$u.http.post("后端提供的url", data);
      // 获取订单编号
      const {
     order_number } = res.data.message;
  },
3.根据订单编号创建支付流程获取支付参数
// 去支付
    async gotoPay() {

      if (!this.addressDetail.trim()) {

        return uni.showToast({

          icon: 'none',
          title: '请填写详细地址~'
        });
      }
      // 获取订单编号
      // 定义请求参数
      const data = {

        order_price: this.selectedCartListPrice,
        consignee_addr: this.detailAddress,
        goods: this.selectedCartList.map((v) => {

          return {

            goods_id: v.goods_id,
            goods_number: v.goods_count,
            goods_price: v.goods_price,
          };
        }),
      };
      const res = await uni.$u.http.post("后端提供的url", data);
      // console.log(res);
      // 获取订单编号
      const {
     order_number } = res.data.message;
      // 获取支付参数
      const res1 = await uni.$u.http.post('后端提供的url', {

        order_number
      });
      // 获取支付参数
      const {
     pay } = res1.data.message;
  },
4.根据支付参数调用微信支付api wx.requestPayment发起支付
// 去支付
    async gotoPay() {

      if (!this.addressDetail.trim()) {

        return uni.showToast({

          icon: 'none',
          title: '请填写详细地址~'
        });
      }
      // 获取订单编号
      // 定义请求参数
      const data = {

        order_price: this.selectedCartListPrice,
        consignee_addr: this.detailAddress,
        goods: this.selectedCartList.map((v) => {

          return {

            goods_id: v.goods_id,
            goods_number: v.goods_count,
            goods_price: v.goods_price,
          };
        }),
      };
      const res = await uni.$u.http.post("/my/orders/create", data);
      // 获取订单编号
      const {
     order_number } = res.data.message;
      // 获取支付参数
      const res1 = await uni.$u.http.post('/my/orders/req_unifiedorder', {

        order_number
      });
      // 获取支付参数
      const {
     pay } = res1.data.message;

      // 调api 发起支付
      uni.requestPayment(pay);
  },
智能推荐
攻防世界_难度8_happy_puzzle_攻防世界困难模式攻略图文-程序员宅基地
文章浏览阅读645次。这个肯定是末尾的IDAT了,因为IDAT必须要满了才会开始一下个IDAT,这个明显就是末尾的IDAT了。,对应下面的create_head()代码。,对应下面的create_tail()代码。不要考虑爆破,我已经试了一下,太多情况了。题目来源:UNCTF。_攻防世界困难模式攻略图文
达梦数据库的导出(备份)、导入_达梦数据库导入导出-程序员宅基地
文章浏览阅读2.9k次,点赞3次,收藏10次。偶尔会用到,记录、分享。1. 数据库导出1.1 切换到dmdba用户su - dmdba1.2 进入达梦数据库安装路径的bin目录,执行导库操作 导出语句:./dexp cwy_init/[email protected]:5236 file=cwy_init.dmp log=cwy_init_exp.log 注释: cwy_init/init_123..._达梦数据库导入导出
js引入kindeditor富文本编辑器的使用_kindeditor.js-程序员宅基地
文章浏览阅读1.9k次。1. 在官网上下载KindEditor文件,可以删掉不需要要到的jsp,asp,asp.net和php文件夹。接着把文件夹放到项目文件目录下。2. 修改html文件,在页面引入js文件:<script type="text/javascript" src="./kindeditor/kindeditor-all.js"></script><script type="text/javascript" src="./kindeditor/lang/zh-CN.js"_kindeditor.js
STM32学习过程记录11——基于STM32G431CBU6硬件SPI+DMA的高效WS2812B控制方法-程序员宅基地
文章浏览阅读2.3k次,点赞6次,收藏14次。SPI的详情简介不必赘述。假设我们通过SPI发送0xAA,我们的数据线就会变为10101010,通过修改不同的内容,即可修改SPI中0和1的持续时间。比如0xF0即为前半周期为高电平,后半周期为低电平的状态。在SPI的通信模式中,CPHA配置会影响该实验,下图展示了不同采样位置的SPI时序图[1]。CPOL = 0,CPHA = 1:CLK空闲状态 = 低电平,数据在下降沿采样,并在上升沿移出CPOL = 0,CPHA = 0:CLK空闲状态 = 低电平,数据在上升沿采样,并在下降沿移出。_stm32g431cbu6
计算机网络-数据链路层_接收方收到链路层数据后,使用crc检验后,余数为0,说明链路层的传输时可靠传输-程序员宅基地
文章浏览阅读1.2k次,点赞2次,收藏8次。数据链路层习题自测问题1.数据链路(即逻辑链路)与链路(即物理链路)有何区别?“电路接通了”与”数据链路接通了”的区别何在?2.数据链路层中的链路控制包括哪些功能?试讨论数据链路层做成可靠的链路层有哪些优点和缺点。3.网络适配器的作用是什么?网络适配器工作在哪一层?4.数据链路层的三个基本问题(帧定界、透明传输和差错检测)为什么都必须加以解决?5.如果在数据链路层不进行帧定界,会发生什么问题?6.PPP协议的主要特点是什么?为什么PPP不使用帧的编号?PPP适用于什么情况?为什么PPP协议不_接收方收到链路层数据后,使用crc检验后,余数为0,说明链路层的传输时可靠传输
软件测试工程师移民加拿大_无证移民,未受过软件工程师的教育(第1部分)-程序员宅基地
文章浏览阅读587次。软件测试工程师移民加拿大 无证移民,未受过软件工程师的教育(第1部分) (Undocumented Immigrant With No Education to Software Engineer(Part 1))Before I start, I want you to please bear with me on the way I write, I have very little gen...
随便推点
Thinkpad X250 secure boot failed 启动失败问题解决_安装完系统提示secureboot failure-程序员宅基地
文章浏览阅读304次。Thinkpad X250笔记本电脑,装的是FreeBSD,进入BIOS修改虚拟化配置(其后可能是误设置了安全开机),保存退出后系统无法启动,显示:secure boot failed ,把自己惊出一身冷汗,因为这台笔记本刚好还没开始做备份.....根据错误提示,到bios里面去找相关配置,在Security里面找到了Secure Boot选项,发现果然被设置为Enabled,将其修改为Disabled ,再开机,终于正常启动了。_安装完系统提示secureboot failure
C++如何做字符串分割(5种方法)_c++ 字符串分割-程序员宅基地
文章浏览阅读10w+次,点赞93次,收藏352次。1、用strtok函数进行字符串分割原型: char *strtok(char *str, const char *delim);功能:分解字符串为一组字符串。参数说明:str为要分解的字符串,delim为分隔符字符串。返回值:从str开头开始的一个个被分割的串。当没有被分割的串时则返回NULL。其它:strtok函数线程不安全,可以使用strtok_r替代。示例://借助strtok实现split#include <string.h>#include <stdio.h&_c++ 字符串分割
2013第四届蓝桥杯 C/C++本科A组 真题答案解析_2013年第四届c a组蓝桥杯省赛真题解答-程序员宅基地
文章浏览阅读2.3k次。1 .高斯日记 大数学家高斯有个好习惯:无论如何都要记日记。他的日记有个与众不同的地方,他从不注明年月日,而是用一个整数代替,比如:4210后来人们知道,那个整数就是日期,它表示那一天是高斯出生后的第几天。这或许也是个好习惯,它时时刻刻提醒着主人:日子又过去一天,还有多少时光可以用于浪费呢?高斯出生于:1777年4月30日。在高斯发现的一个重要定理的日记_2013年第四届c a组蓝桥杯省赛真题解答
基于供需算法优化的核极限学习机(KELM)分类算法-程序员宅基地
文章浏览阅读851次,点赞17次,收藏22次。摘要:本文利用供需算法对核极限学习机(KELM)进行优化,并用于分类。
metasploitable2渗透测试_metasploitable2怎么进入-程序员宅基地
文章浏览阅读1.1k次。一、系统弱密码登录1、在kali上执行命令行telnet 192.168.26.1292、Login和password都输入msfadmin3、登录成功,进入系统4、测试如下:二、MySQL弱密码登录:1、在kali上执行mysql –h 192.168.26.129 –u root2、登录成功,进入MySQL系统3、测试效果:三、PostgreSQL弱密码登录1、在Kali上执行psql -h 192.168.26.129 –U post..._metasploitable2怎么进入
Python学习之路:从入门到精通的指南_python人工智能开发从入门到精通pdf-程序员宅基地
文章浏览阅读257次。本文将为初学者提供Python学习的详细指南,从Python的历史、基础语法和数据类型到面向对象编程、模块和库的使用。通过本文,您将能够掌握Python编程的核心概念,为今后的编程学习和实践打下坚实基础。_python人工智能开发从入门到精通pdf