Chapter 2. ROS 创建和编译功能包_ros创建功能包-程序员宅基地
技术标签: 机器人 Building a ROS Package 机器人ROS | 基础 Creating a ROS Package ROS
1. 创建ROS功能包
使用catkin_create_pkg命令来创建一个新的catkin程序包。
首先切换到之前通过创建catkin工作空间教程创建的catkin工作空间中的src目录下:
~/ros_workspace$ cd src接着使用catkin_create_pkg命令来创建一个名为’beginner_tutorials’的新程序包,这个程序包依赖于std_msgs、roscpp和rospy:
~/ros_workspace/src$ catkin_create_pkg my_demo roscpp rospy std_msgs创建成功后,提示如下:
Created file my_demo/package.xml
Created file my_demo/CMakeLists.txt
Created folder my_demo/include/my_demo
Created folder my_demo/src
Successfully created files in /home/nic/ros_workspace/src/my_demo. Please adjust the values in package.xml.
这将会创建一个名为my_demo的文件夹,这个文件夹里面包含一个package.xml文件和一个CMakeLists.txt文件,这两个文件都已经自动包含了部分你在执行catkin_create_pkg命令时提供的信息。
catkin_create_pkg命令会要求你输入package_name,如果有需要你还可以在后面添加一些需要依赖的其它程序包:
# This is an example, do not try to run this
# catkin_create_pkg <package_name> [depend1] [depend2] [depend3]catkin_create_pkg命令也有更多的高级功能,这些功能在catkin/commands/catkin_create_pkg中有描述。
2. 编译ROS功能包
采用CLion开发环境进行编译
CLion的安装及破解请参照此文
(1)创建节点 my_demo
~/ros_workspace/src/my_demo/src$ gedit my_demo.cpp将一下示例代码复制到my_demo.cpp中:
/*
 * Copyright (C) 2008, Morgan Quigley and Willow Garage, Inc.
 *
 * Redistribution and use in source and binary forms, with or without
 * modification, are permitted provided that the following conditions are met:
 *   * Redistributions of source code must retain the above copyright notice,
 *     this list of conditions and the following disclaimer.
 *   * Redistributions in binary form must reproduce the above copyright
 *     notice, this list of conditions and the following disclaimer in the
 *     documentation and/or other materials provided with the distribution.
 *   * Neither the names of Stanford University or Willow Garage, Inc. nor the names of its
 *     contributors may be used to endorse or promote products derived from
 *     this software without specific prior written permission.
 *
 * THIS SOFTWARE IS PROVIDED BY THE COPYRIGHT HOLDERS AND CONTRIBUTORS "AS IS"
 * AND ANY EXPRESS OR IMPLIED WARRANTIES, INCLUDING, BUT NOT LIMITED TO, THE
 * IMPLIED WARRANTIES OF MERCHANTABILITY AND FITNESS FOR A PARTICULAR PURPOSE
 * ARE DISCLAIMED. IN NO EVENT SHALL THE COPYRIGHT OWNER OR CONTRIBUTORS BE
 * LIABLE FOR ANY DIRECT, INDIRECT, INCIDENTAL, SPECIAL, EXEMPLARY, OR
 * CONSEQUENTIAL DAMAGES (INCLUDING, BUT NOT LIMITED TO, PROCUREMENT OF
 * SUBSTITUTE GOODS OR SERVICES; LOSS OF USE, DATA, OR PROFITS; OR BUSINESS
 * INTERRUPTION) HOWEVER CAUSED AND ON ANY THEORY OF LIABILITY, WHETHER IN
 * CONTRACT, STRICT LIABILITY, OR TORT (INCLUDING NEGLIGENCE OR OTHERWISE)
 * ARISING IN ANY WAY OUT OF THE USE OF THIS SOFTWARE, EVEN IF ADVISED OF THE
 * POSSIBILITY OF SUCH DAMAGE.
 */
// %Tag(FULLTEXT)%
// %Tag(ROS_HEADER)%
#include "ros/ros.h"
// %EndTag(ROS_HEADER)%
// %Tag(MSG_HEADER)%
#include "std_msgs/String.h"
// %EndTag(MSG_HEADER)%

#include <sstream>

/**
 * This tutorial demonstrates simple sending of messages over the ROS system.
 */
int main(int argc, char **argv)
{
    /**
     * The ros::init() function needs to see argc and argv so that it can perform
     * any ROS arguments and name remapping that were provided at the command line.
     * For programmatic remappings you can use a different version of init() which takes
     * remappings directly, but for most command-line programs, passing argc and argv is
     * the easiest way to do it.  The third argument to init() is the name of the node.
     *
     * You must call one of the versions of ros::init() before using any other
     * part of the ROS system.
     */
// %Tag(INIT)%
    ros::init(argc, argv, "talker");
// %EndTag(INIT)%

    /**
     * NodeHandle is the main access point to communications with the ROS system.
     * The first NodeHandle constructed will fully initialize this node, and the last
     * NodeHandle destructed will close down the node.
     */
// %Tag(NODEHANDLE)%
    ros::NodeHandle n;
// %EndTag(NODEHANDLE)%

    /**
     * The advertise() function is how you tell ROS that you want to
     * publish on a given topic name. This invokes a call to the ROS
     * master node, which keeps a registry of who is publishing and who
     * is subscribing. After this advertise() call is made, the master
     * node will notify anyone who is trying to subscribe to this topic name,
     * and they will in turn negotiate a peer-to-peer connection with this
     * node.  advertise() returns a Publisher object which allows you to
     * publish messages on that topic through a call to publish().  Once
     * all copies of the returned Publisher object are destroyed, the topic
     * will be automatically unadvertised.
     *
     * The second parameter to advertise() is the size of the message queue
     * used for publishing messages.  If messages are published more quickly
     * than we can send them, the number here specifies how many messages to
     * buffer up before throwing some away.
     */
// %Tag(PUBLISHER)%
    ros::Publisher chatter_pub = n.advertise<std_msgs::String>("chatter", 1000);
// %EndTag(PUBLISHER)%

// %Tag(LOOP_RATE)%
    ros::Rate loop_rate(10);
// %EndTag(LOOP_RATE)%

    /**
     * A count of how many messages we have sent. This is used to create
     * a unique string for each message.
     */
// %Tag(ROS_OK)%
    int count = 0;
    while (ros::ok())
    {
// %EndTag(ROS_OK)%
        /**
         * This is a message object. You stuff it with data, and then publish it.
         */
// %Tag(FILL_MESSAGE)%
        std_msgs::String msg;

        std::stringstream ss;
        ss << "hello world " << count;
        msg.data = ss.str();
// %EndTag(FILL_MESSAGE)%

// %Tag(ROSCONSOLE)%
        ROS_INFO("%s", msg.data.c_str());
// %EndTag(ROSCONSOLE)%

        /**
         * The publish() function is how you send messages. The parameter
         * is the message object. The type of this object must agree with the type
         * given as a template parameter to the advertise<>() call, as was done
         * in the constructor above.
         */
// %Tag(PUBLISH)%
        chatter_pub.publish(msg);
// %EndTag(PUBLISH)%

// %Tag(SPINONCE)%
        ros::spinOnce();
// %EndTag(SPINONCE)%

// %Tag(RATE_SLEEP)%
        loop_rate.sleep();
// %EndTag(RATE_SLEEP)%
        ++count;
    }


    return 0;
}
// %EndTag(FULLTEXT)%
(2)配置CLion快捷方式
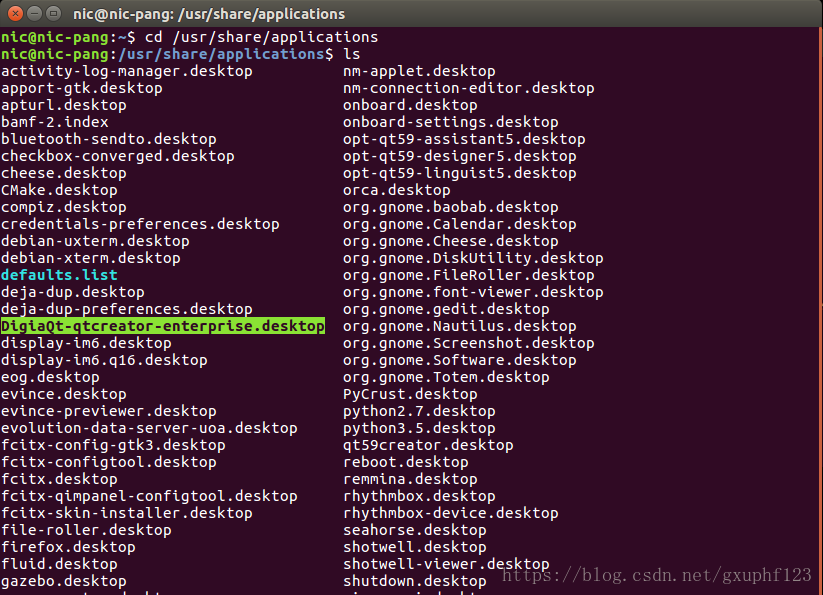
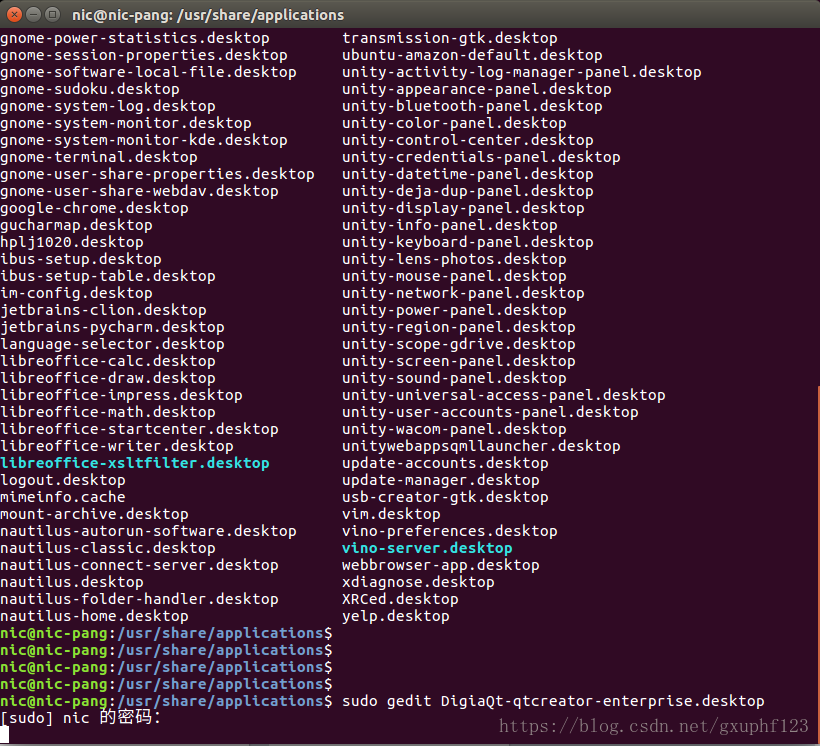
进入CLion快捷方式所在的目录:
~$ cd /usr/share/applications打开并编辑快捷方式:
/usr/share/applications$ sudo gedit jetbrains-clion.desktop按照如下所示修改:
Exec=bash -i -c "/opt/clion-2018.1.6/bin/clion.sh" %f重新注销系统使之生效。
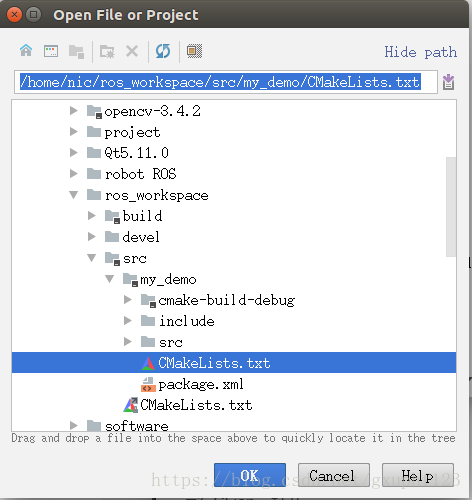
(3)加载功能包
运行CLion,打开功能包下的CMakeList.txt文件,并作为工程打开,如图:
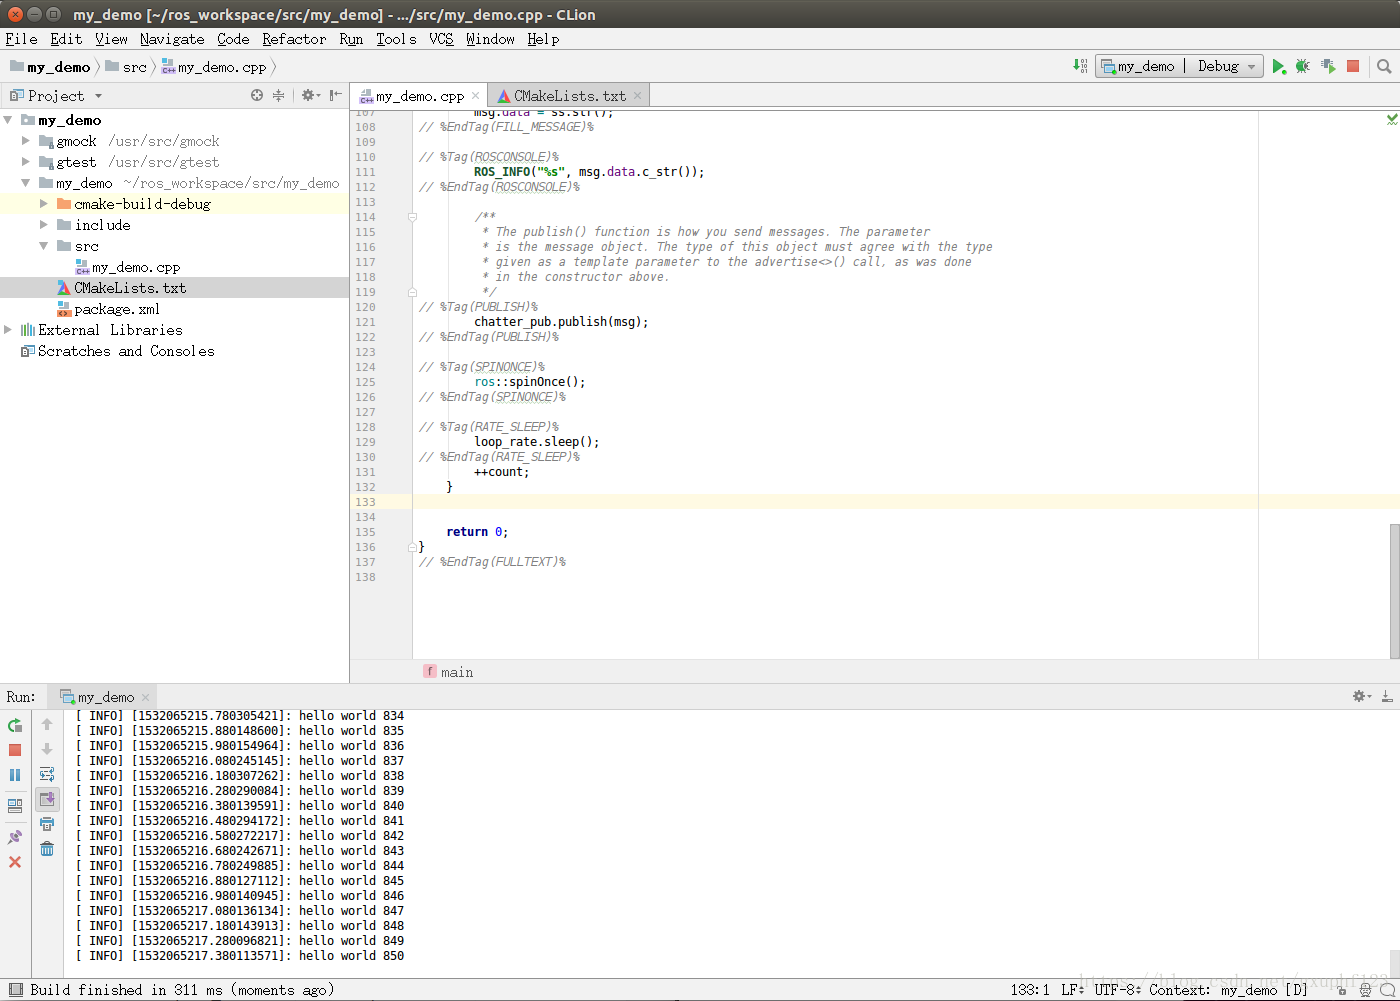
(4)编译节点并运行
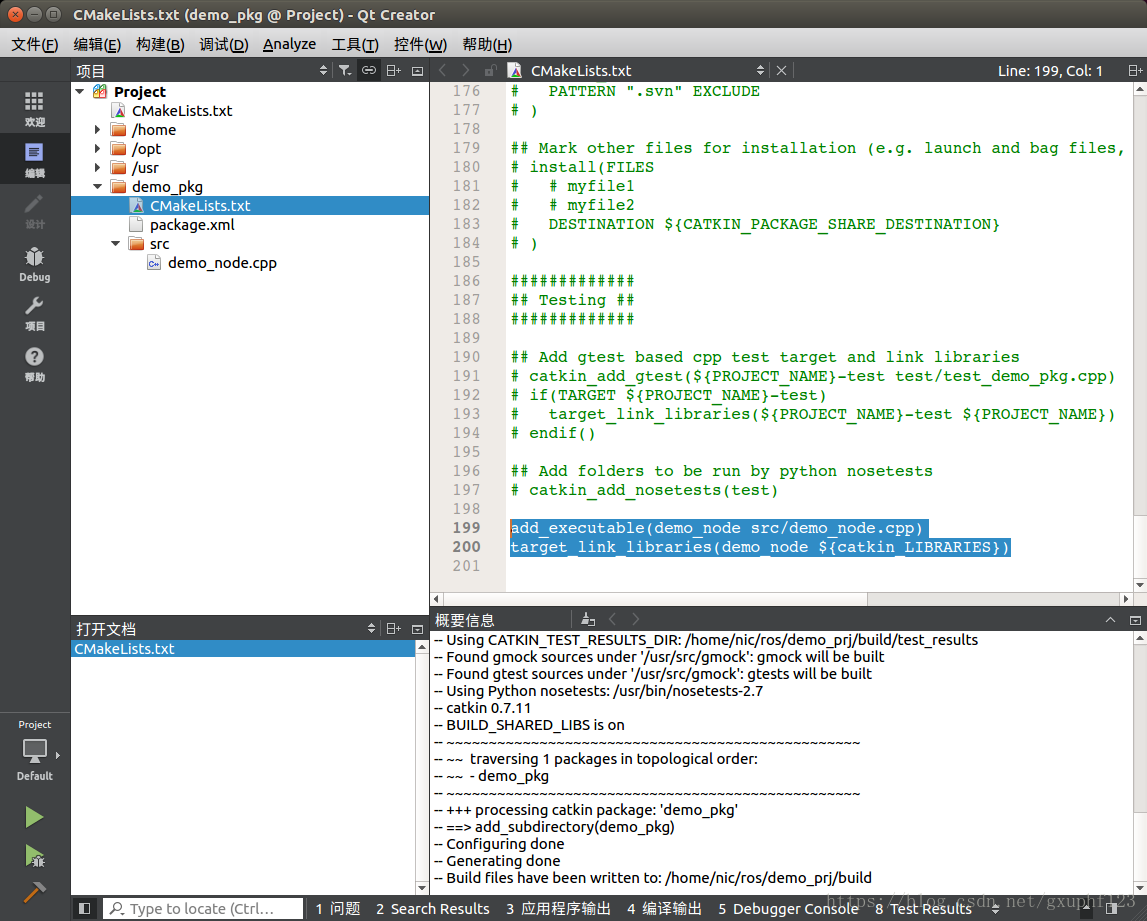
打开功能包工程如图,编辑CMakeList.txt文件:
add_executable(my_demo src/my_demo.cpp)
target_link_libraries(my_demo ${catkin_LIBRARIES})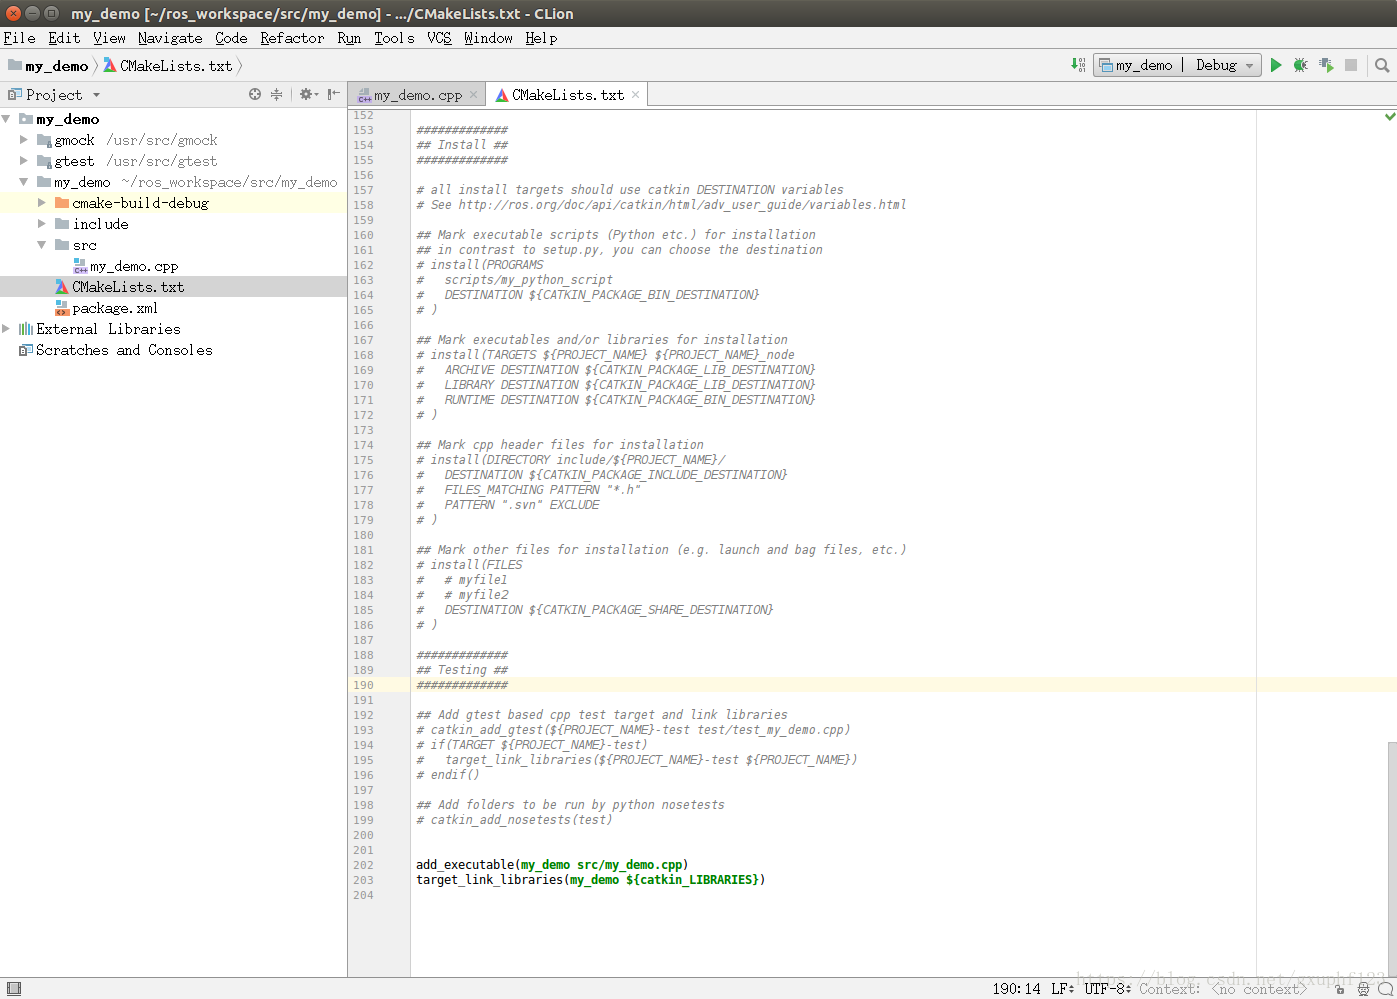
点击调试按钮,提示如下:
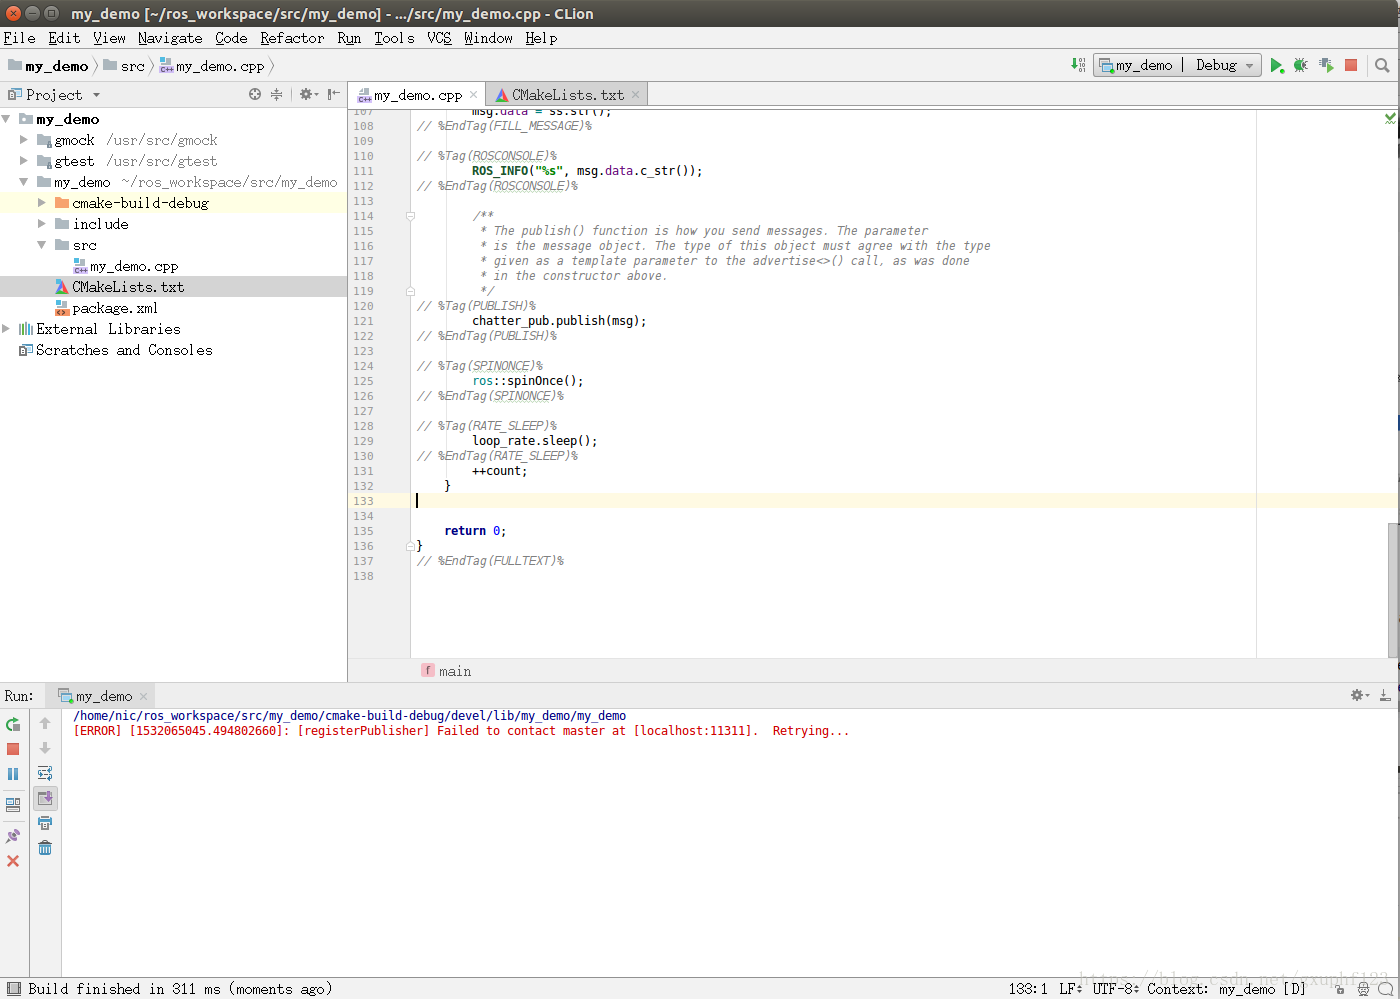
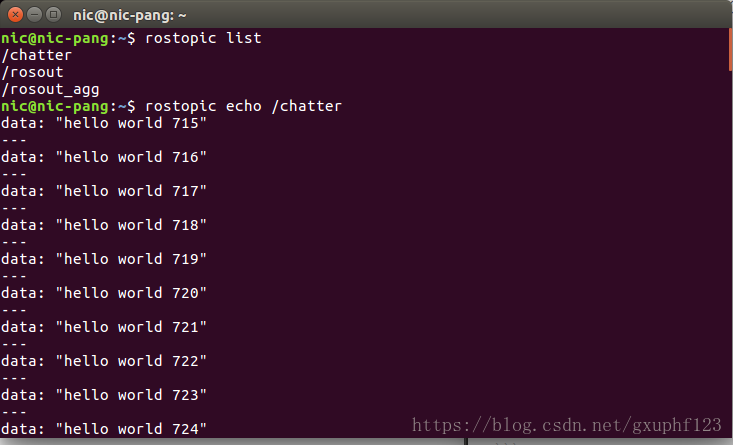
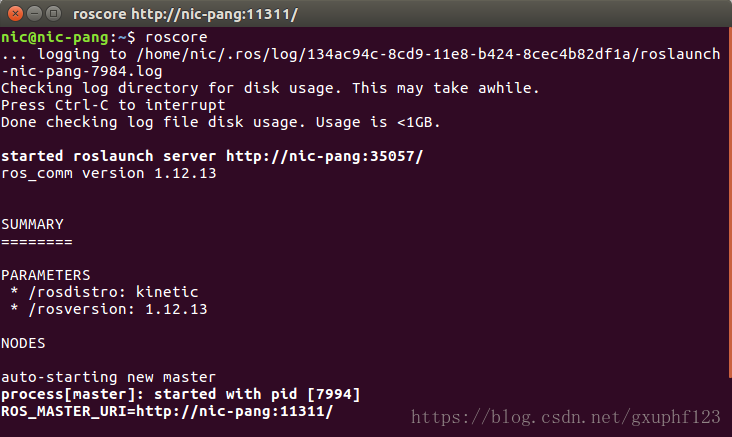
打开新的终端,输入:
~$ roscore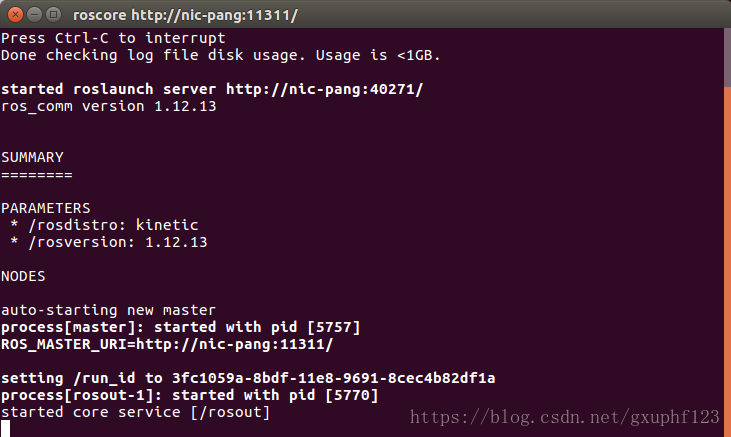
在CLion环境中,显示如下:
新建一个终端查看执行结果:
3. 创建ROS功能包并利用CLion进行编译,至此成功完成!
补充说明
如果采用标准版的QtCreator进行编译,请按以下步骤进行:
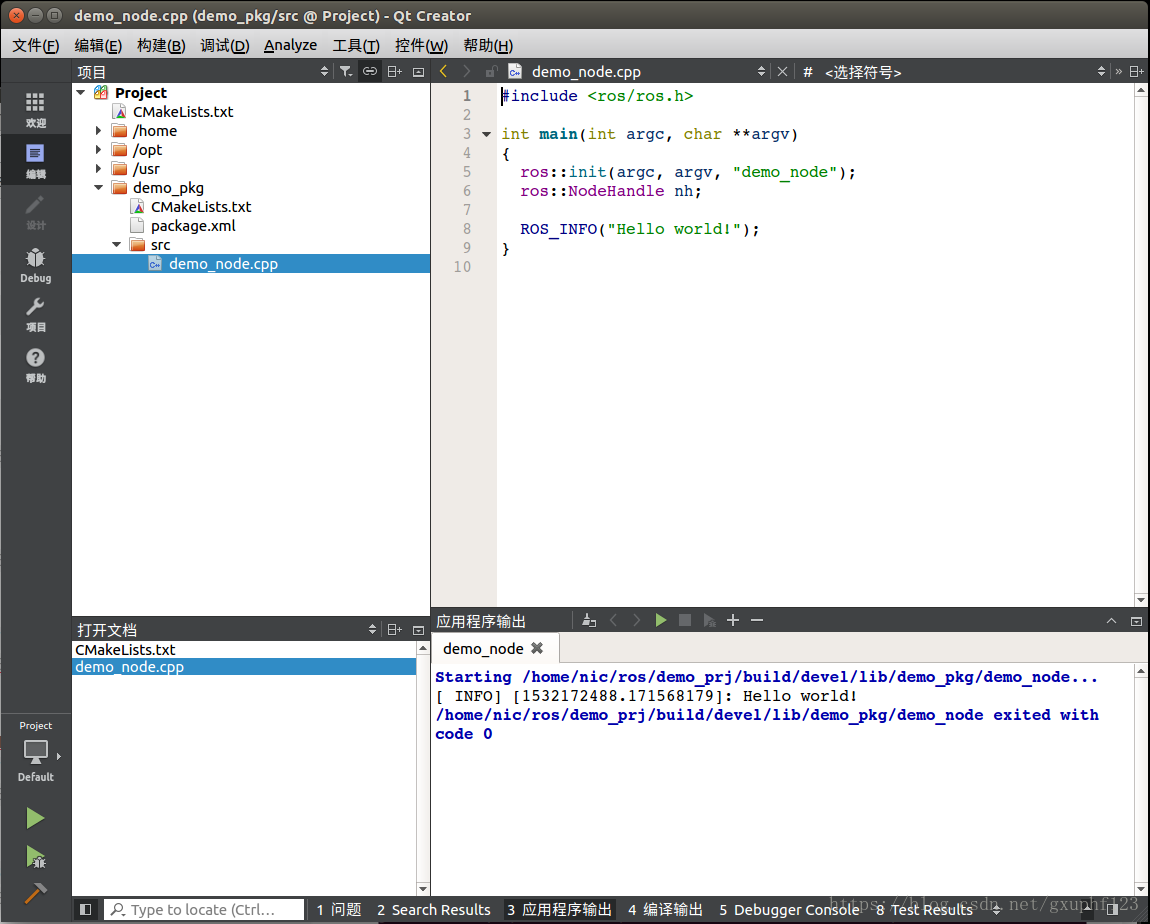
a. 参照前面,创建节点 demo_node
b. 设置QtCreator能够在启动时候添加ros环境
查找QtCreator的快捷方式
修改QtCreator的快捷方式
在Exec=处加上 bash -i -c

重启QtCreator。
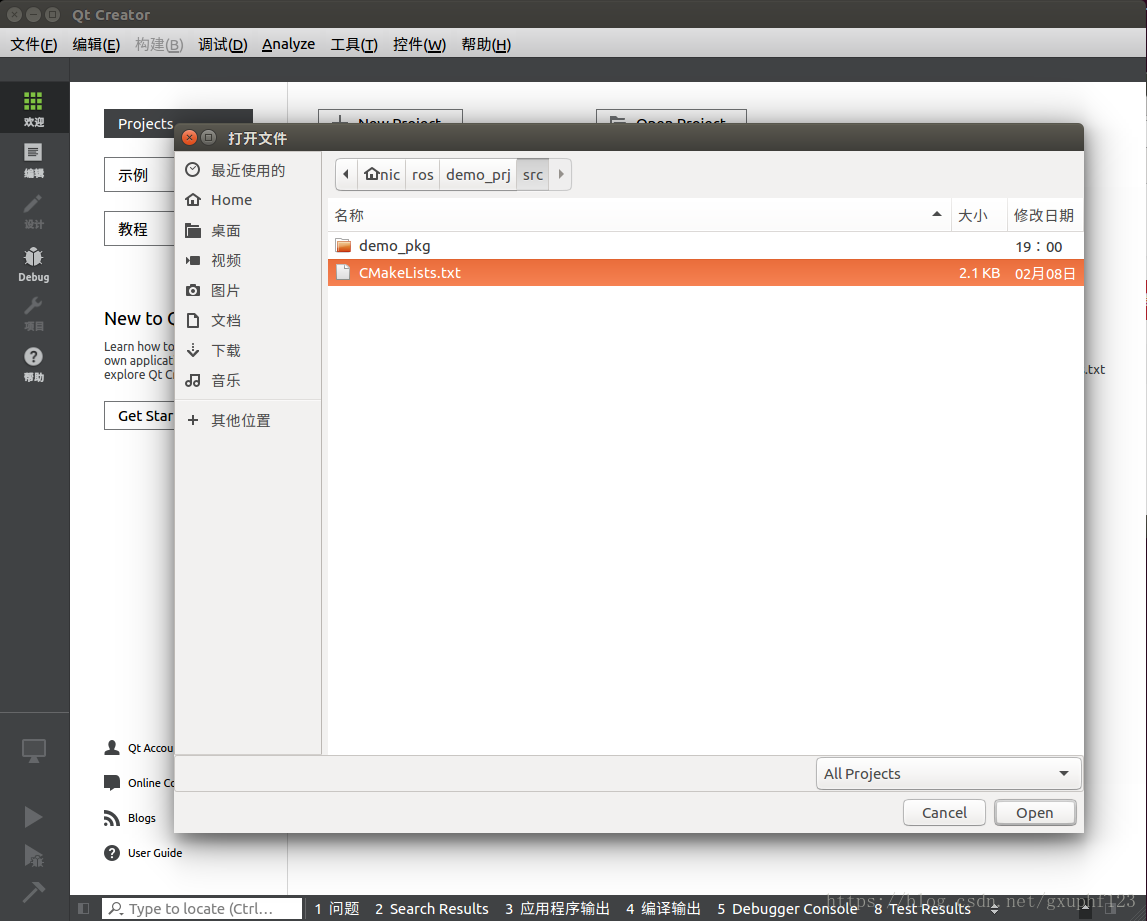
c. 打开QtCreator,通过OpenProject打开工作空间下的CMakeLists.txt文件
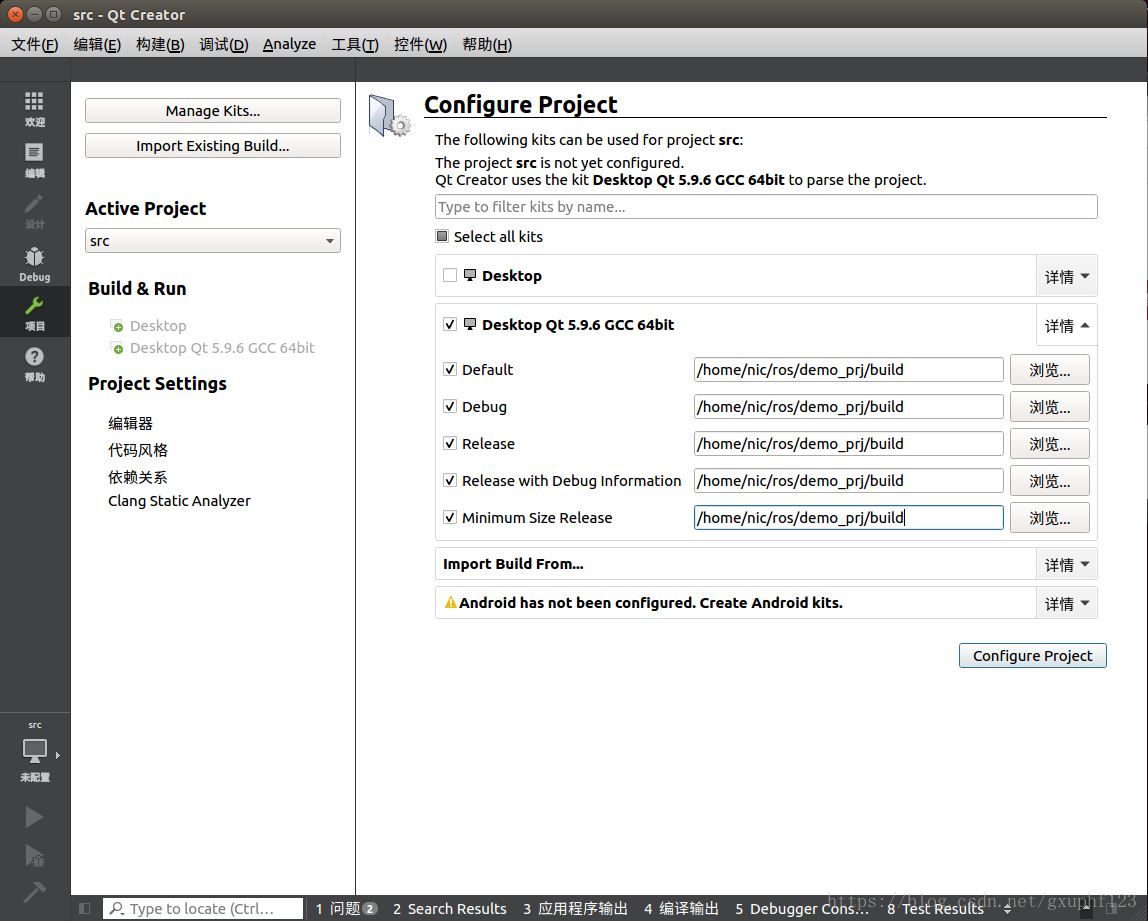
d. 配置项目
e. 修改package中CMakeLists.txt的内容
d. 运行结果
智能推荐
基于模型的聚类和R语言中的高斯混合模型_bic高斯混合模型计算p值怎么算-程序员宅基地
文章浏览阅读828次。方法是用于估计有限混合概率密度的参数的最广泛使用的方法。基于模型的聚类框架提供了处理此方法中的几个问题的主要方法,例如密度(或聚类)的数量,参数的初始值(EM算法需要初始参数值才能开始),以及分量密度的分布(例如,高斯分布)。基于概率模型的聚类技术已被广泛使用,并且已经在许多应用中显示出有希望的结果,从图像分割,手写识别,文档聚类,主题建模到信息检索。在使用不同的聚类方法将数据拟合到聚类中之后,您可能希望测量聚类的准确性。四种最常见的聚类方法模型是层次聚类,k均值聚类,基于模型的聚类和基于密度的聚类 ._bic高斯混合模型计算p值怎么算
操作系统实验:线程的创建与撤销_线程的创建与撤销实验报告-程序员宅基地
文章浏览阅读1.1w次,点赞16次,收藏103次。一、实验目的(1)熟悉windows系统提供的线程创建与撤销系统调用。(2)掌握windows系统环境下线程的创建与撤销方法。(3)掌握CreateThread()函数和ExitThread()函数。..._线程的创建与撤销实验报告
vue渲染动态渲染图片_动态/动态渲染视频和音频-程序员宅基地
文章浏览阅读1.9k次。vue渲染动态渲染图片 Vue-Viaudio (vue-viaudio)Dynamically/Reactively render videos and audios. 动态/动态渲染视频和音频。 View Documentation查看文档 Reactive exampleReact性示例 Dynamically Render Video source动态渲染视频源 项目设置 (..._vue render 一个视频
cesium自定义的弹窗 Popup弹窗(可随球放大缩小,移动)_cesium popup-程序员宅基地
文章浏览阅读1.3w次,点赞31次,收藏147次。# 效果图中效果源代码在下面的封装栏中# 基本思路添加一个鼠标左键点击事件,当鼠标点击时,利用vue2.0中 Vue.extend() 动态添加一个dom元素,将DOM元素渲染到cesium容器中,并利用cesium中提供的 viewer.scene.postRender 实时更新坐标位置。思路很简单,接下来我们进行实现。# 实现方法 1. 首先我们需要生成一个球体做我们标记的容器。viewer = new Cesium.Viewer('cesiumContainer',{ _cesium popup
Linux--详细安装教程-程序员宅基地
文章浏览阅读1.1w次,点赞14次,收藏134次。本文是以centos为例,虚拟机是VMvare,虚拟机时VMvare,centos 下载地址:可以去官网下载最新版本:https://www.centos.org/download/,可以默认选择第一个,下载后放到自己的目录下。一 安装VMvare1.进入VMware官网,点击左侧导航栏中的下载,再点击图中标记的Workstation Pro,如下图所示。2。选择下载版本......_linux
《从问题到程序:用Python学编程和计算》——练习-程序员宅基地
文章浏览阅读2k次。本节书摘来自华章计算机《从问题到程序:用Python学编程和计算》一书中的第2章,练习,作者 裘宗燕,更多章节内容可以访问云栖社区“华章计算机”公众号查看。练习概念和理解1. 复习下面概念:表达式,语句,赋值,控制结构,函数,提示符,值,求值,语法错误,单词,整数,浮点数,运算符,一元运算符,二元运算符,优先级,结合顺序,字面量,语法错误..._假定首先做下面的赋值
随便推点
2023深圳杯(东三省)数学建模D题思路 - 基于机理的致伤工具推断_锐器对人体伤口模型-程序员宅基地
文章浏览阅读2k次。致伤工具的推断一直是法医工作中的热点和难点。由于作用位置、作用方式的不同,相同的致伤工具在人体组织上会形成不同的损伤形态**,**不同的致伤工具也可能形成相同的损伤形态。致伤工具品种繁多、形态各异,但大致可分为两类:锐器(如刀、刺等)和钝器(如锤子、铁棍、石头等)。_锐器对人体伤口模型
wiringpi库的应用 -- sg90 定时器 oled-程序员宅基地
文章浏览阅读1k次,点赞20次,收藏15次。对wiring库的应用,博客,包含舵机sg90 和 定时器 处理和 olde的显示
修饰符:final、static、abstract-程序员宅基地
文章浏览阅读196次。A.java文件中只能有一个public class A{}的类,其他的类不能用publicfinal 修饰变量:标记为常量,不能被重新赋值final 修饰方法:禁止该方法在子类中重写final 修饰类:表明这个类不能被继承(String、Math),final类中的所有成员方法都会被隐式地指定为final方法static修饰的变量:该变量有且只有一个,被所有的对象...
第3章-13 字符串替换 (15分) PTA-python 题解 浙大版《Python 程序设计》题目集_python将输入字符串中的大写英文字母按以下对应规则替换用元组替换-程序员宅基地
文章浏览阅读567次。致读者: 博主是一名数据科学与大数据专业大三的学生,一个互联网新人,这篇文章是记录我作为python助教总结的简单题解,写博客一方面是为了记录自己的学习过程中遇到的问题和思考,一方面是希望能够帮助到很多和自己一样处于困惑的读者。由于水平有限,博客中难免会有一些错误,有纰漏之处恳请各位大佬不吝赐教!之后会写大数据专业的文章哦。GitHub链接https://github.com/wfy-belief尽管现在我的水平可能还不太及格,但我会尽我自己所能,做到最好。——天地有正气,杂然赋流形。下则为河岳,._python将输入字符串中的大写英文字母按以下对应规则替换用元组替换
halcon -> expand_gray_ref(灰度填充)(by shany shang)-程序员宅基地
文章浏览阅读3.5k次。一、应用场景:*加载一幅图像read_image (Image, 'fabrik')*区域增长regiongrowing (Image, Regions, 1, 1, 1, 100)*生成空区域gen_empty_region (EmptyRegion)*计算灰度平均值 方差intensity (Regions, Image, Mean, Deviat..._expand_gray_ref
HQL语句-程序员宅基地
文章浏览阅读7w次,点赞3次,收藏23次。hql常用查询语句// HQL: Hibernate Query Language.// 特点:// >> 1,与SQL相似,SQL中的语法基本上都可以直接使用。// >> 2,SQL查询的是表和表中的列;HQL查询的是对象与对象中的属性。// >> 3,HQL的关键字不区分大小写,类名与属性名是区分大小写的。// >> 4,SELECT可以省略.// 1,简单的查询,Employee为实体名而不是数据库中的表名(面向对象特性)hql = “F_hql语句